Weaverhead's RB 260z Restoration

Weaverhead

Well-Known Forum User
Right then, as promised this is the start of my quest for perfect Z ownership. After my 2+2 260z garage find turned out to be the most monumentally f***ed motor I'd ever come across I was determined to find one that could be restored.

With the chaps at Retropower already lined up to do the difficult work I set about sourcing a rolling shell for the madness to commence. My criteria were simple: 2 seater, all steel, very few previous repairs, lots of the original metal (need good patterns for replacement metal), cheap as possible and any additional spares would be nice.

So on the 20th April I collected this rather shabby looking 1974 260z rolling shell together with replacement tailgate, replacement bonnet, a bunch of repair panels and a replacement roof and carted the lot over to Retropower for work to begin.

534107_568688276484762_809140060_n.jpg

67522_568688323151424_1074525099_n.jpg

562373_568688279818095_1099648565_n.jpg
 

Weaverhead

Well-Known Forum User
Now it's off to be blasted and zinc primed for the metalwork to begin...

front end pretty good, bar the inner wing reinforcers and front x-member - a few more 'frilly' bits than we might have hoped for, but all-in-all not bad
941089_572195696134020_1147403505_n.jpg


Pretty rough on the back end but this was expected. I have repair panels for the worse bits. A little rot to sort on the corner of the quarter panels
945491_572195149467408_140799376_n.jpg


Arches, lower rear quarters and fuel filler are shabby but there are plans to customise most of this anyway so really it's less to cut out ;)
381533_572195349467388_835458854_n.jpg

936835_572195449467378_2136851953_n.jpg


Over rear axle is good... we'll move on to the floors next
316320_572195516134038_1706665896_n.jpg


Floors are shot and will be replaced
315493_572195006134089_2090801255_n.jpg


Rotten chassis rails. Will be fabricating new, stronger rails to cope with the increased power anyway.
396890_572194582800798_369634593_n.jpg


Still plenty left though :)
168248_572195759467347_683974894_n.jpg
 

Weaverhead

Well-Known Forum User
Now the real fun starts and metalwork genius Stu at Retropower gets his hands on it.

The back end is all rotten and knackered
485733_588013837885539_529146108_n.jpg

970289_588013884552201_1265148168_n.jpg

969632_588013961218860_1240632230_n.jpg


So it's chopped out!!
602396_588013981218858_1459904959_n.jpg


Rear cross member is really rough too
971088_588013991218857_1246141153_n.jpg


So that is cut out... and while we are there we'll lose that spare wheel well too...
383436_588014024552187_1588652459_n.jpg


And a new cross member is fabricated and welded in
970070_588014034552186_358058959_n.jpg

The underside
389274_588014047885518_1676349830_n.jpg


More metalwork pics to follow...
 

atomman

Club Member
Been following this on facebook, like the fuel filler idea.

Alot of work to do but well worth it in the end :)
 

Rob Gaskin

Treasurer
Staff member
Site Administrator
I'll enjoy this thread :thumbs:

I think you may find out that it's going to cost more to repair the shell than import one however that wouldn't be of so much interest to us.

If the shell could talk it would be thanking you I'm sure!

Inner sills look sound. ;)
 

Weaverhead

Well-Known Forum User
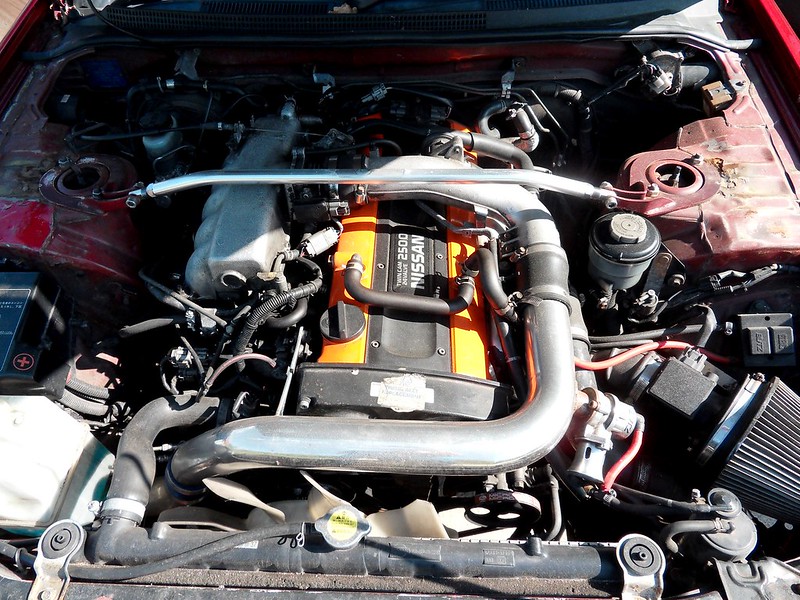
Meanwhile... I've sourced an engine donor vehicle!!

Tidy RB25 unit running plenty of sensible aftermarket upgrades, and a load of value in the parts to be removed from the car. Bought for the grand total of £1900 off flea-bay and at the time of writing this I've made £1890 selling parts with a stack of smaller stuff left to sell. £10 isn't bad for an engine & gearbox :p

8924278284_1e786ec8fa_c.jpg


That's what we're after
9085999271_2d4b9f3dba_c.jpg


Wheel it in to the workshop and get it stripped!!

295558_585719488114974_15232923_n.jpg


Out and ready for storage until it finds its new home in the Z :)

946544_588013384552251_1655540021_n.jpg
 

Weaverhead

Well-Known Forum User
Back to the metalwork!!
Here we have some old metal removed and new hand made repair sections fabricated and ready to go in

971201_589676874385902_2100803563_n.jpg

7187_589676851052571_1887845346_n.jpg

970763_589676844385905_717277926_n.jpg


This also needs to come out

995921_589676904385899_944935550_n.jpg

994846_589676757719247_1484482075_n.jpg


Replacement section made up..

943449_589676761052580_2056996105_n.jpg


and in it goes with the corner repaired too

994307_589677004385889_1744176030_n.jpg


Same on the other side

7238_592460430774213_1885043535_n.jpg

1010652_592460337440889_1877134512_n.jpg


Rear valance repair panel wheeled flat to remove indents where the bumpers would go (we won't be needing those) and welded in to place. It's coming together nicely :)

1010437_592460324107557_137253296_n.jpg
 

morbias

Well-Known Forum User
I'm just tackling this bit of my Z too, I think I'm going to extend the drip rail inside the tailgate opening all the way down to exit above the lights, it should stop this area rusting away again in the future. A bit of a functional design oversight imo! Maybe it's worth considering while you're at this stage also. I have to say, they are making epic progress!
 

Rob Gaskin

Treasurer
Staff member
Site Administrator
............ I think I'm going to extend the drip rail inside the tailgate opening all the way down to exit above the lights, it should stop this area rusting away again in the future...........

I think 'on the face of it' that seems a brilliant idea.

I wonder why it did stop short - spolier bolts?
 

Weaverhead

Well-Known Forum User
Now for my favourite piece of customisation to date...

What to do with the nasty rotten fuel filler section??

1004717_592460300774226_2066542057_n.jpg


Should probably follow the recurring theme across the rest of the car and cut it out!

1005881_592460257440897_1823634122_n.jpg


Panel made up to blank out the section...

935914_592460287440894_2076692274_n.jpg


Then pop the new section in place. The join has been spot welded to minimise distortion, and will be lead-filled to seal it up and avoid cracking. Nice smooth lines on both sides :)

969206_592460237440899_762521295_n.jpg


The fuel filler will be relocated to the rear to be hidden behind a flip-down number plate. Slam panel and hand made fuel filler panel tried out for size...

1002432_592460174107572_1999962950_n.jpg


Testing the look with the original light units...

6748_592460230774233_1652706028_n.jpg


New rear panel sections all offered up to check alignment. The rear lamp cut-outs will be finished once the 240Z lamp units have arrived :D

1012618_592460157440907_605318104_n.jpg
 

richiep

Club Member
Some fantastic fabrication going on here. This combined with Morbias' thread really bums me out - I wish I could do that kind of stuff.
 

Weaverhead

Well-Known Forum User
Some fantastic fabrication going on here. This combined with Morbias' thread really bums me out - I wish I could do that kind of stuff.

I wish I could too!! I have felt the same looking at other build threads in the past, my only solution was to save a ton of money on top of a small redundancy fund and outsource the job to some very skilled people.
 

candy red

Club Member
Looking good can't wait to see it finished ;) my 280 wasn't quite as bad yours but i fabricated and welded everything myself very satisfying once I got the hang of it, see my thread in general discussion forum under Candyred resto


Derrick
 
Last edited by a moderator:
Top