The "Ultimate" Sacrifice

ZHead

Well-Known Forum User
Hi Guys,

As you know, I was gutted that for whatever reason, I realised that without a lot more money and heartache, my V8 project would never see the light of day. There were only a couple of options :

1) Carry on with the V8 project and accept that I was destined to continually shell out good money after bad, knowing I would not drive anything for another few years.

2) Change the specification to straight six, standard type suspension etc which would be far easier, cheaper and quicker to build

3) Give up totally

4) Have a kit car that would allow me to do the majority of work myself.

Options 1, 2 and 3 did not light my fire so I chose number 4

On 3rd November 2008 I made the decision to sell my current project and start a new one that I could play a much bigger part in, so scoured the web all day looking at options and bought all the kit car mags. By tea time it was a toss up between a Gardner Douglas 427 Cobra replica and the Ultima so I rang and booked to go to see both.

On 4th November I went to Ultima ........

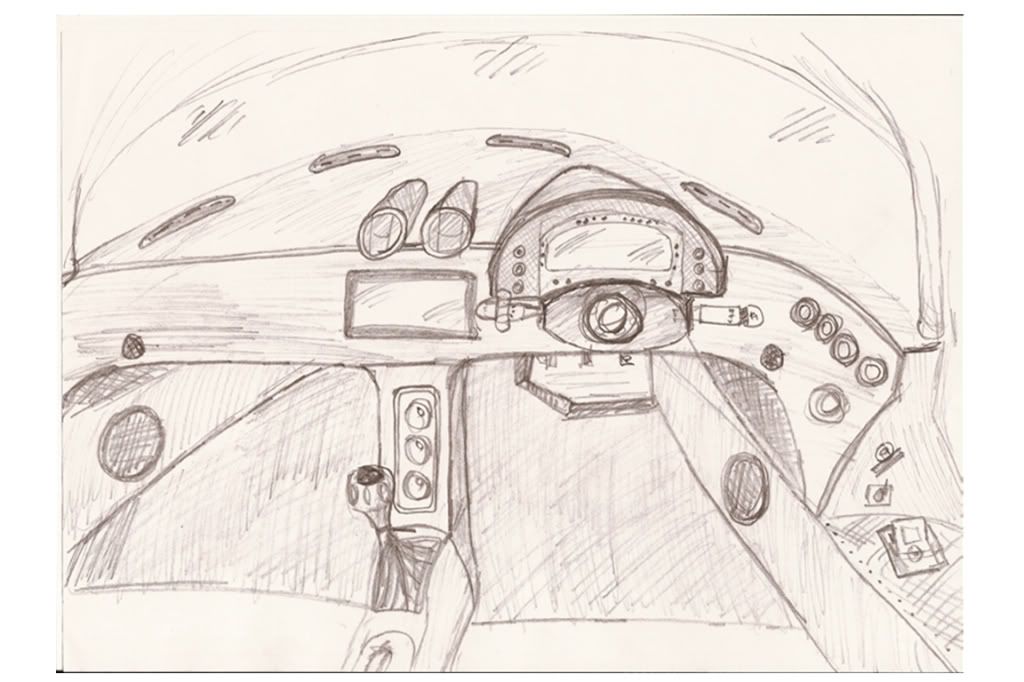
When I saw the cars close up my jaw dropped. From the outside they did not look like kit cars at all, but more like production supercars. The inside, however, was more spartan but easy to take up from a bland and basic race design to a well trimmed sports car level.

Ted Marlow, Ultima's MD offered to take me for a spin in the factory's silver demonstrator, so despite being a nervous passenger, in I climbed. The fuel pumps whirred then went silent. As if in slow motion, Ted's finger hit the start button then 500 horsepower of small block chevy didn't so much roar into life but hissed and spat and warned me of what was to come.

The first thing that hit me was how civilised the car was considering it was 500BHP, weighed less than a ton (even less with an all aluminium LSx engine) and was a race car.

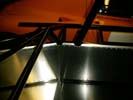
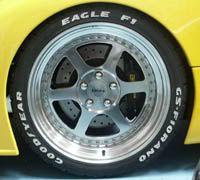
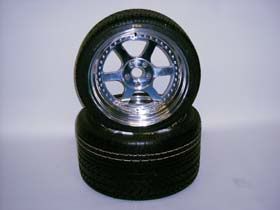
We pottered around town, burbling and crackling until we turned left onto a country lane ...... Ted floored it..... On a wet day, with no traction control and no ABS, the Ultima launched itself like a thing posessed without a single twitch from the massive 13" rear wheels. The phrase "adrenaline rush" is an understatement. smidgeon over three seconds to 60 and 180 miles hour .... mental.

I never got to Gardner Douglas.

We all know the details of selling my project as it was done on this forum, the upshot being that today on 14th November 2008 I ordered and paid for stages 1 and 2 of 17.

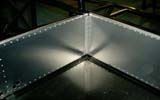
There is a 12 week delivery on the space frames but someone smiled on me and I was in the right place at the right time. A customer had asked to delay his delivery until early next year so they gave him my production slot and I will take his chassis ...... in 3 to 4 weeks.

I will document each stage, 1 to 17 as they happen. :thumbs:
 

Mr.G

Club Member
Andy it sounds like a beast, looking forward to you posting all about it!

Great news on jumping the que too.
 

ZHead

Well-Known Forum User
PHASE ONE

CHASSIS
chassis.jpg

Developed over thousands of miles of road and track testing

Fully triangulated spaceframe, with integral crash protection crumple zones all round

Fully jigged to ensure total uniformity, including all mounting points for suspension etc.

Integral rollcage welded to the main frame.

Once fully checked, the chassis is grit-blasted, etch primed and powder-coated to form a smooth corrosion resistant finish


Will not be supported on trestles as shown, will be on a workshop dolly on lockable castors for ease of movement annd convenience. Will show pictures when it arrives.
 

samuri-240

Well-Known Forum User
Looking forward to this thread, Andy would be great if you could upload loads of pics of components & different stages of the build. :thumbs:
 

ZHead

Well-Known Forum User
The Build Manual turned up today - incredibly comprehensive. The BIGGEST job of the whole build is the first one, fitting the aluminium panel kit so I thought you might like to see the depth of explanation in the build manual. Designed for muppets like me :D

I will obviously not post up every single one of the 17 stages because there are in excess of 2000 photos but this is a flavour of the professionalism that Ultima have shown in putting together very detailed instructions for semi skilled people like me.

FITTING THE ALUMINIUM PANELS TO THE CHASSIS

TOOLS REQUIRED -

Electric drill
90o Adapter
Drill bits: 3.3mm
1/8" skin pins
Rivet gun
Soft pencil
Straight edge
Steel tape measure
Hole de-burring tool
Sealant gun
The alloy panels are supplied cut to size and the bends formed in the cockpit sides. The sheets are covered in a protective film that is advisable to leave on until immediately prior to fixing to the chassis.

ORDER OF FIXING PANELS -

Rear bulkhead
Cockpit sides
Front bulkhead
Cockpit floor
Master cylinder area
Radiator area

DESCRIPTION
The alloy panels are bonded and riveted to the chassis members at 30 mm spacing. The alloy panels so fixed will increase the strength of the chassis and form a waterproof tub section, which can be simply polished or covered in a material of your choice.

PROCEDURE
With the chassis the correct way up and on the trestles offer up the rear bulkhead panel to the chassis. Position so that the top of the panel is level with the top of the chassis rail and lightly clamp in place with two "G" clamps and a timber packer. In order to achieve this level it may be necessary to notch the sheet over the weld fixing the cockpit dividing chassis rail to the rear lower bulkhead member.

AlloyPanel1.jpg

AlloyPanel2.jpg

AlloyPanel3.jpg


Using the soft pencil mark the intended line of your pop rivets which should be coincident with where the alloy touches the chassis rail tube i.e. on its centreline and 10mm up from the bottom edge of the sheet

AlloyPanel4.jpg

AlloyPanel5.jpg


Remove the alloy sheet and draw two parallel lines on and mark the position of the rivets at the spacing selected.
Lightly centre punch the intended holes and drill through with the 3.3mm bit into a flat sheet of ply or similar. Deburr the holes on both sides of the sheet with a proprietary deburring tool or a hand held larger drill bit.
Position and clamp the alloy back on the chassis as before and using the holes in the alloy as a template drill through the four corners fixing the alloy in place with four skin pins

AlloyPanel6.jpg


Remove the "G" clamps and drill the remaining holes into the chassis fixing the panel with skin pins at intervals to prevent any movement and chatter.

AlloyPanel7.jpg


Remove the alloy sheet and deburr the holes in the chassis before spraying some Waxol into the rivet holes at regular intervals to prevent internal corrosion.

AlloyPanel8.jpg


With the alloy panel removed drill the larger holes for the hand brake cables and the hole for the gear linkage. The hole shown in the photo is the one for a centre change rod linkage used on a G50 transaxle.

AlloyPanel9.jpg


Temporarily fit the rear bulkhead with skin pins and fit the cockpit sides by carefully cutting out around the dashboard support tubes not forgetting to allow for the welds. Mark out the rivet positions as before and the positions of the gear change rose joints (if applicable) plus the seat belt fixings.

AlloyPanel10.jpg

AlloyPanel11.jpg

AlloyPanel12.jpg

AlloyPanel13.jpg

AlloyPanel14.jpg


Where the cockpit sides meet the rear bulkhead the folded return must be cut down by 18mm to allow the bending of the sheet over the chassis later.

AlloyPanel15.jpg


Drill the holes in the chassis as before plus the holes through the rear bulkhead panel and cockpit return flanges then remove all the panels and set aside.

AlloyPanel16.jpg


Prepare the front bulkhead (which fits to the master cylinder side of the chassis rails) as before carefully cutting around the top chassis rails. Mark the master cylinder stud positions and drill slightly over size once satisfied with the fit. Also mark out the three master cylinder holes remove the alloy and cut 3 x 38 mm holes.

AlloyPanel17.jpg

AlloyPanel18.jpg

AlloyPanel19.jpg
AlloyPanel20.jpg


The hole for the steering column 7/8" can be drilled before this panel is finally fitted.
See sketch for the exact position and remember to hand the dimensions for LHD.


Remove the protective covering to the alloy sheet and deburr the edges with a proprietary tool or a smooth file whilst supporting the sheet on a flat surface. If you intend to polish the alloy cockpit skin then now is the time to start.
Degrease the chassis and alloy panels where they touch using brake cleaner, meths or similar. Apply a bead of sealant to the rear chassis rails and carefully place the rear bulkhead panel in place securing it with skin pins. Progressively rivet the panel in place removing the skin pins as you proceed. Any excess sealant can be removed when wet from the face of the sheet by the judicious use of a rag dampened with brake cleaner in a well-ventilated area.

AlloyPanel21.jpg


Before the adhesive has hardened the alloy panels must be bent over the chassis rails by using a 100 mm wide soft wooden block against the sheet as a drift and a suitable hammer. Move the drift along the alloy with each hammer blow and do not try to bend the alloy fully over the chassis rails with the first pass. Go over the full length 3 to 4 times to achieve the correct profile.

AlloyPanel22.jpg

AlloyPanel23.jpg

AlloyPanel24.jpg


ZHead

Well-Known Forum User
The spaceframe is being delivered on the 12th so am quite excited by that.

Bought some of these today :


ugtr32.jpg


wheels.jpg


with :

335 / 30 / ZR / 18 Goodyear Eagle F1 GS-Fioranos for the rear &
245 / 35 / ZR / 18 Goodyear Eagle F1 GS-Fioranos for the front.

Only bought those particular tyres because a deal came up, they will be swapped for Kumhos or Toyos when they have worn down.
 

jay28

Well-Known Forum User
Precisely WHY is this information on a 'Z' Club Website ?

because its cool :thumbs: , dont follow the thread if you have no interest in it :unsure:

Ive been looking at the ultimas on youtube and they really are savage........Ide love to build one myself someday.

I'll be reading this thread with great interest, best of luck with the build.

Jay
 

Arkwright

Inactive
because the writer is a stalwart club member, he's doing something exciting and is prepared to tell us about it. And we are interested.
 

Dale

Club Member
Precisely WHY is this information on a 'Z' Club Website ?

I would have asked the same question had it been posted by a newbie, with no Zed connection. The fact is though, it wasn't!

And Andy wasn't going to post this up until there was enough members request that he did so, for which I am glad, as I too will enjoy reading his progress. (With a slight hint of jealousy too :)).
 

SeanDezart

Well-Known Forum User
I would have asked the same question had it been posted by a newbie, with no Zed connection. The fact is though, it wasn't!

......man has no Z connection now though.......now, I have and I was thinking about buying another diesel - let me tell you all about it.....in stages.......:devil: !

Honestly, rien contre toi mon ami but if anyone wants to read about it, hop over to piston heads, I'm sure it's repeated there for their pleasure too ! Now if it had a stroked L series engine..........THAT would be original !
 

Rob Gaskin

Treasurer
Staff member
Site Administrator
Sean, what about your house/garden projects? :thumbs:

Reasonable question Duncan but Andy was asked to keep in touch. Don't upset him he might buy a Z off you one day.
 

ZHead

Well-Known Forum User
Precisely WHY is this information on a 'Z' Club Website ?

Hi Duncan, this info is here because :

a) I am a member and have been for years and b) because I had a lot of PM's asking me to document the Ultima build - if you don't like it, please feel free not to read this thread :D

EVEN THE TITLE OF THE THREAD WAS SUGGESTED BY ANOTHER FORUM MEMBER !

If people do not want to know about the build am happy not to document it
 
Last edited by a moderator:

suzy

Well-Known Forum User
this is posted under "anything and everything" an area that is dedicated for non Z related stuff - if you are not intertested you don't have to read the thread;)
 

STEVE BURNS

Club Member
The forum section explains what the area is for
Anything and everything Area for non Z related posts.(13 Viewing) The "Ultimate"... by rallymanDP


The guy asked prior to posting anything on this if people were interested

And to me if anybody doesn't want to read it then don't

JESUS not everybody just wants to read about S30s
new-fishing-rod.jpg


Touche Sean Touche

There is few anough posts here as it is
 

STEVE BURNS

Club Member
Note any more off topic posts on here will be deleted in fact almost feel like deleting all the posts from no 8 onwards to get it back on track
 

ZHead

Well-Known Forum User
Thanks for your support guys, I appreciate it. I know that the Ultima is non Z but I was asked to document it so I will continue if it is welcome. As Steve and Suzy pointed out, it is the "non Z" related section.

Bear in mind that this is my second love to the S30 anyway and the only reason I am doing it is what I wanted from the Z was too time consuming and WAY too expensive. I had sunk a fortune and over 3 years into just having a shell and boxes of bits.

No Sean, this is not duplicated on pistonheads.

I look forward to the day when I can pitch up at The Pod in it :cheers:

This is a standard Ultima dash, in my opinion total pants : http://www.ultimasports.co.uk/gtr/pics/gtr86.jpg

This is a custom dash built by autobionics and I love it : http://www.autobionics.co.uk/Can-Am/Interior.jpg
http://www.autobionics.co.uk/Can-Am/Centre console carbon surround.JPG
http://www.autobionics.co.uk/Can-Am/Motec SDL.jpg

I want mine changed slightly so they have designed this for me as an initial pencil sketch :
interiordesign.jpg


believe it or not, the custom billet switchgear (fitted to ford switch unit), stalks cnc machined to my design, engraved and anodised, billet knobs cnc machined to my design, custom centre console including billet insert, mounting sat nav in the dash (sat nav not included), mounting digital dash (mxl strada not included), sorting out air con, all wiring loom modifications, changing the vents for demisting and fabricating custom pipework, trimming the roof and A pillars in alcantara and the bulkhead behind the driver in scrim foam and leather, carpeting the floor and providing carbon fibre retainers, carbon fibre luggage boxes ..... IS LESS than I was quoted to leather trim the Z.

Amazing.

The sneaky ones among you may notice that the gear lever is not in the same place :)
 
Last edited by a moderator:

SeanDezart

Well-Known Forum User
this is posted under "anything and everything" an area that is dedicated for non Z related stuff - if you are not intertested you don't have to read the thread;)

a bit like PMs requesting back copies of artciles.......:rolleyes:

Someone's just wound me up so I'm having a go back.

Andy, was this the second love of your life before you met the MD and had a ride ? In fact, you love S30s so much, you want to completly change it, including the engine type ?

Burnsie - you delete my posts, delete every other one that is off topic, including the DJR ones and delete my membership too ! Must be my old age but now I'm ranting !
 
Top