-
The Z Club relies on the support of it's paid members - join the club or renew your membership here.
You are using an out of date browser. It may not display this or other websites correctly.
You should upgrade or use an alternative browser.
You should upgrade or use an alternative browser.
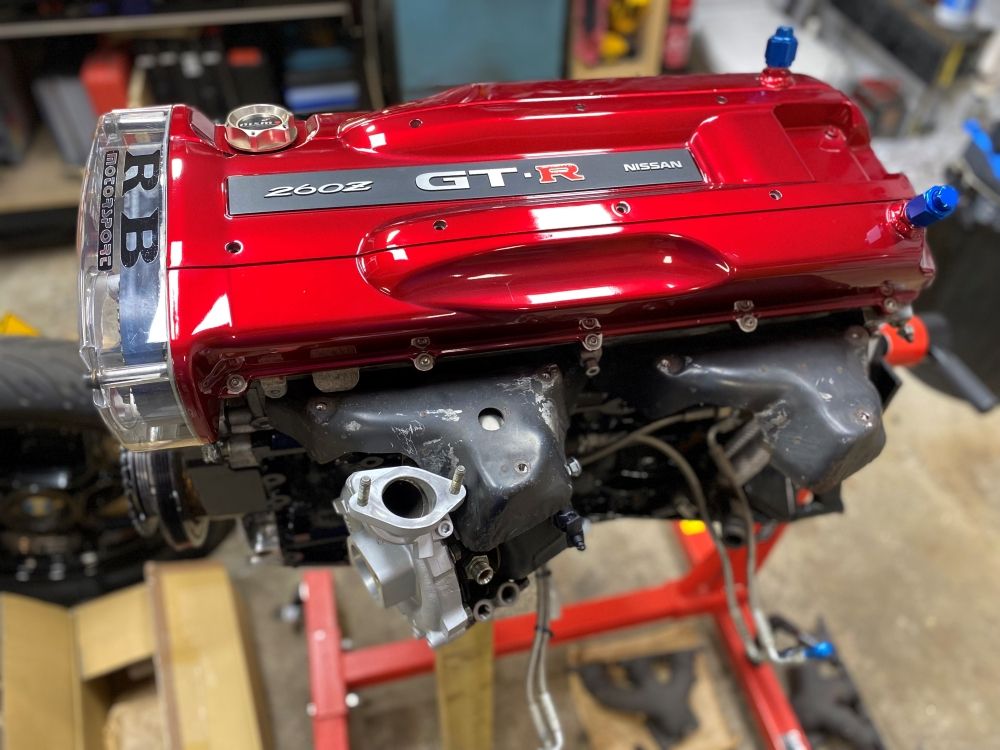
260Z Project - 260Z GT-R
- Thread starter Ian
- Start date

Ian
Club Member
Will still be months before I have it back.Looking great about time
I bevel Dave plans to take a break from this once its epoxied to complete other builds.
Once its back in the shop it will be worked to completion. I imagine that could be as much 3 weeks work.


Absolutely fantastic Ian. I hope it is well insured in storage. I watched an old episode of Salvage Hunters today it was the Jensen Interceptor - reminded me so much of this project.
Last edited:
Rushingphil
Club Member
That's looking really sharp, great job!


Ian
Club Member
I hope his insurance is good. I have layup insurance, but I'm sure that wouldn't even cover half the cost of a new shell and restoration to this stage. I'll be getting an agreed value and all mods covered insurance once its back on the road, want it insured for at least £100kAbsolutely fantastic Ian. I hope it is well insured in storage. I watched an old episode of Salvage Hunters today it was the Jensen Interceptor - reminded me so much of this project.
At least mine didn't hide too much rust like that one, but there were certainly plenty of poor repairs.
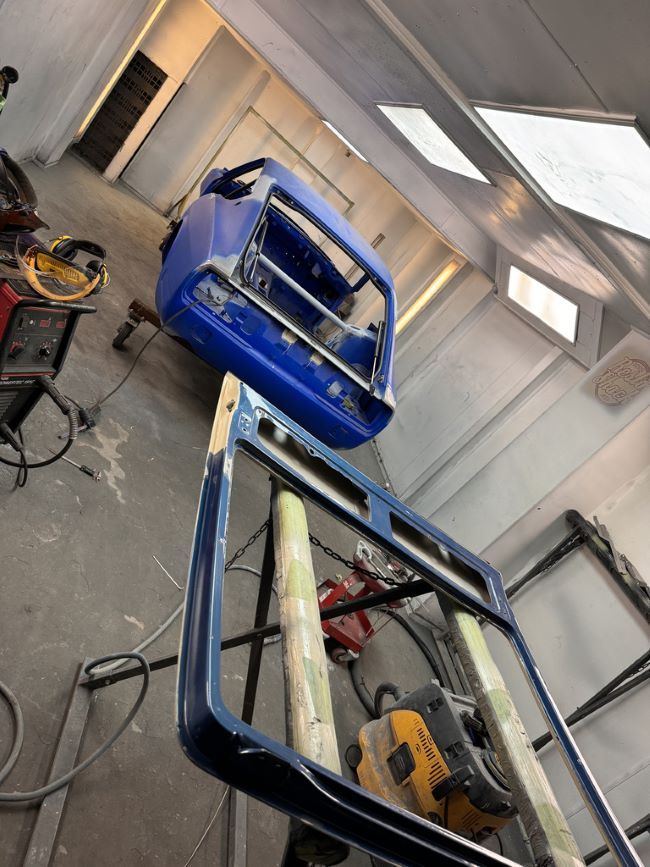
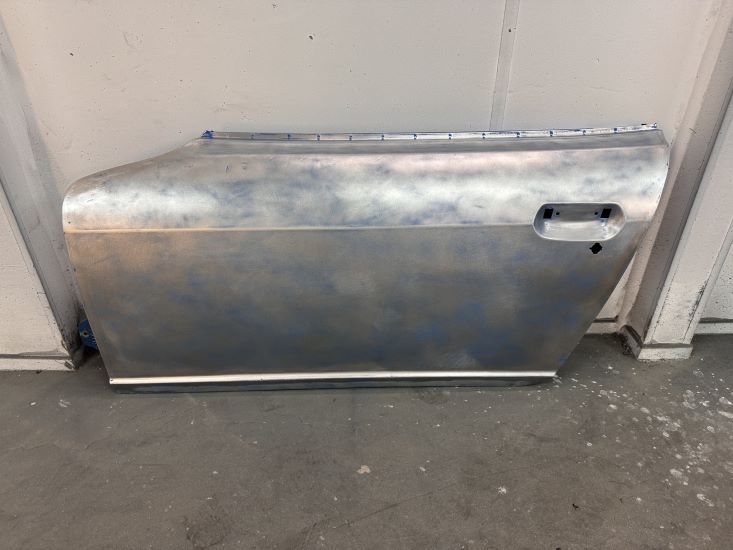
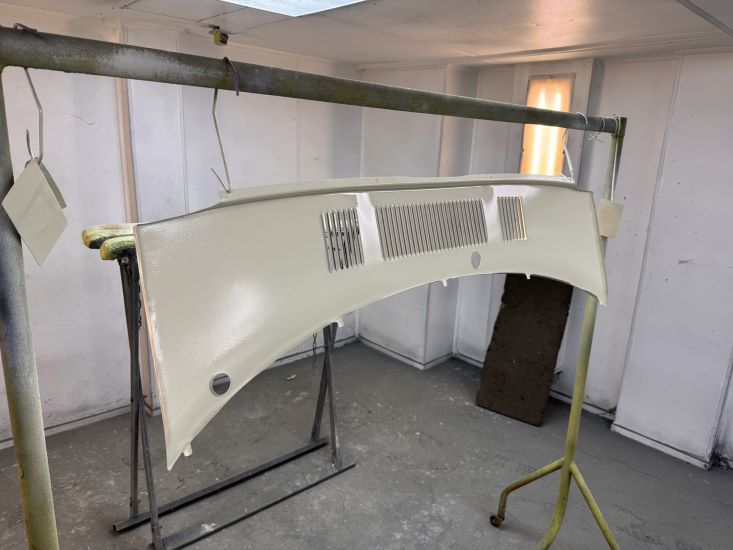
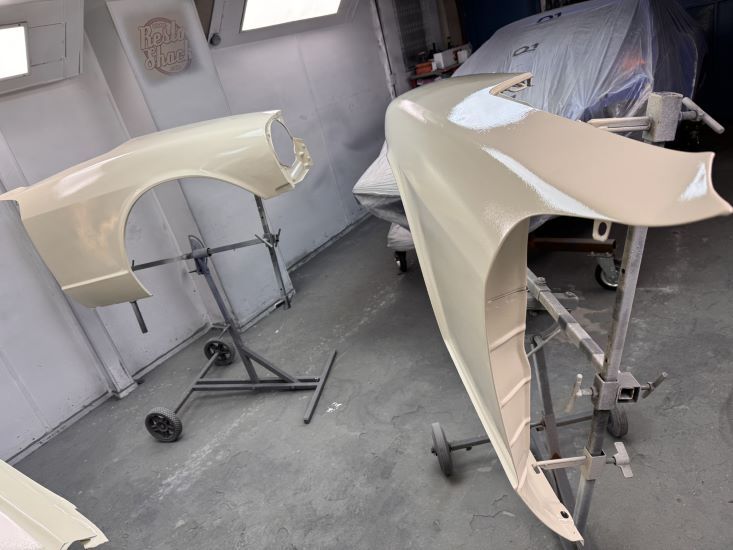
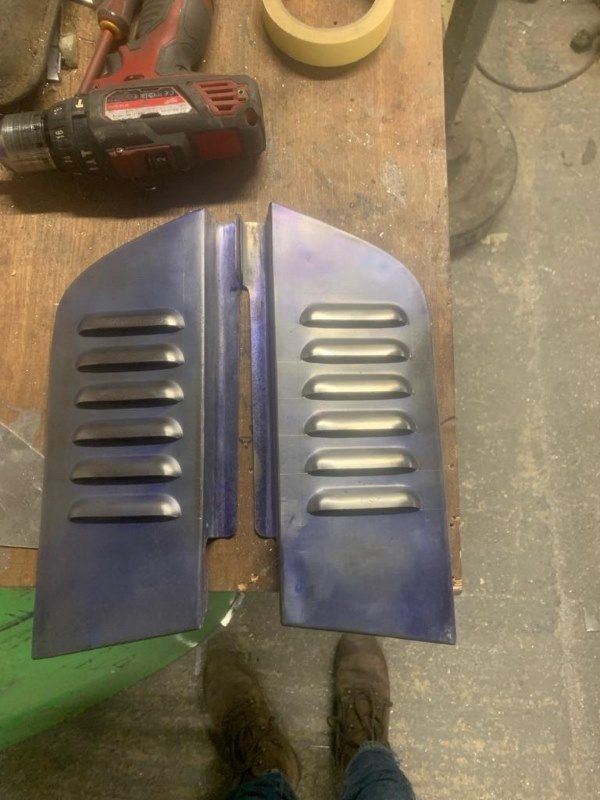
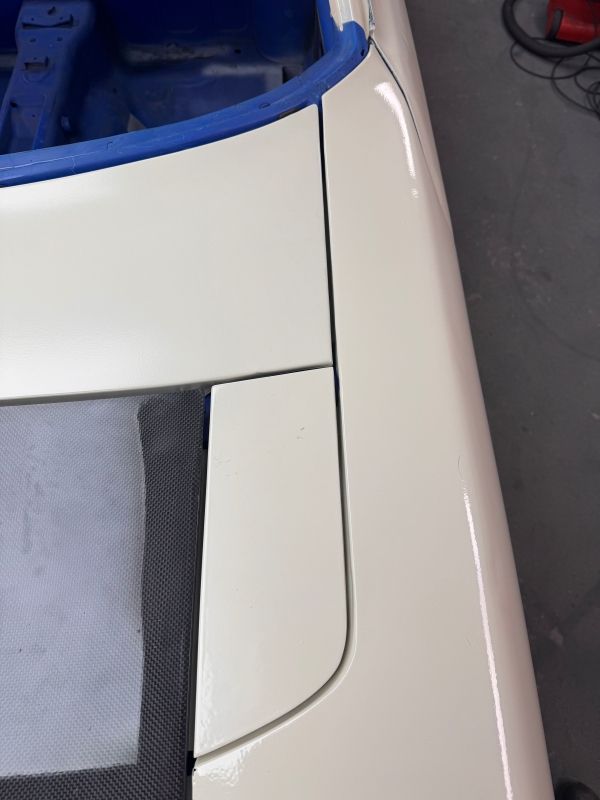
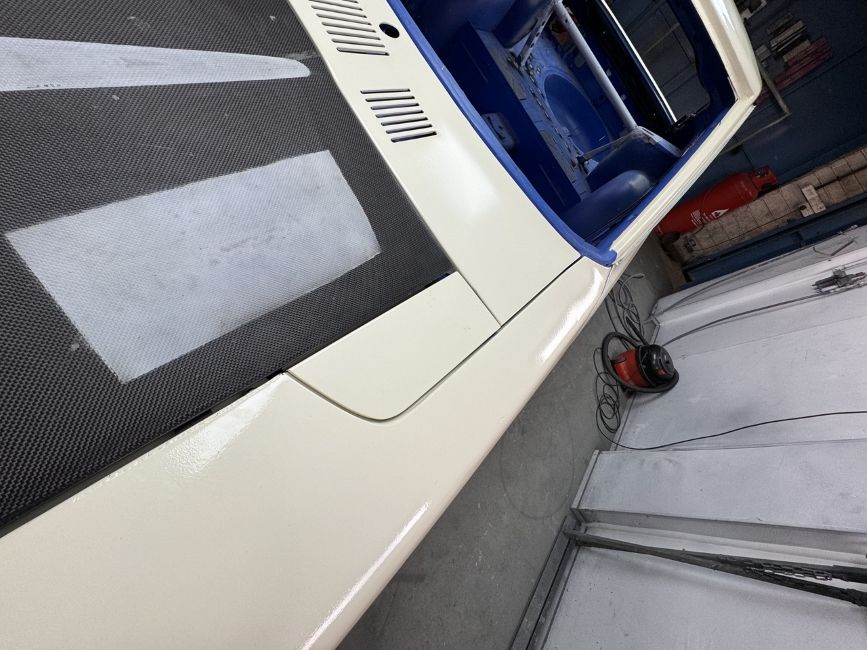
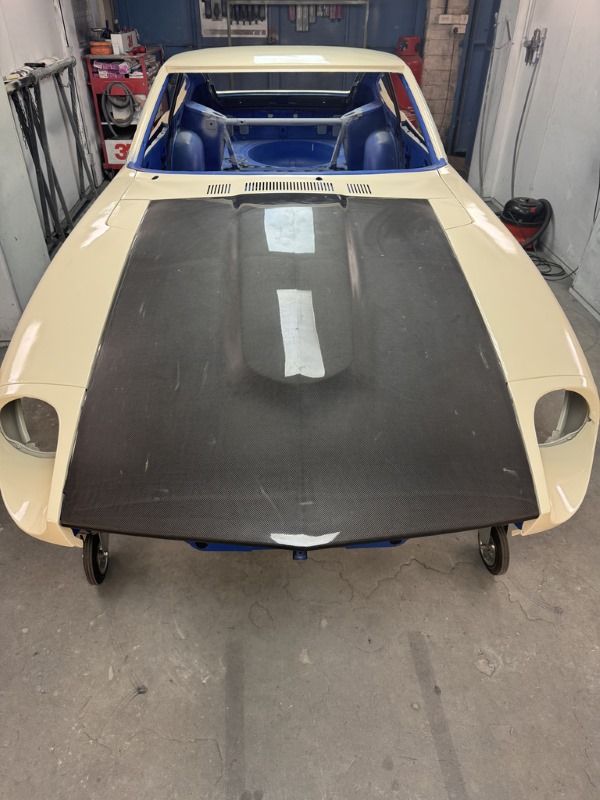
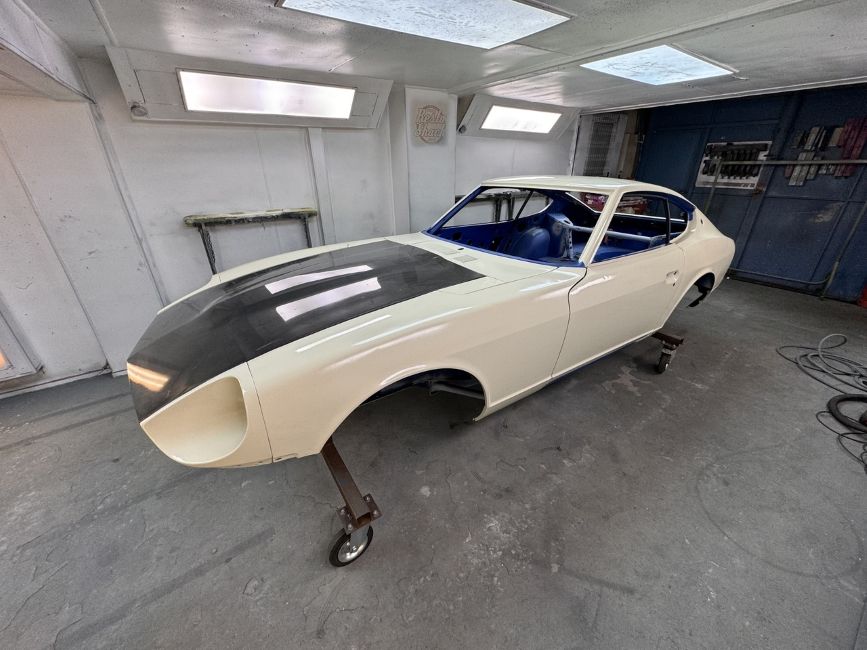
Interested to see how they look once on.Love the Louvred inspection flap would like to find someone to do mine
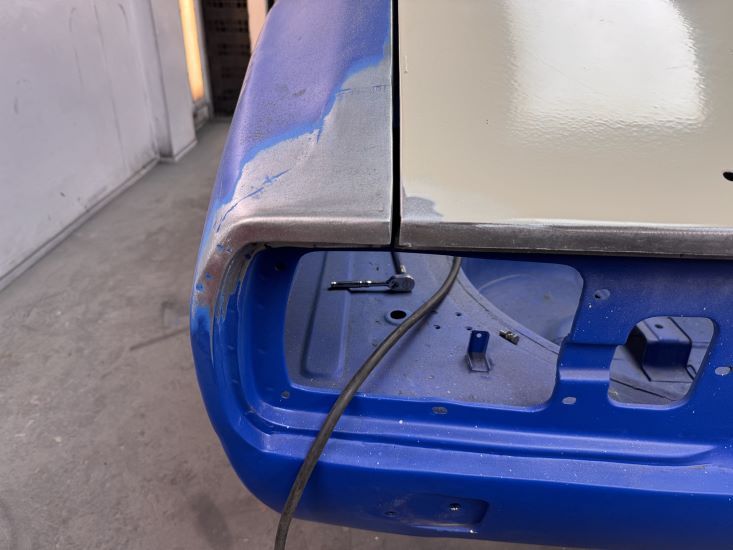
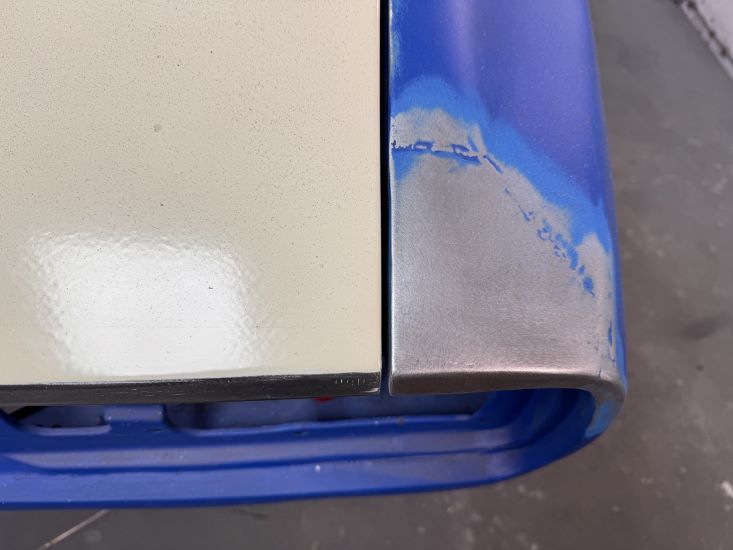
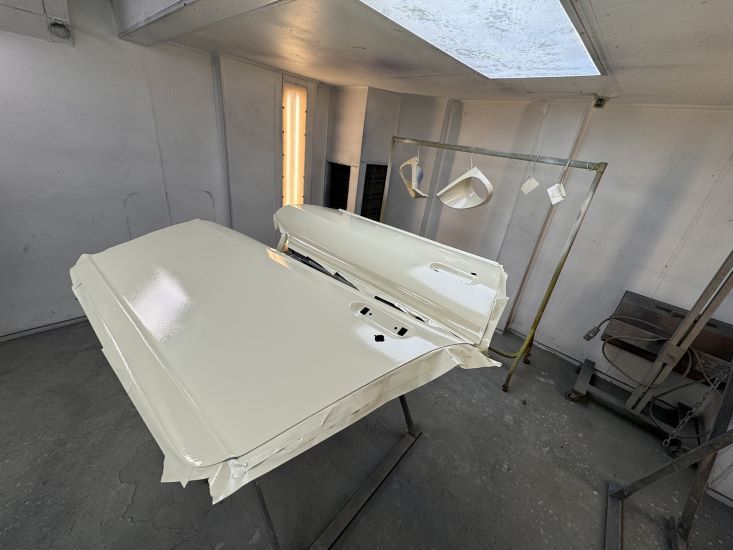
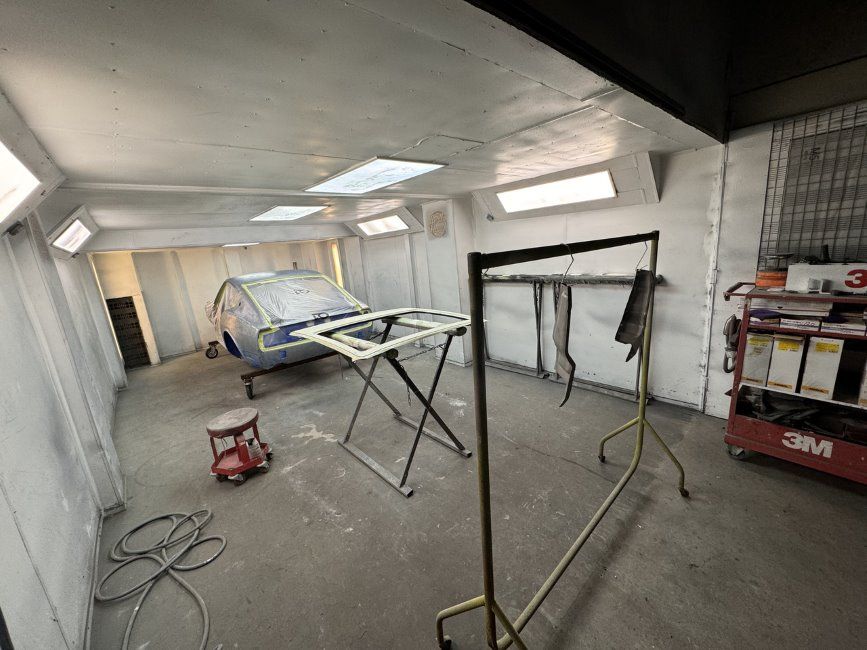
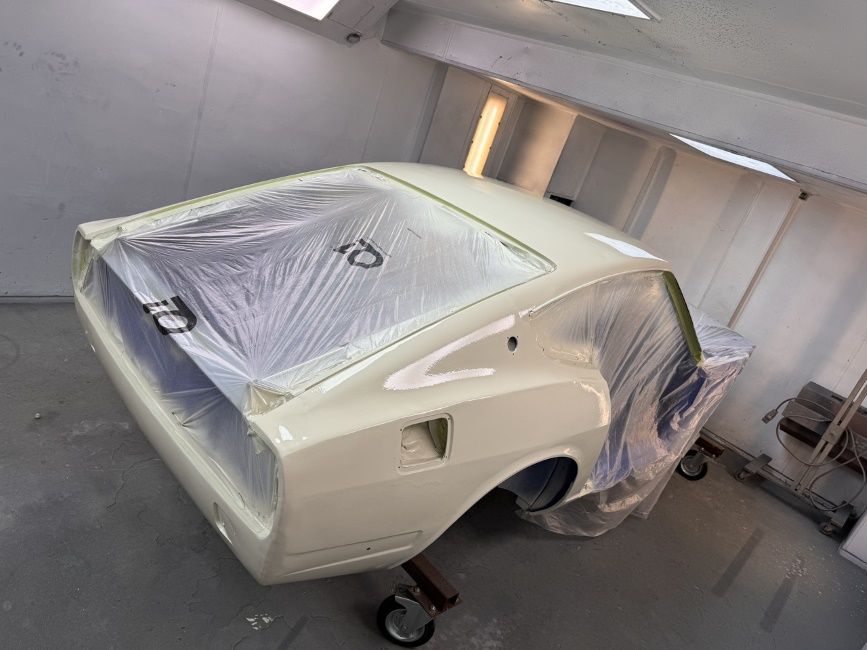
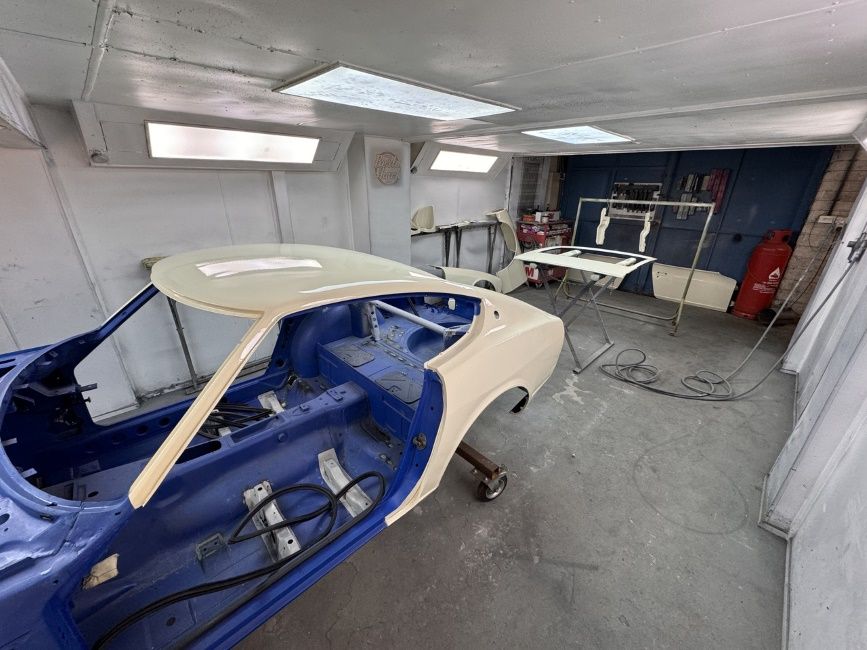
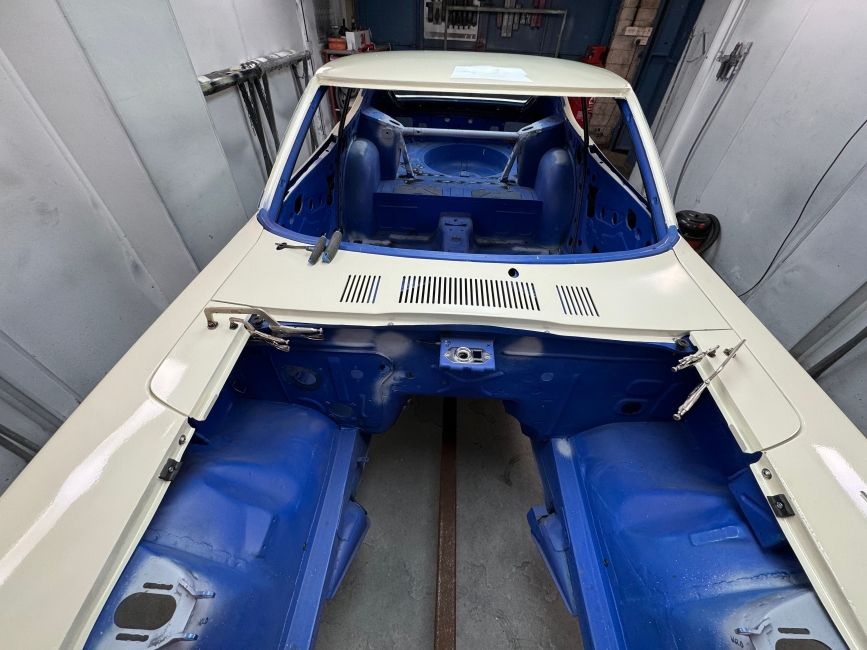
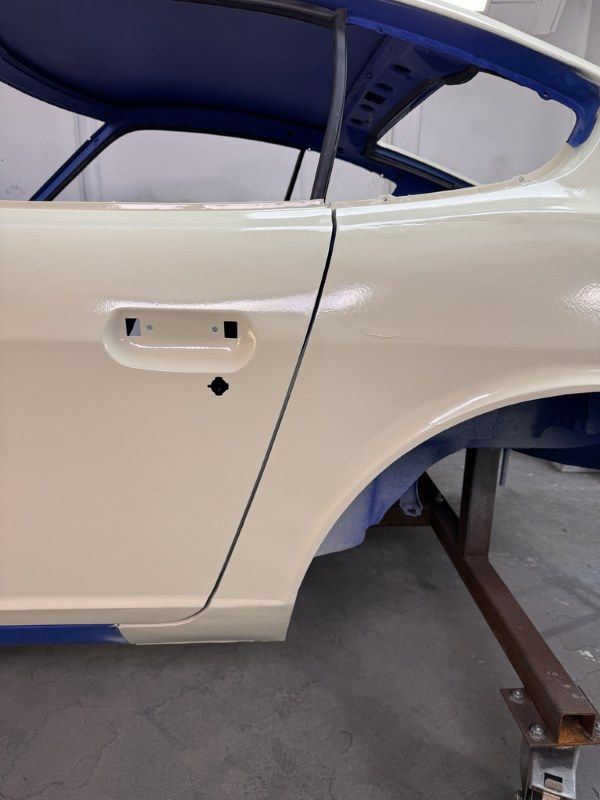
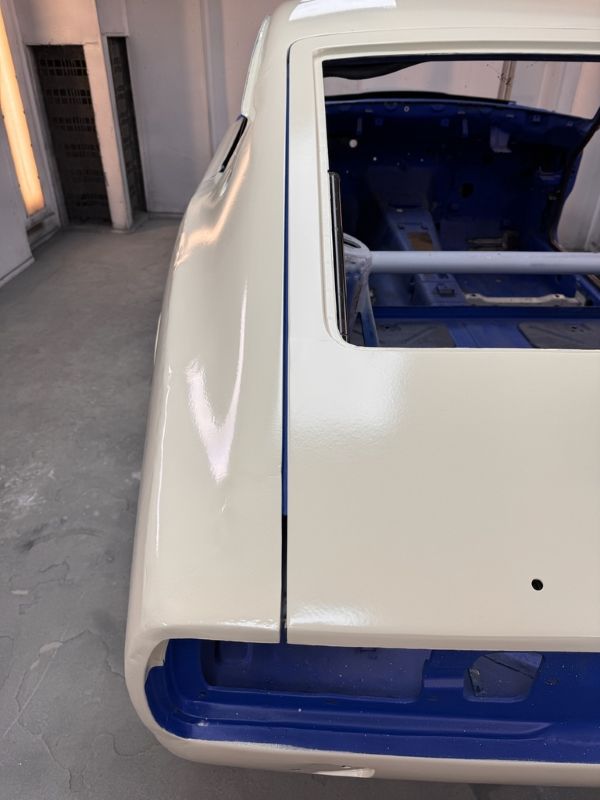
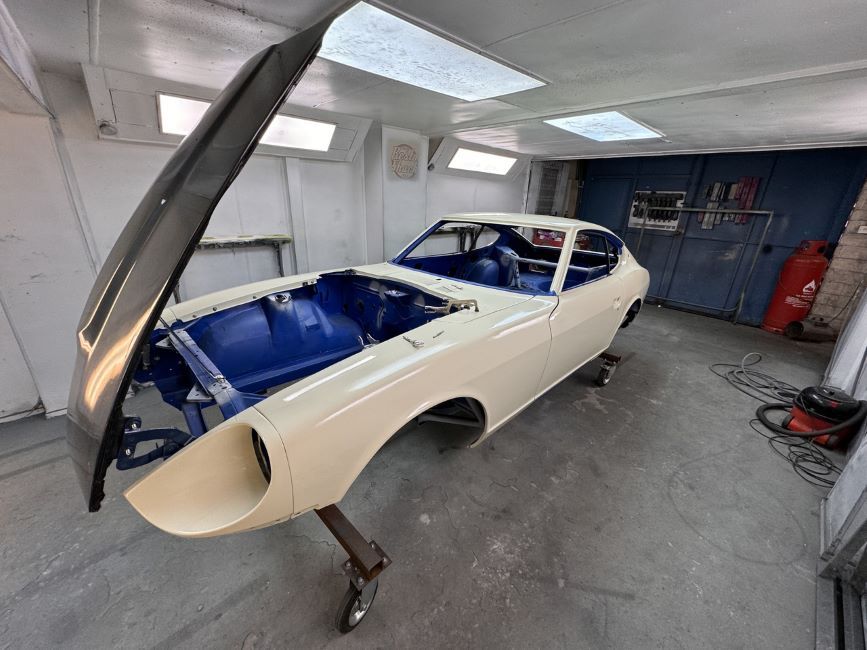
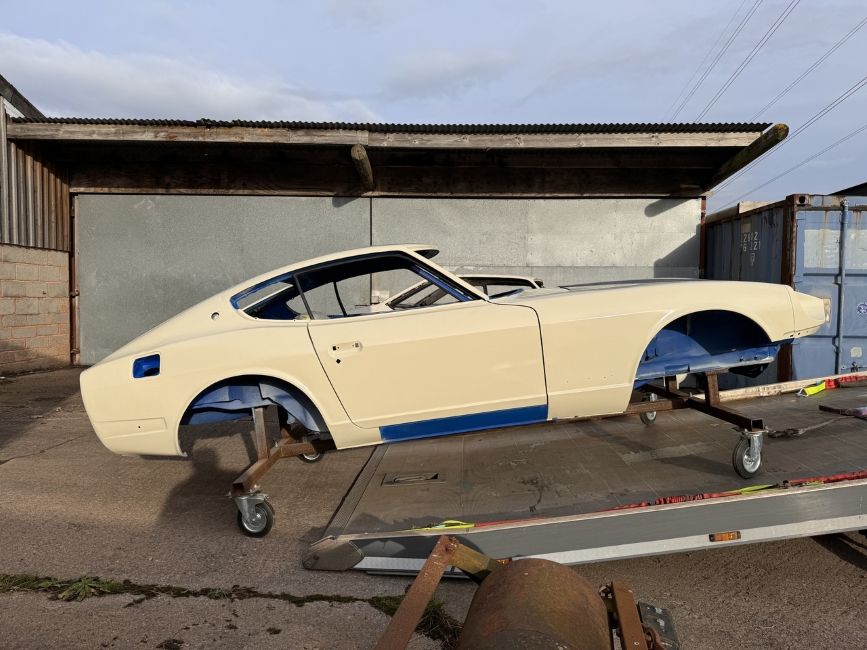
Off to storage for a bit, looking pretty good considering its all pre bodyworking.
Mark N
Club Member
I would be surprised if you get such a high agreed value as they are usually limited within an acceptable range of the market value.
An insurer probably won't care what it has cost you to restore.
For example, (hypothetically) what is worth more, an exceptionally good UK 260Z shell that cost 10 grand to get completely rust free, or a rotten one that cost 100 grand?
I really do hope you get it though.
An insurer probably won't care what it has cost you to restore.
For example, (hypothetically) what is worth more, an exceptionally good UK 260Z shell that cost 10 grand to get completely rust free, or a rotten one that cost 100 grand?
I really do hope you get it though.
Isn't insurance based on the cost to replace like for likr?
Whatever, it needs to be insured well.
Whatever, it needs to be insured well.
Ian
Club Member
It will be insured like for like, For the body it should be insured for the cost to buy a decent shell and do a full restoration on it to concourse standards. Then all mods covered like for like on top of that. I have receipts for everything which they get sent.
Its not like its going to be on a classic policy, it will be a custom modified policy. Of course it costs more, at least £1k+ a year, but no point in not getting a decent amount of value back if something happens.
Its not like its going to be on a classic policy, it will be a custom modified policy. Of course it costs more, at least £1k+ a year, but no point in not getting a decent amount of value back if something happens.
Alphabettispaghetti
Club Member
1384 hours?
34.6 weeks on a 40 hour week.
34.6 weeks on a 40 hour week.
Ian
Club Member
Yes, its a lot1384 hours?
Unfortunately many panels were not available when we started, now though, full rear quarters and full floors are available, these would have saved a good amount of custom work and therefore labor.
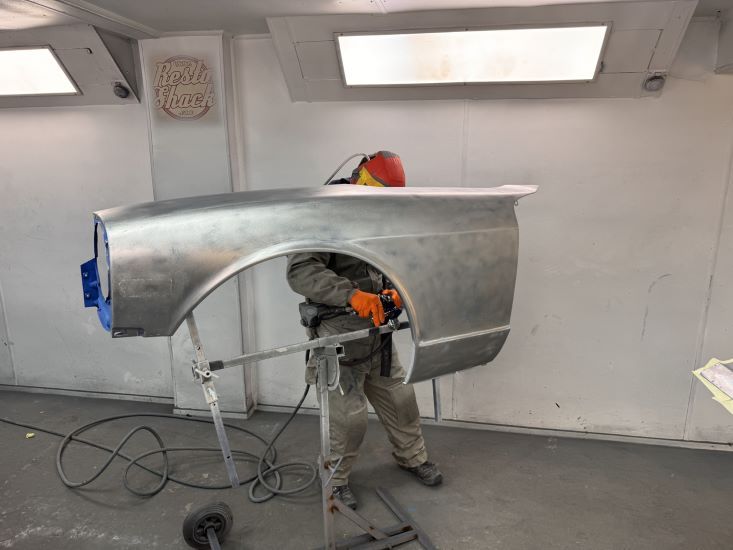
Every enclosed section on this has been opened up to check for rust and be sealed properly, quite time consuming.
Some of these hours would have been two people working so not quite that many, but still a lot.34.6 weeks on a 40 hour week.
Surely another 120 hours to go before completion I would say. Not to mention the amount of hours I will have to put in to get it back on the road.
Ian
Club Member
I really miss this thing, but that gives me good motivation to keep working on it.
I got home a few days before Christmas to find some great presents waiting for me in my Garage
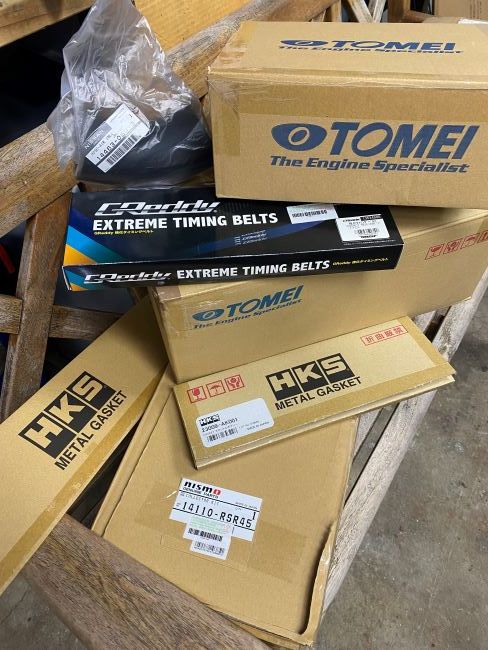
Got all this lot to go on the engine.
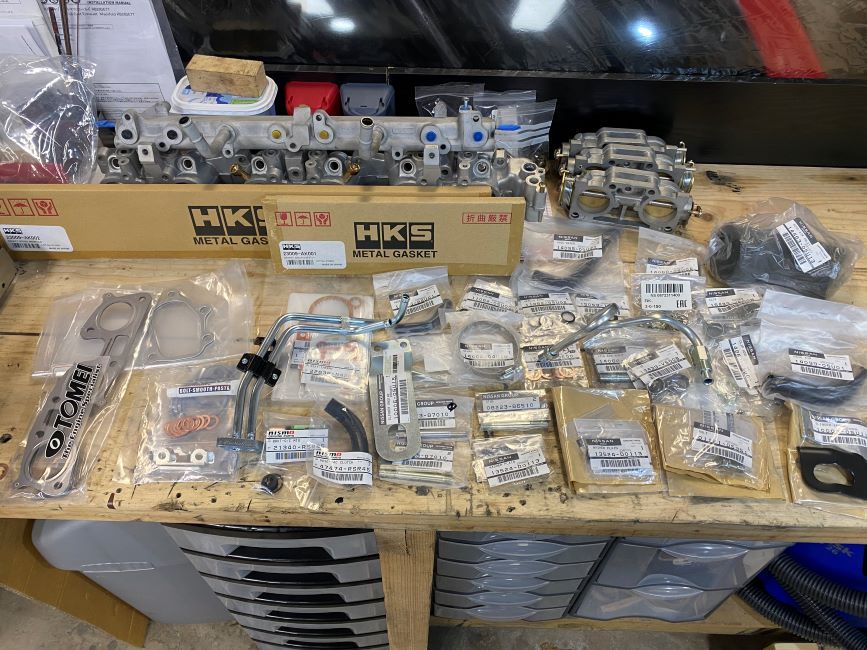
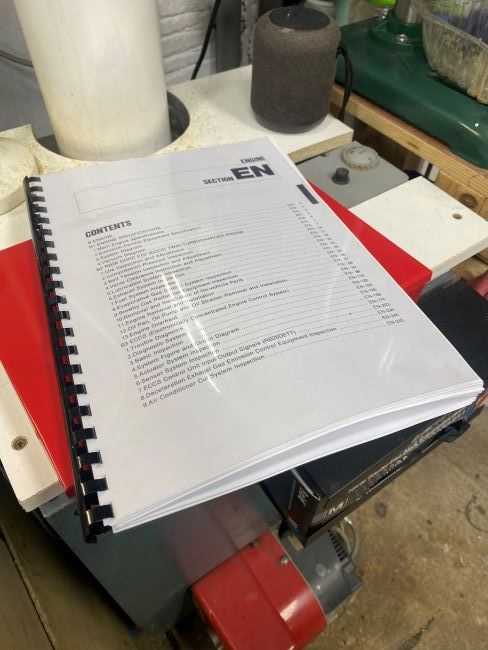
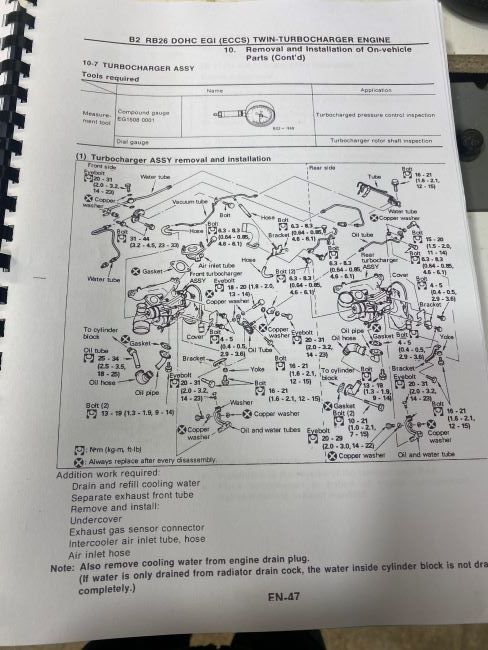
Luckiy I printed off all the relevant pages from the workshop manual at work.
Nicely re plated parts
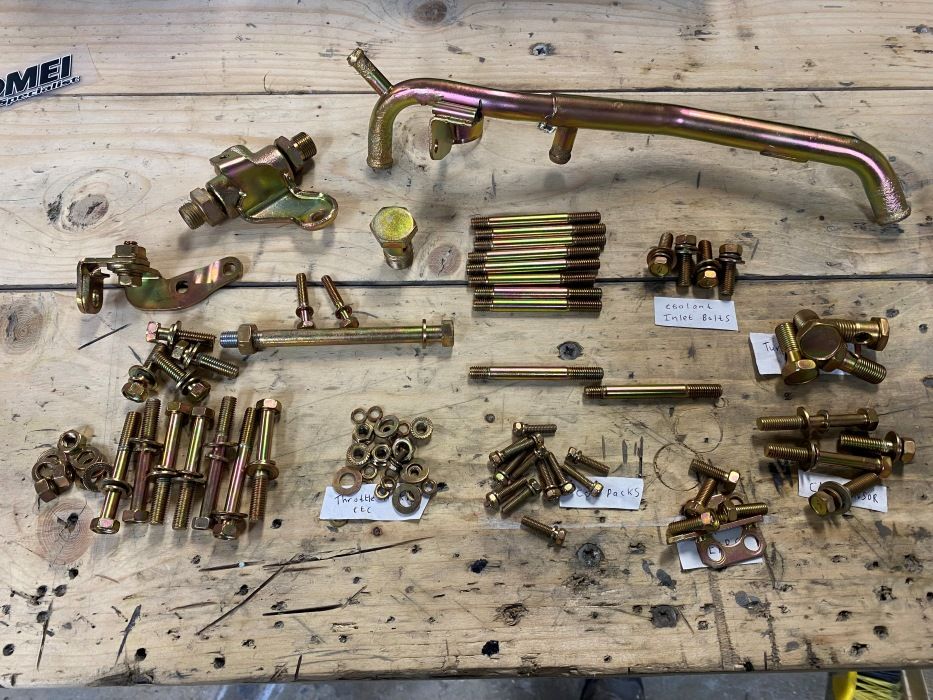
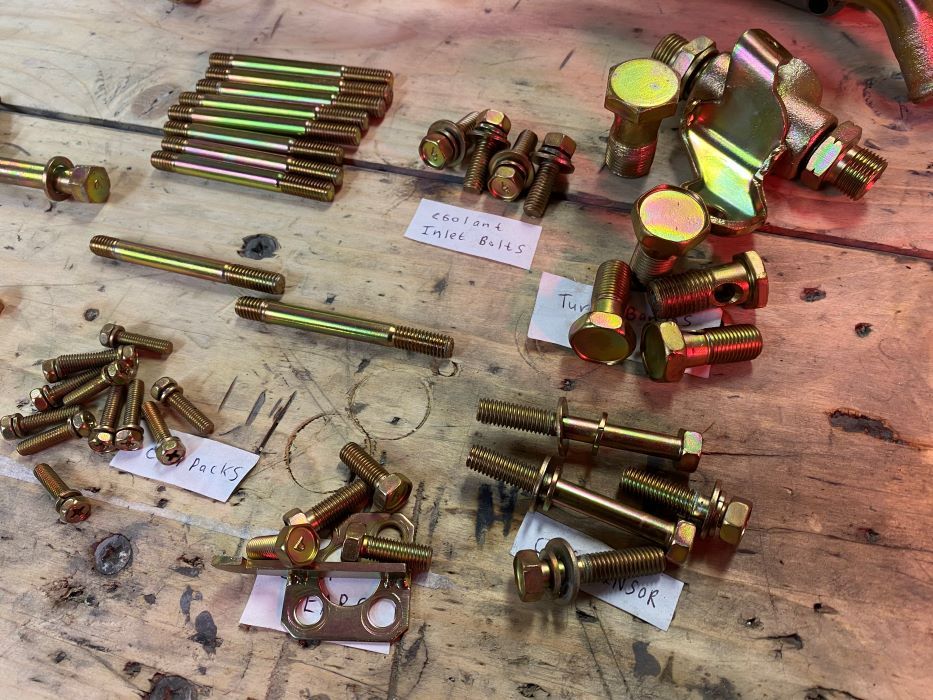
Great gold colour
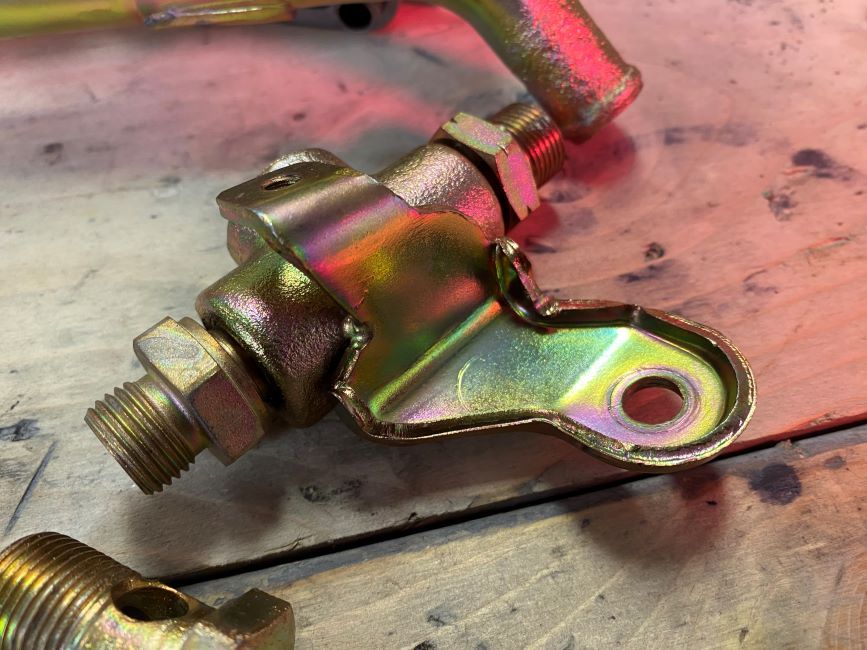
ITBs looking as they should again.
I got home a few days before Christmas to find some great presents waiting for me in my Garage
Got all this lot to go on the engine.
Luckiy I printed off all the relevant pages from the workshop manual at work.
Nicely re plated parts
Great gold colour
ITBs looking as they should again.
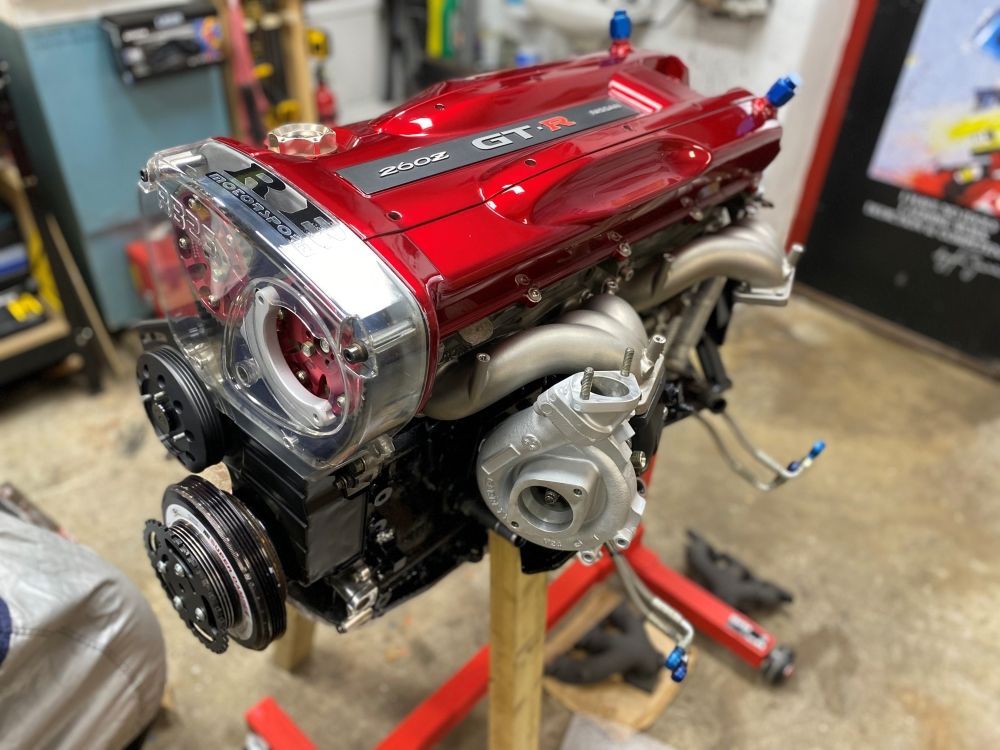
Ian
Club Member
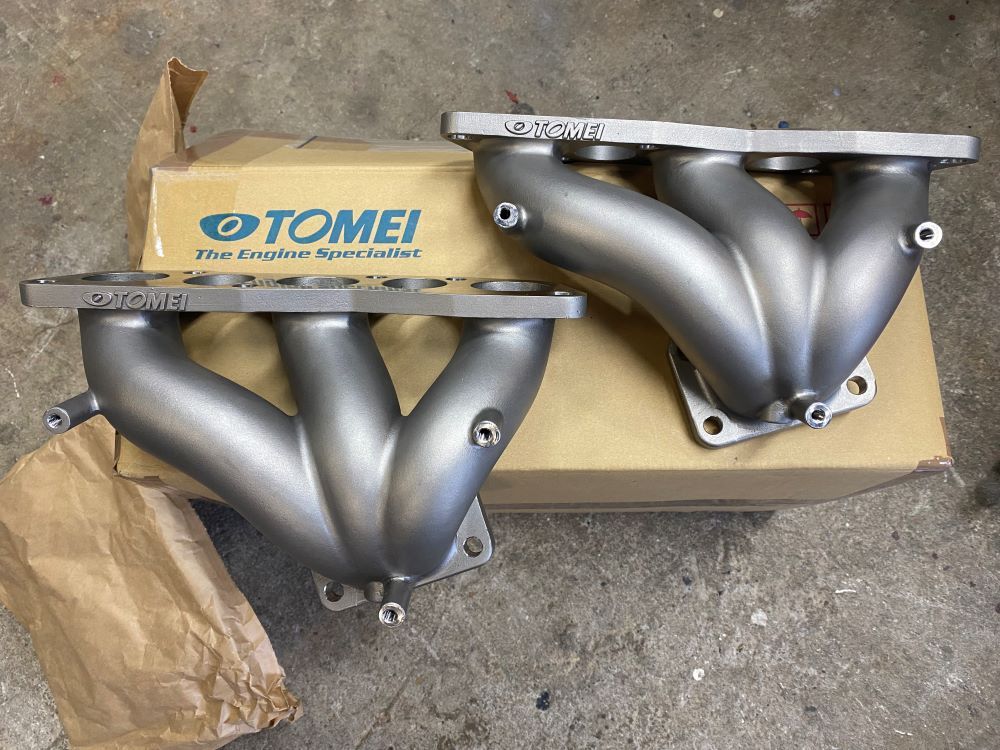
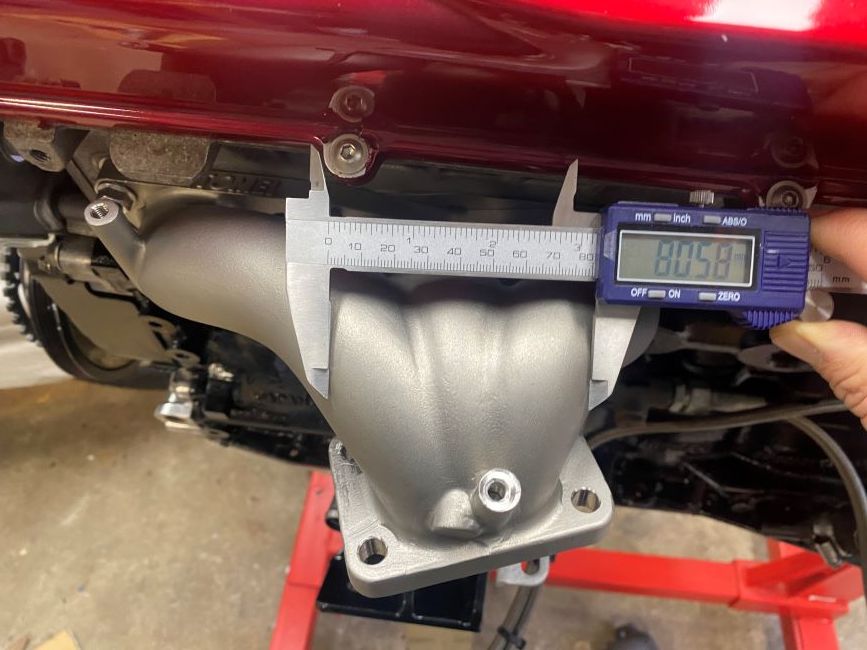
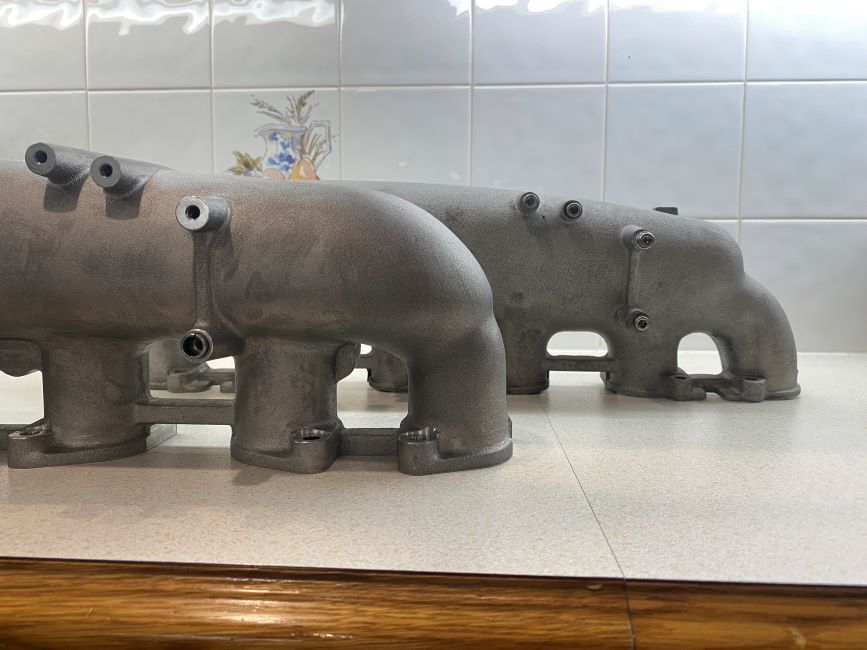
Tomei Full cast stainless manifolds, These should be a good upgrade over stock as you will see from the following photos, they surely flow better and offer less restriction and as a benefit are 1kg lighter per unit. Hopefully coupled with the ported turbos and new custom equal length downpipes that leaves the exhaust side of things as good as I can get it.
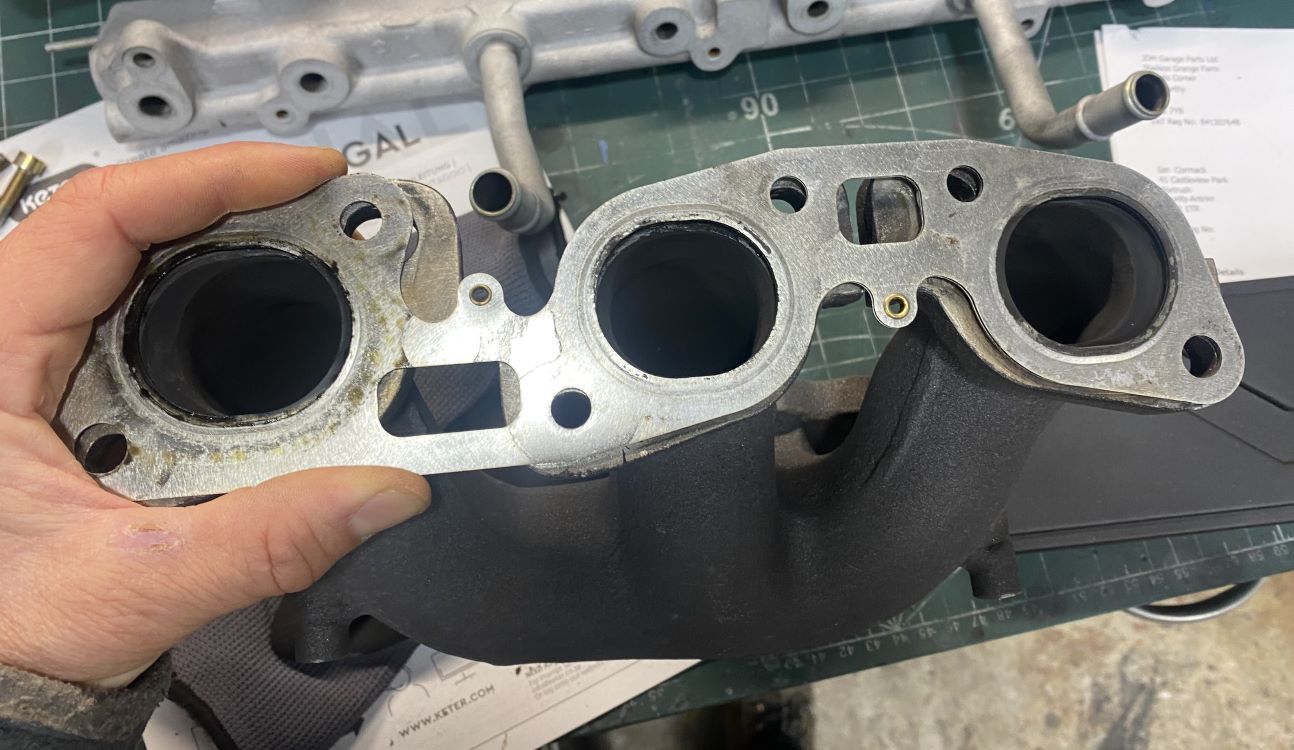
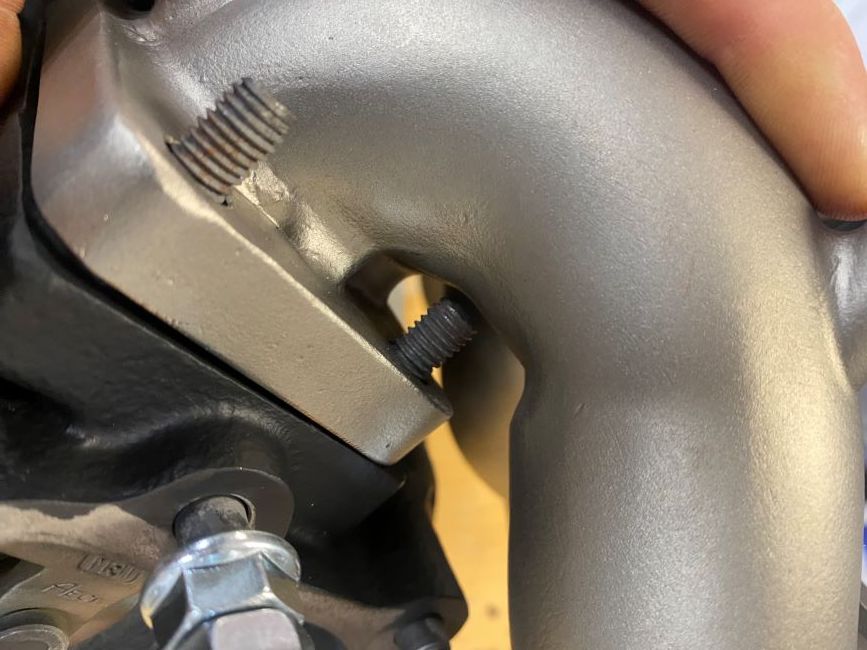
Check out how much the stock ones block the flow directly out the ports, not only is it a small hole left on the outer pipes but the exhaust flow will hit a wall and cause massive turbulence.
No such problems on the Tomei's
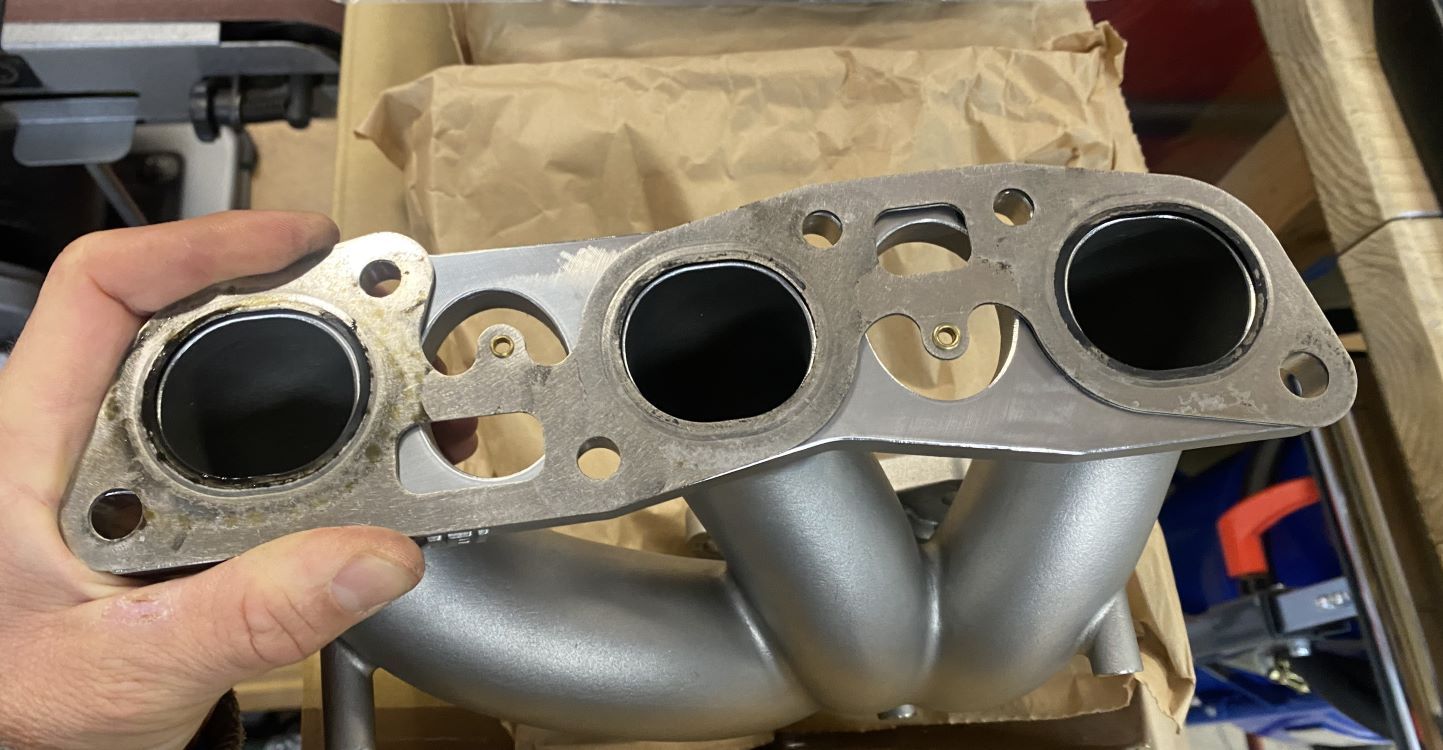
Much more open on the outlet side

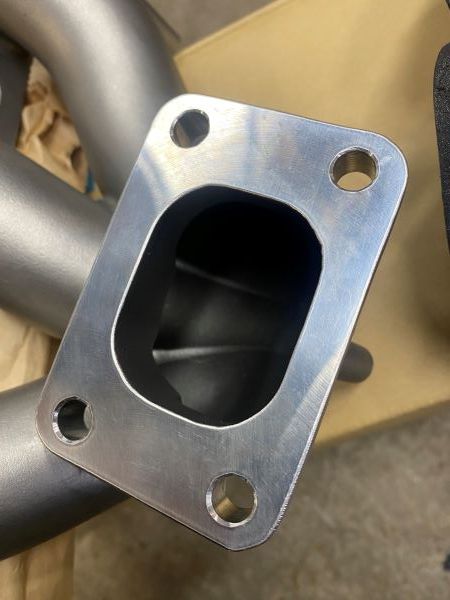
Quite a bit larger in the middle and a better shape

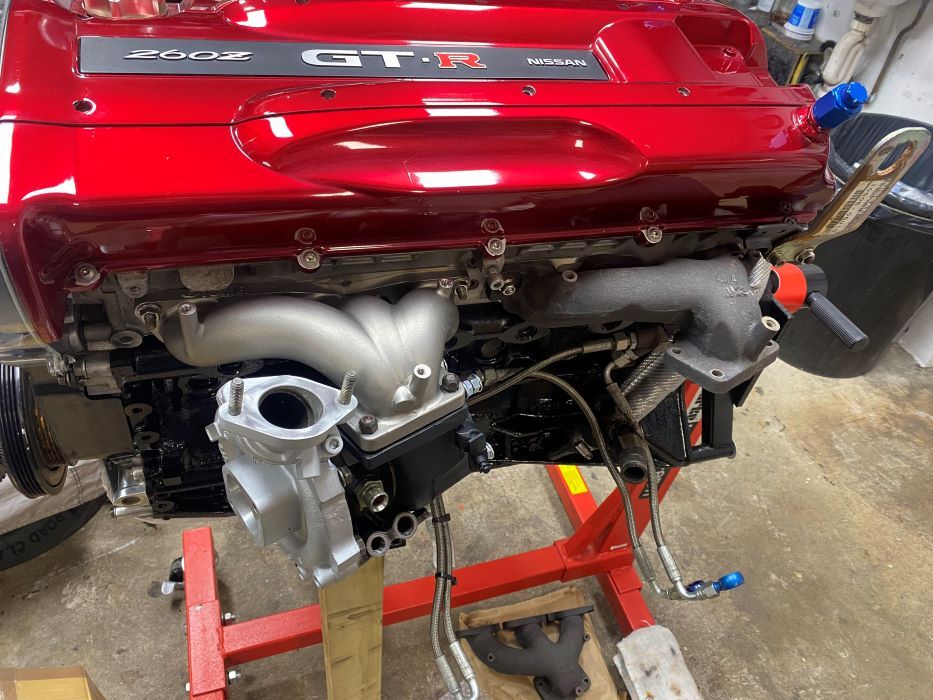
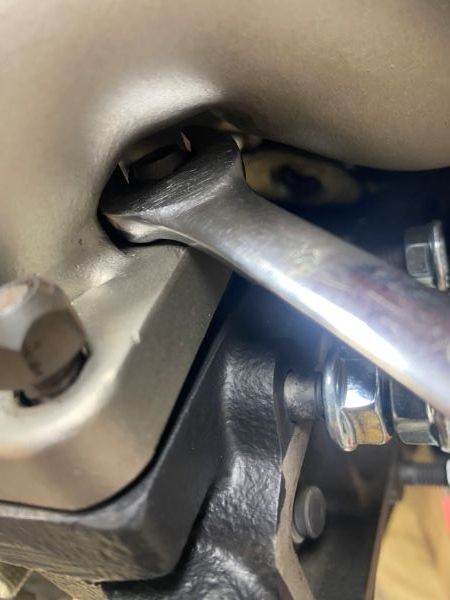
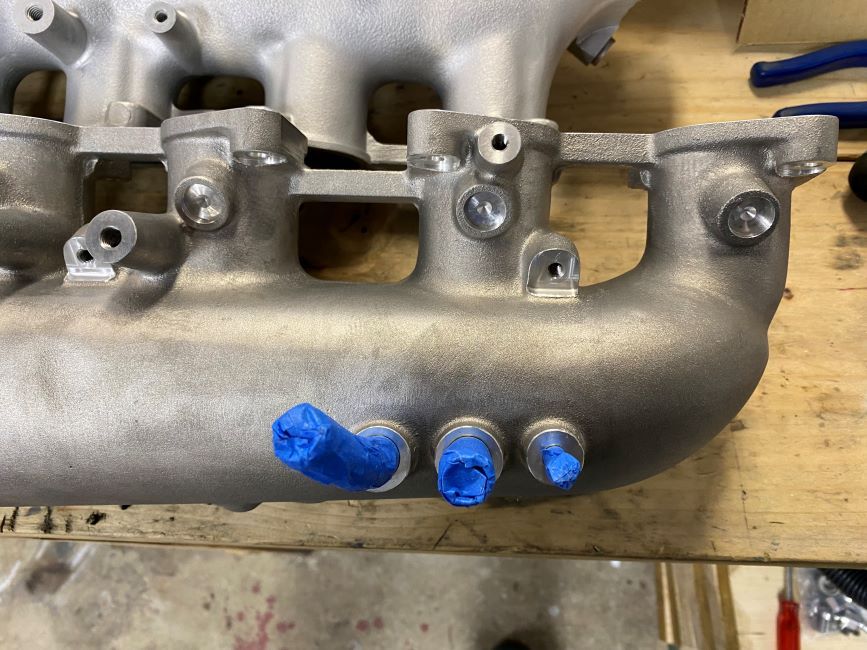
They have downsides though, much harder to fit, I'm going to have clock the compressor housing just to tighten up the nut.
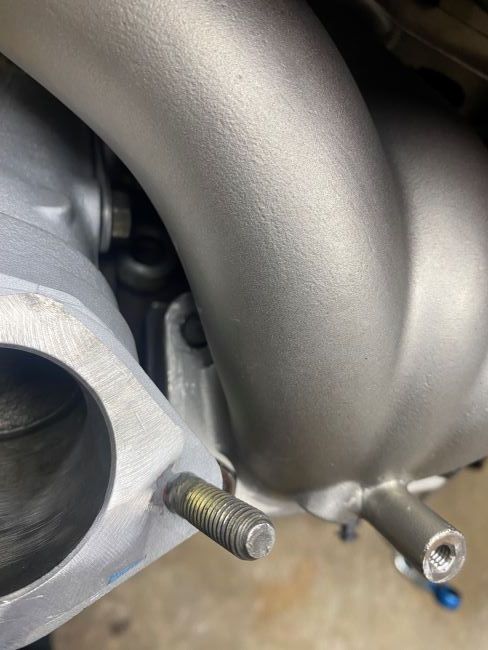
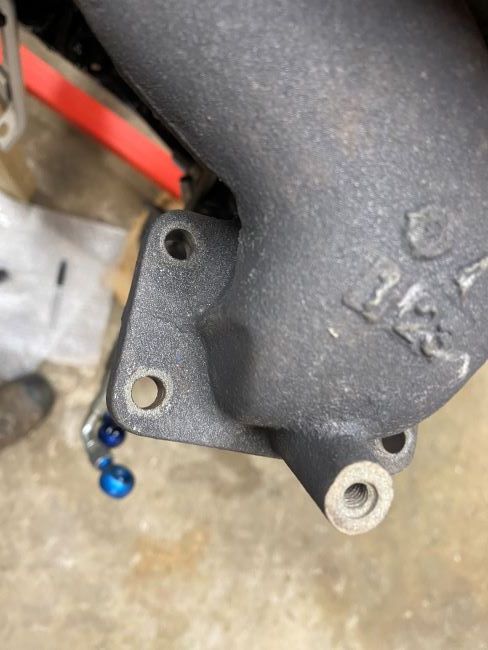
Stud will have to be trimmed and I'll need to turn down a spanner for the other side,
Can't fully fit up yet as they will still require some form of extra heat shielding, but I'll still run the stock heat shields as well, but it pains me because you loose the nice look. I had to modify the shields with a ball peen hammer to make them fit. They will be cerakoted silver on the inside and black on the outside.

Check out how much the stock ones block the flow directly out the ports, not only is it a small hole left on the outer pipes but the exhaust flow will hit a wall and cause massive turbulence.
No such problems on the Tomei's
Much more open on the outlet side
Quite a bit larger in the middle and a better shape
They have downsides though, much harder to fit, I'm going to have clock the compressor housing just to tighten up the nut.
Stud will have to be trimmed and I'll need to turn down a spanner for the other side,
Can't fully fit up yet as they will still require some form of extra heat shielding, but I'll still run the stock heat shields as well, but it pains me because you loose the nice look. I had to modify the shields with a ball peen hammer to make them fit. They will be cerakoted silver on the inside and black on the outside.
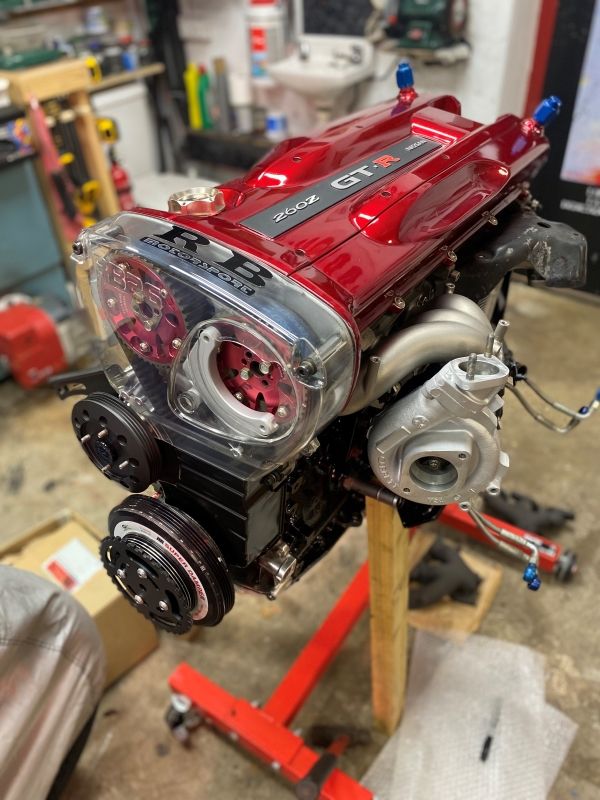
Ian
Club Member
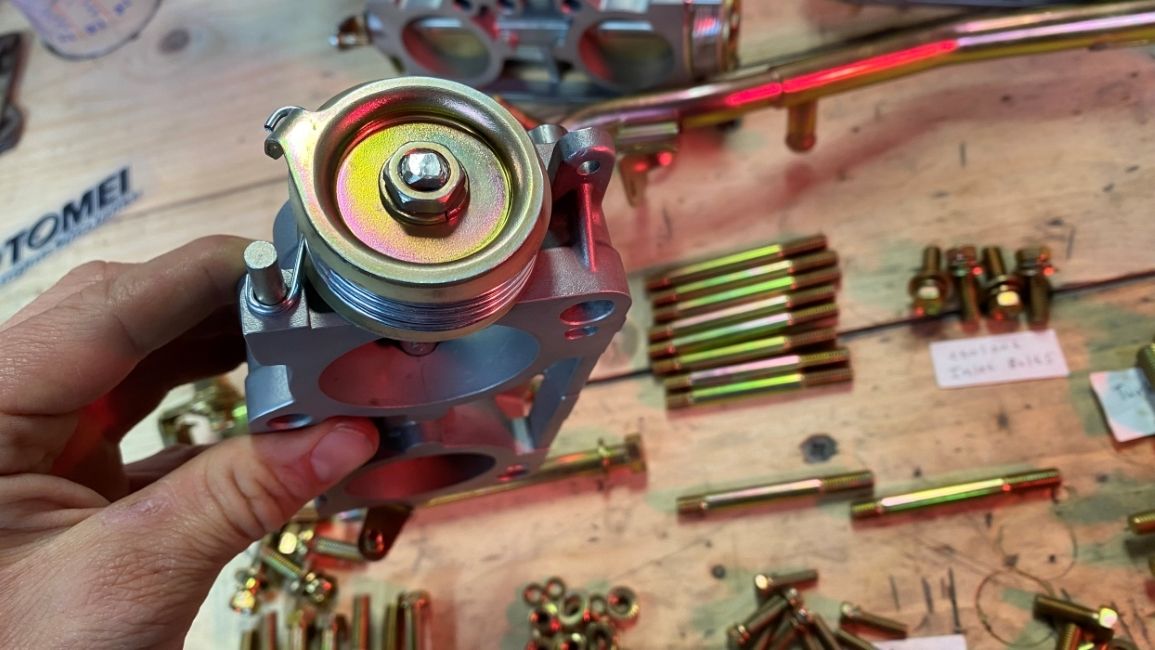
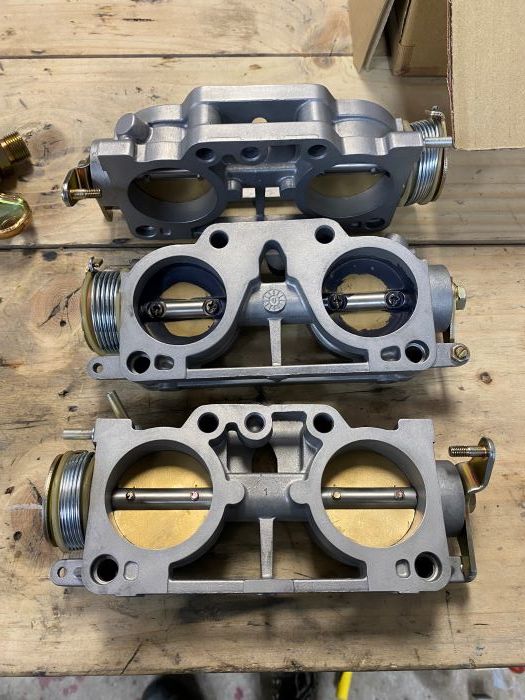
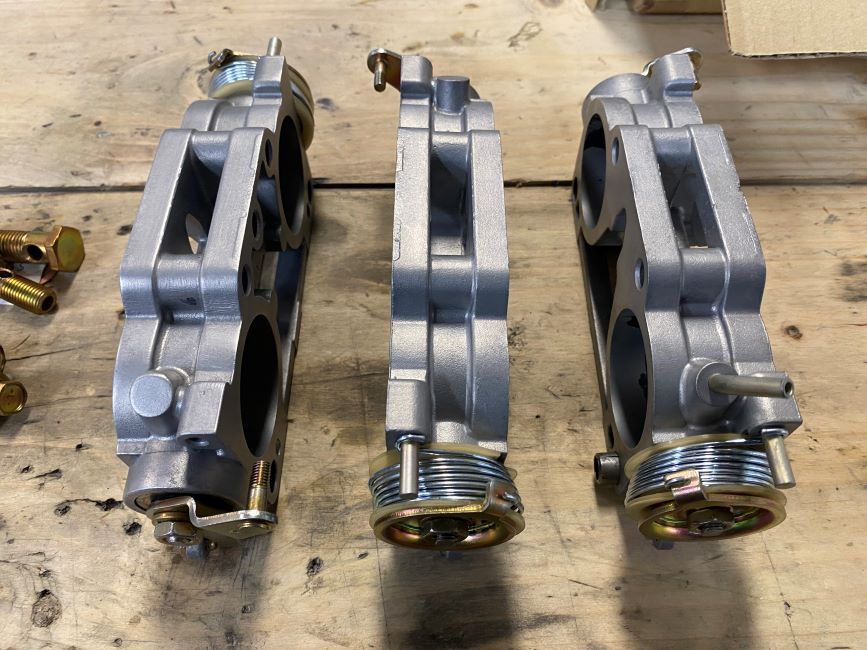
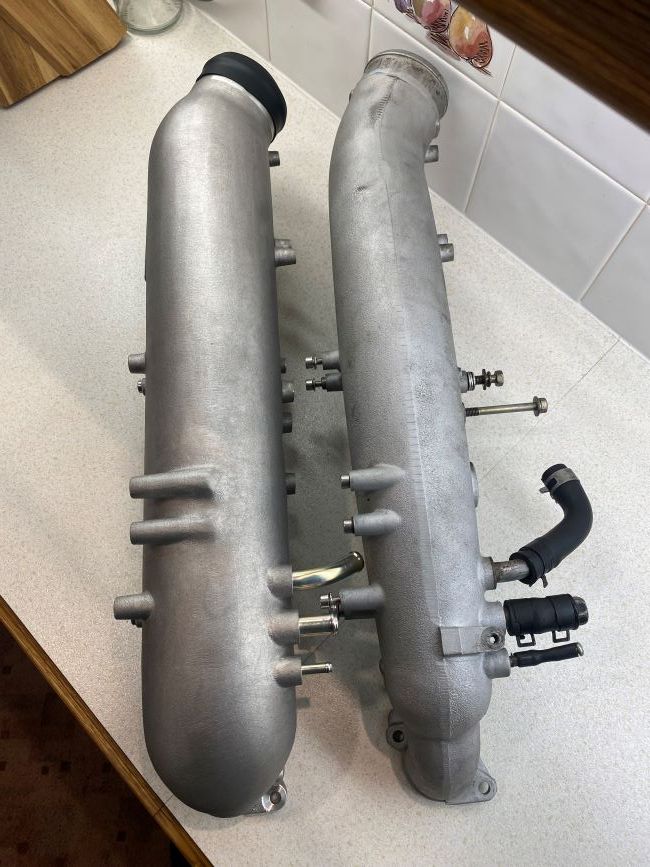
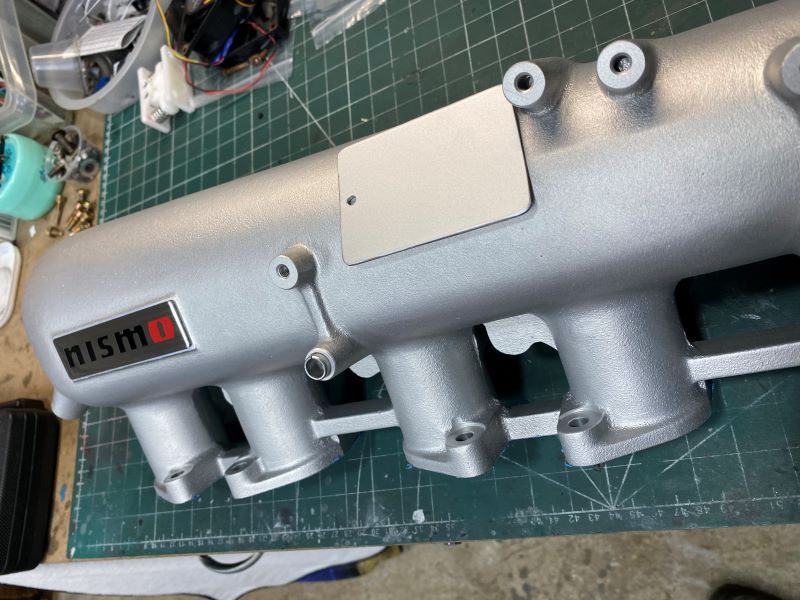
Also received a Nismo Plenum, to improve flow on the intake side.
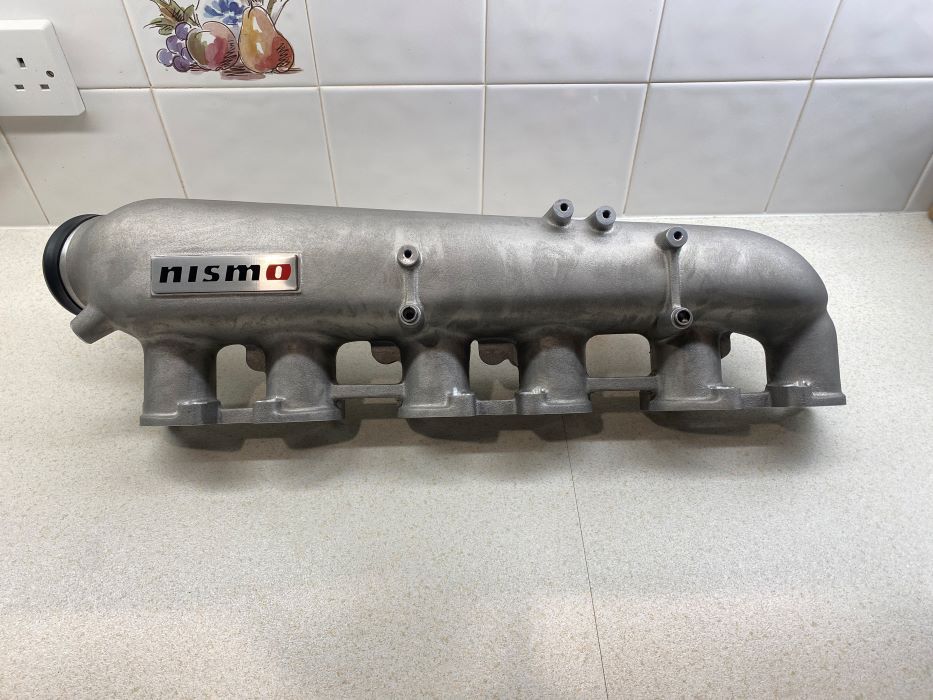
You can see the shape and size difference
Quite a bit chunkier
I was planning to fit it as it came, but the blotchy colouring in the metal was annoying me too much. So I swapped the blaster over to Glass beads

So much better safterwards

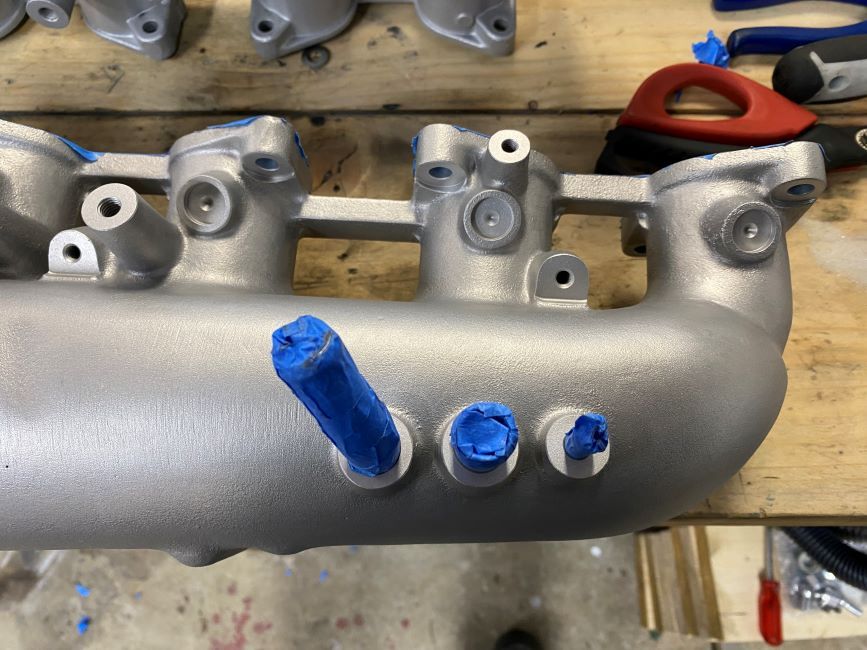
Considered cerakoting it, but I want to keep the variation in colour that the bare aluminum finish gives, so the current plan is to use a cerakote clear, tested gloss, now got to test matte and then decide what to go with. Its not to improve the look at all, just to keep dirt from getting embedded.
You can see the shape and size difference
Quite a bit chunkier
I was planning to fit it as it came, but the blotchy colouring in the metal was annoying me too much. So I swapped the blaster over to Glass beads
So much better safterwards
Considered cerakoting it, but I want to keep the variation in colour that the bare aluminum finish gives, so the current plan is to use a cerakote clear, tested gloss, now got to test matte and then decide what to go with. Its not to improve the look at all, just to keep dirt from getting embedded.
Wow £££. Don't you dare plead poverty again.
Rushingphil
Club Member
Wow £££. Don't you dare plead poverty again.
I think Ian has every right to plead poverty!!