Progress is slow but getting there.

vpulsar

Well-Known Forum User
Right I got bored adding to my colour choice thread and thought you maybe had to, So I'm starting this new thread to keep you guys informed of my progress thus far, Even if you don't care :rofl::D.

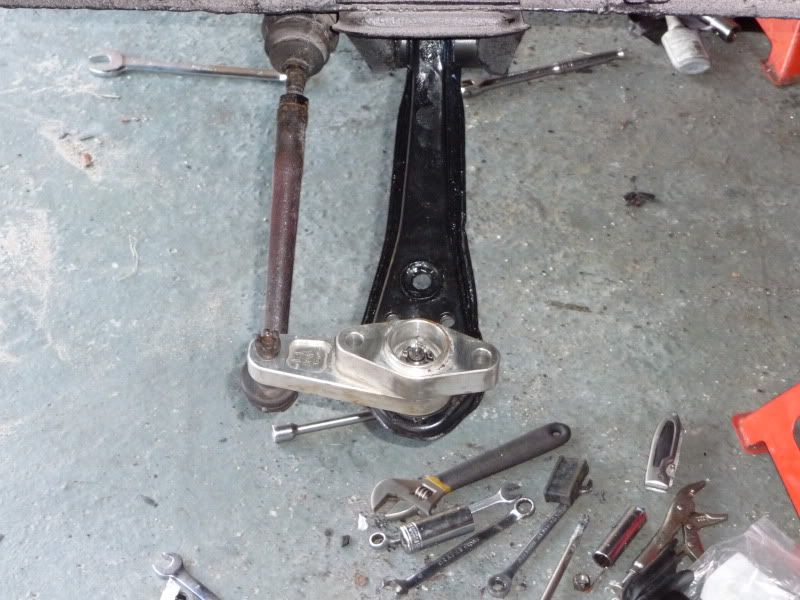
This week I've been busy fitting new poly bushes to the wish bones and mustache bar after having them shot blasted and painting them with POR15 in tasteful black of cause.

I've also rubbed down and painted the bigger R200 diff I acquired from the other Z I had bought a while ago, I also fitted new seals to the front and drive shaft flanges just to be on the safe side plus a new gasket for the freshly painted diff cover. I took the precaution of lock tighting the drive shaft bolts because they where all loose when I stripped it down :confused:.

reardiffandrebuildpics017.jpg

reardiffandrebuildpics020.jpg


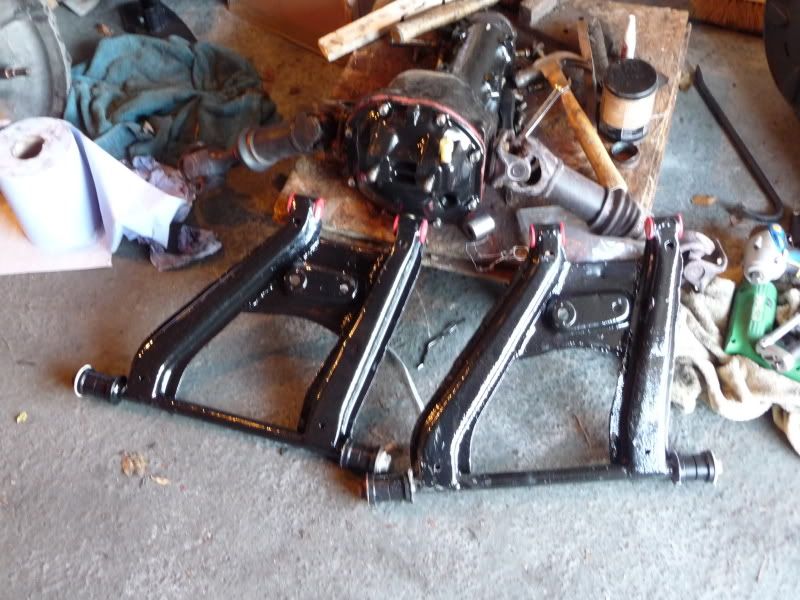
If you're wondering what those 3 holes are in the diff carrier bit they are to mount my electric pump when I get around to fitting the webers.

I also managed to finally sort out the tank filler hose thanks to pistol Pete (thanks buddy), After the moron that started building my car had fitted one of those tacky alloy fillers :(, It caused all sorts of problems which I've got around by cutting up a standard 240 filler hose and joining it with some flexi fuel hose from demon thieves.

reardiffandrebuildpics021.jpg


Will hopefully get it all back together at the rear end tomorrow then I can start on the front susp lol.


Rob
 
Great work Rob......I changed the gearbox in my 260 on Saturday, I only found 2 bolts in the driveshaft, the other 2 were missing! I also put lock tight on mine to be safe.
 
I've had lots of driveshaft loose bolt problems before, thanks to previous owner painting the bolt threads (doh) :)

Looking good, keep us up to date even if it's just motivation that we should all be getting on and doing something to ours ... :D
 
Cheers guys, I was a bit worried about removing the prop shaft flange to fit the new oil seal because I thought it might effect the crown wheel and pinion settings, But the bolt is back in the exact same position it started so should be fine.

I also buggered up the two drive shaft seals and had to redo them with new seals, It pays to have the right size socket something I'll have to remember next time lol.


Rob
 
Looking good:thumbs:
Just a quick observation but maybe I talking cr*p. I noticed that you've tied the fuel pipes together with cable ties. Do you think that this could be a problem come MOT time. If the pipes are continually rubbing together might they not eventually rub through completely.:unsure:
 
The fuel and brake lines are all mounted in the correct rubber mounts running on the underside of the gearbox tunnel, I just added the cable ties to neaten everything up a little.

I doubt very much if their will be any movement at all once the cars back on the road, I probably didn't need to bother with the ties but I tend to over do everything as I don't like having to do things twice lol.

That rear section of the pipe work will change once I fit the electric fuel pump anyway.


Rob
 
Rob,
Are your halfshaft UJ's ok, as this is a prime time to get them checked and replaced if necessay? Or have you already looked at that? I would also put some fresh grease under the halfshaft boot, as they have probably never seen any grease since they were made. Overkill maybe, but worth a look....
 
Rob,
Are your halfshaft UJ's ok, as this is a prime time to get them checked and replaced if necessary? Or have you already looked at that? I would also put some fresh grease under the halfshaft boot, as they have probably never seen any grease since they were made. Overkill maybe, but worth a look....

Cheers Ian, Yes they seem fine at the moment and have no play in either, But one of them will need replacing in the future because the grease nipple has broken off, But I will try and remove it and replace if at all possible.

I was planning on re greasing them under the rubber boots as they where a bit stiff when I tried to get them out from under the car, With the bigger R200 diff being fitted I want them to move as easy as pos when I put it back together.


Rob
 
Well it's been a while and I've been busy ish lol.

I finished installing the bigger R200 diff and have moved on to the front end were progress was halted by Mike sending me the wrong rack bushes now solved by the speedy arrival of the correct ones lol, To be fair it wasn't Mikes fault that my 260 has a 240 rack.

My to do list for the rest of week consists of starting to strip and rebuild the front susp.

I had a lucky result by picking up a complete US spec number plate light assembly including the bulb holder's and wiring from a guy in the states which solves my problem of lighting the number plate with out having a bumper fitted.

numberplatelightassembly003.jpg

numberplatelightassembly001.jpg


Rob
 
Last edited by a moderator:
I finally got the gearbox and prop shaft back in today so it shouldn't be to long until I can actually try and get it running again hopefully.

I found some more strange things out about my supposedly early 260, So far its come with a R180 diff instead of of the R200 is should of been fitted with, This week we found that it also has a 240 steering rack and 240 front brakes, All things it shouldn't have so Mike has told me.

I reckon it's a ringer lol.


Rob
 
I was going to take a few pictures today but the camera battery ran out lol.

014.jpg


I'll get some more up tomorrow if I remember.


Rob
 
Are you sure you've got the correct steering arm on? That's the nearside arm yes? Looks to me as tho the balljoint is the wrong side of the centreline of the strut fixings, unless you're looking for positive camber.

Original LH arm :-
 

Attachments

  • 2008_0525windback0004.jpg
    2008_0525windback0004.jpg
    447.6 KB · Views: 31
Are you sure you've got the correct steering arm on? That's the nearside arm yes? Looks to me as tho the balljoint is the wrong side of the centreline of the strut fixings, unless you're looking for positive camber.

I'm not 100% sure just yet if its right or wrong lol, But going by a picture I have on my other computer its fitted right, These alloy arms dont have the twisted end like the standard arm has.

I'm sure I'll work it out even if it's by trial and error lol :p.


Rob
 
The twisted steering arm end is'nt the problem. Camber is determined by the length of the track control arm, cross member to strut bottom bolts. If the balljoint is as it looks, then you will get less camber.
 
The twisted steering arm end isn't the problem. Camber is determined by the length of the track control arm, cross member to strut bottom bolts. If the ball joint is as it looks, then you will get less camber.

OK I get your meaning :thumbs:, It's not bolted up properly yet because of just that fact and I'm still unsure which way round it goes :confused:, Like I said in my other post I'm just trying it the way I've seen it fitted on another car.

I've got quite a few other bits and bobs to do now so their isn't a rush, I'm going to take the cross member out and clean that up while I'm at it as well as order new shorter stiffer springs, Oh and save for new struts :eek:.


Rob
 
Hi Rob

You have it the right way up in your picture, the block goes between the steering knuckle & strut.

I know they can only go one way up but they're sided and that is the debate, I'm trying to work out which side goes where mate, I think I have it right but with out the fitting instructions I'm not 100% confident :eek:.


Rob
 
Back
Top