'The Wasp' Project Thread

Mrs HollowPoint

Well-Known Forum User
Crikey thats going to be very loud!!

:thumbs:.. hopefully!
I wonder about the proximity of glass though.

No engine mods yet really. It's been enough sorting the niggles to keep it on the road and make it safe. ive only had it a few months as yet.
The boot build so far has cost me about a fiver. Ive been using all the MDF that was sat in the garage rafters and using up whatever has been left over in the garage. I'll have to start spending now because Ive about exhausted the supply.

Look what turned up today
rearstrut.JPG


Now, wheres that going to go? :rolleyes:
 

Mrs HollowPoint

Well-Known Forum User
Well, I havnt done much more than use up a litre of resin and a ton of fibreglass sheet to reinforce the inside of the box and the support rings. Oh, and a bit more filler on the outside. I'll smoothe the back out if necessary when the side pieces are built up.

...Been high as a kite all day
 

Mr HollowPoint

Well-Known Forum User
It's looking better again, she's in the utility room adding more filler, sanding it back, adding more filler, sanding it back, here comes another signature "Smoother than anything you've ever seen before" Rose project :D
 

Mrs HollowPoint

Well-Known Forum User
Here is one of it laid on its back in the middle of body filler stage..... Looking ahem, very rude

lookinrude.jpg


I have nearly finished smoothing it all out. Need to set the subs in for a check before I go further. This part won't be going any further really until the other parts of the install are up to this stage.

firstprimer-side.jpg

firstprimer-front.jpg
 

Mrs HollowPoint

Well-Known Forum User
Well it looks even more like an owl now, Ive got big wide dark eyes for it :p

I said I needed to re-jig the bog volume because of going for MUCH more powerful speakers...... 21 Litres ON THE DOT... Woohooo!

Yeh yeh yeh... bit more sanding yet lol. I have it all reinforced with extra fibreglass, odd spots and pockets smoothed out, and wadded/padded inside now.

21litresondot.jpg


p3testfit.jpg
 

Mrs HollowPoint

Well-Known Forum User
Right then, I had all the seats out of the car earlier in the week to feed through another RCA cable and took the front passenger wheel off to feed the power cables through the arch into the engine bay....

fruits of my labour:

fuseholders2.jpg


One new rear strut brace fitted. There is 5.5 inch depth of space behind the seats so took advantage by fitting a shelf, and added a lip to keep things on it:

rearbrace1.jpg


rearbrace2.jpg


And with the boot blind in:

rearbraceblind.jpg


Youve probably guessed from the fact the weather shield has been removed and the masking tape and newspaper, I intend to get very messy... correct ;)

It's looking quite a mess in the install area at the moment but progressing slowly...

This is one of the targa blind support:

sidesupport.jpg


The sub box just needs paint and carpet now really, but not until Ive finished making a mess with the rest of it.

whitesubbox.jpg


Ok, thats the updates for now.
 

Mrs HollowPoint

Well-Known Forum User
Oh yeah... I was about to start suspending the 6x9 rings at which point I could start getting the cloth over and resin... BUT my jigsaw broke... this wimpy girl doesnt like sawing lol


Oh and while feeding the power cable through the wheel arch I found a massive hole rusted through too close to the suspension for comfort... thats a welding job before the next MOT ..... Nuisance of a car! grrrrrrr
 

Mr HollowPoint

Well-Known Forum User
Latest update from Rose, she's out in the garage working on it, so asked me to post it up on zClub for her, lol

I said it would be better today...

gettingreal1.jpg


gettingreal2.jpg


still working on it tonight.... laters! :)
 

Mrs HollowPoint

Well-Known Forum User
FYI for future boot builders, Rockford Fosgate measurements are spot on to the millimeter. Infinity however cant measure for **** - theres 10mm too much on the outside measures and 10mm too little on the inside. Good thing is, if this hold true, the amps should be swimming with space when they turn up lol.

6x9sincantmeasure.jpg

6x9sincantmeasure1.jpg

close6x9.jpg
 

Mrs HollowPoint

Well-Known Forum User
Impressed with the 6x9's or the head unit, dunno, but ****, whats the amped up version and the subs going to sound like? Also showing one of 3 sound settings on the underlighting and the ease of the targas.

Yes, I look like **** after a week huddled in the garage with sanding paper and got more to go lol

300ZX Targa Trick - YouTube
[YOUTUBE]69uNnnWBy4k[/YOUTUBE]
 
Last edited by a moderator:

Mrs HollowPoint

Well-Known Forum User
Since this project is causing a bit of a stir now the video is up, people can see what I'm actually doing here. I could explain it forever, but now the video is there....

Resounding concerns...

A. Decapitation by targas
B. Glass being damaged


A. They are very secure, pure physics of the angle they sit in would not allow them to come forward into the car. The curvature of the boot and roof also wont allow this, it is a relative impossibility. However, since the concern is resounding, a simple fibreglass modification to the boot lid to 'stop' the targas on the outer edge should satisfy this.

B. An early consideration I had, although after further research, this is also highly unlikely. The free flowing space around the targas allow plenty of space for the resonating sound waves to escape. True, the vibration may take its toll on the seals of the targas, but who doesnt have leaky targas anyway.

Lets bring it down a few decibels.
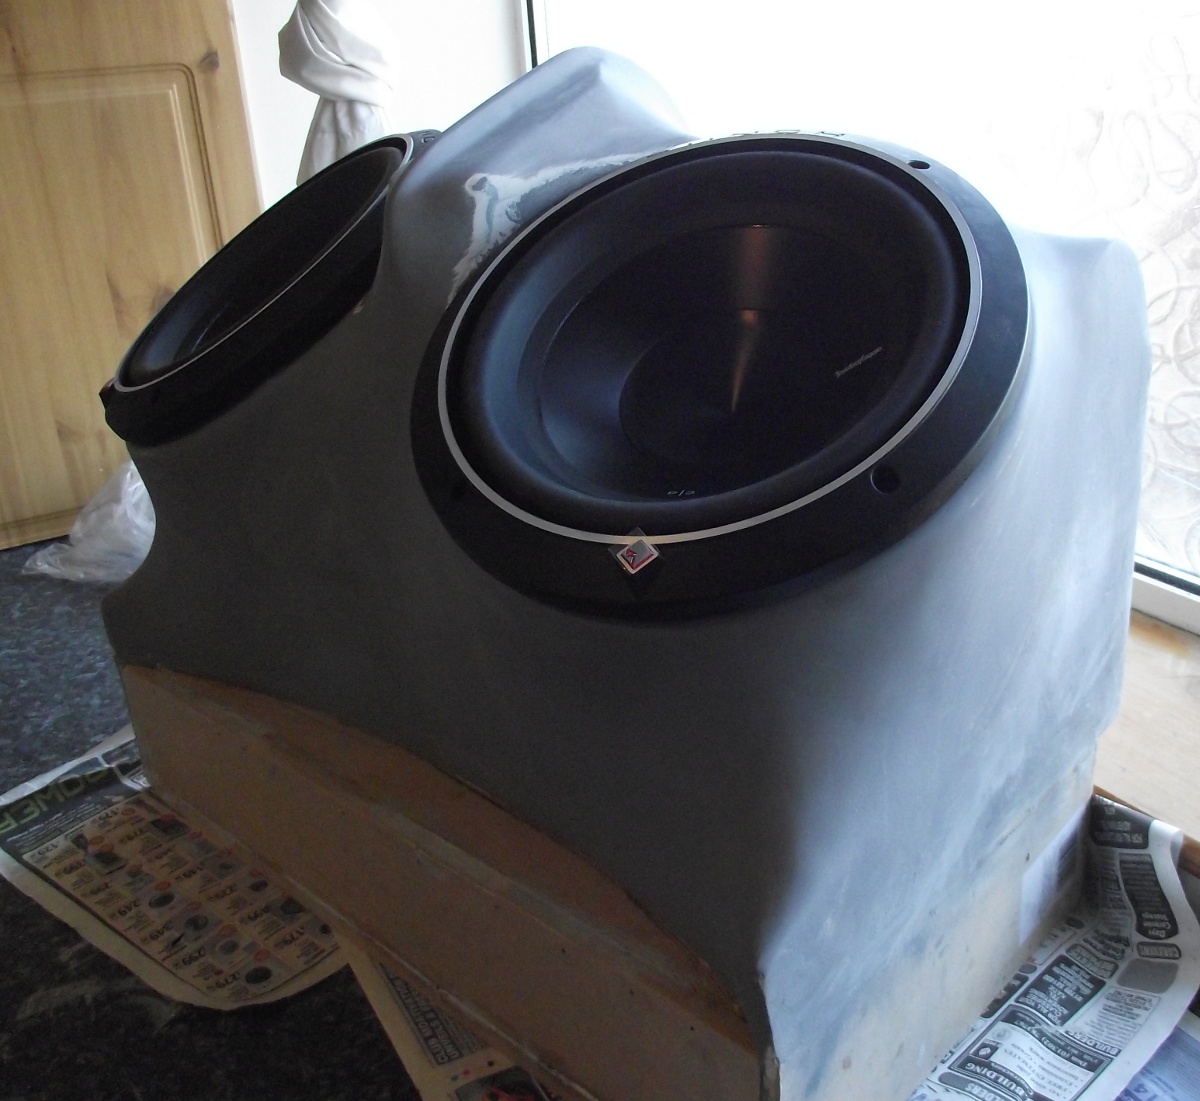
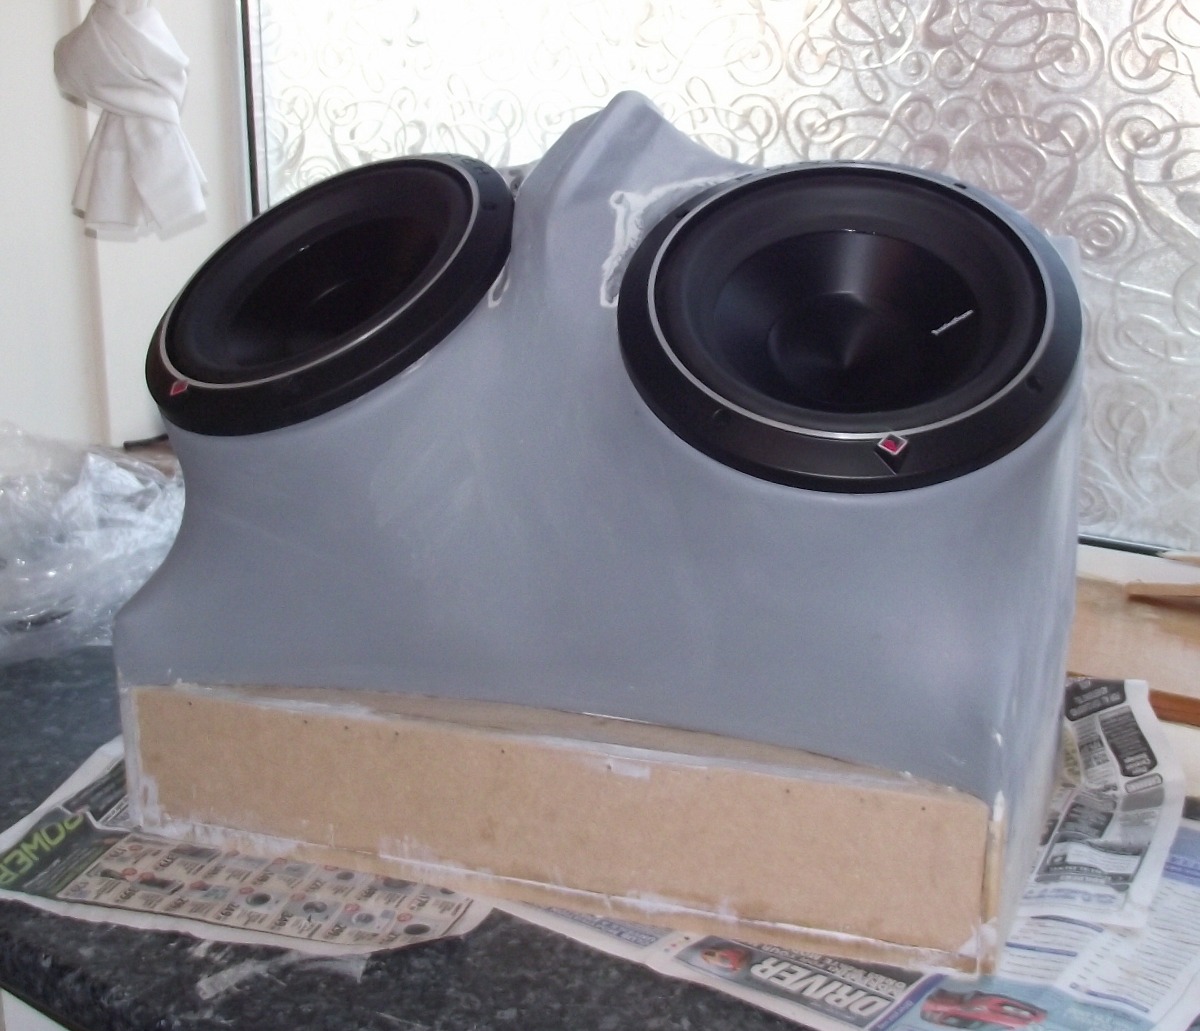
Its only 2x10" subs and 2x6x9's!! I'm not in it for the sound off of the century.
Concerns about bursting glass is rather bizzare, since I dont see this on the Beast (massive install) or Artztogo (15", 2x12", 2x10" subs and oodles more speakers) threads, or the hundreds of other cars with FAR more decibels in their cars than I will ever have.:blush:

I don't drive around that often with the targas off anyway.I also don't intend on having the system at permanent full whack. It's built for sound quality not so much quantity. By the time all the sound deadening and padding is in place, there will not be too much to be heard from outside the car when it's all shut up.

If a was heading for a 1/4 mile race or a spin around silverstone, it just plain won't be in the car.

All in all, yes, I've researched the hell out of it. After all, safety first.

I thoroughly expect plenty to absolutely hate it when it's done, and some may love it. ... all I can say to that is welcome to modifieds lol
 
M

madmarco

Well I think it's a great piece of work! Completely original design with some practical features thrown in. Dont really understand the concerns rasied, appears to be more of a personal taste issue to me. I love a good (and loud) sound system but have a more subtle install. The only sign that gives away the upgraded system are the Focal tweeters in the door panels.
 

Mrs HollowPoint

Well-Known Forum User
Well I think it's a great piece of work! Completely original design with some practical features thrown in. Dont really understand the concerns rasied, appears to be more of a personal taste issue to me. I love a good (and loud) sound system but have a more subtle install. The only sign that gives away the upgraded system are the Focal tweeters in the door panels.

It wont look subtle!!, but pretty much, the tweeters are all you can see in mine too when its all closed up....for the time being

The concerns are those brought up by several people. Fair enough since they cover the main things I've been considering, researching and solving on the build. Best to show they are already thought of from the offset because I've taken a right beating elsewhere.
 

Mrs HollowPoint

Well-Known Forum User
Just so you can see where I am up to.
My measurements on the amp panels were spot on (of course :p), so this is in celebration of the Kappa One that arrived yesterday.

I'm still filling and sanding. On one of these pics you will see that I am busy matching up the rear of the sub box to the side pieces. Believe me, it is annoying if they don't match because the view from the rear view mirror accentuates it if it doesn't. Another hard thing to do is the upper panel that fits under the weather seal (after a lot of work it does lol), and getting it suitably matched up to the rest of the standard interior plastics. I don't care if it takes until this time next year to get right, I'm not painting it until its RIGHT.

I have indeed started thinking about some lighting, for mood as well as practicality.


Infinity Kappa One amplifier - will be bridged and powering the 2x 10" Rockford Fosgate P3 Subs. I'm thinking about placing 4 blue LED's to shine up the back of it under the 6x9's. Blue lighting on pearl yellow paintwork looks ace. The wiring is not going to be that easy to make tidy, which reminds me I need bigger grommets than I currently have left.
ampcloseup.jpg


The filler match-up ... sand sand sand sand ... then more sanding!
Alex seems to be pretty fond of the 'dorsel fin' but it may be going yet - I suppose it adds character to the build as if it needs any more.
fillermatching.jpg


The front of the sub box in the center is going to have a panel in front of it, with a cold cathode light shining up the yellow belly of the sub box. You can see one of the 'practical' white LED lights underneath at the far end of the install.
newamp.jpg


The new amp again :wub: The pen lines you'll see around the installation is where I am thinking about carpeting up to. I have 5m of automotive pipe edging to give it a nice finish here.
rubbersealmatching.jpg
 

STEVE BURNS

Club Member
Beginning to see what the point of all the hollows and sticky up bits are for now:driving:

Thought it was some sort of sexual aide when first saw it:eek:

Looks like a fair bit of research went into it size wise for every thing to fit into place
Looking good:thumbs:
 
Top