zeeman1972
Well-Known Forum User
The Installation Begins
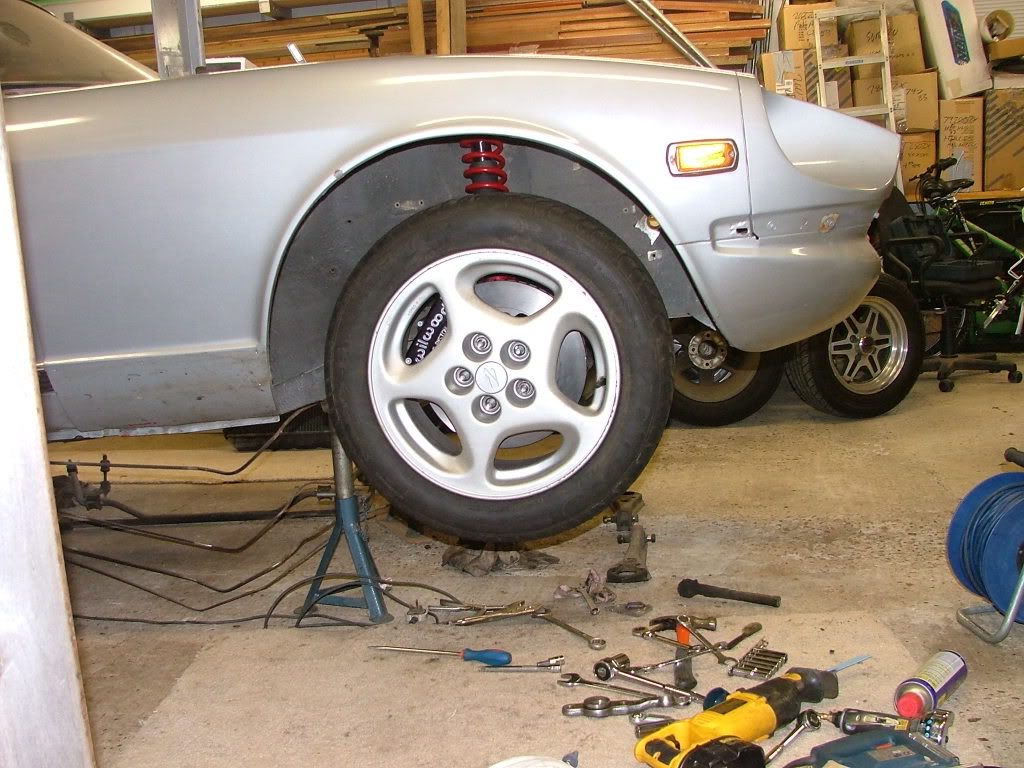
After months of fannying around with other things I have finally made some headway into getting the suspension and brake upgrades fitted.
Along the way it was nice to see that my cars's previous US owners 'maintained it regardless of cost'
I also poured more oil out of the strut tubes than was in any of the dampers. I wondered why it was a bit bouncy to drive and would change lane if you hit a bump in the road
Anyhoo the crowning glory is this cotter pin replacement alternative that we could all learn from......
I believe its rebar tying wire and yes you could pull the castellation cap off over the top! Thank god for tight hub dust caps
In order to get the rear hubs out I knew I needed to buy a CHEAP slide hammer but couldn't find one so I decided to make my own
Don't think I'll be using it for bodywork somehow works well on the hubs though!
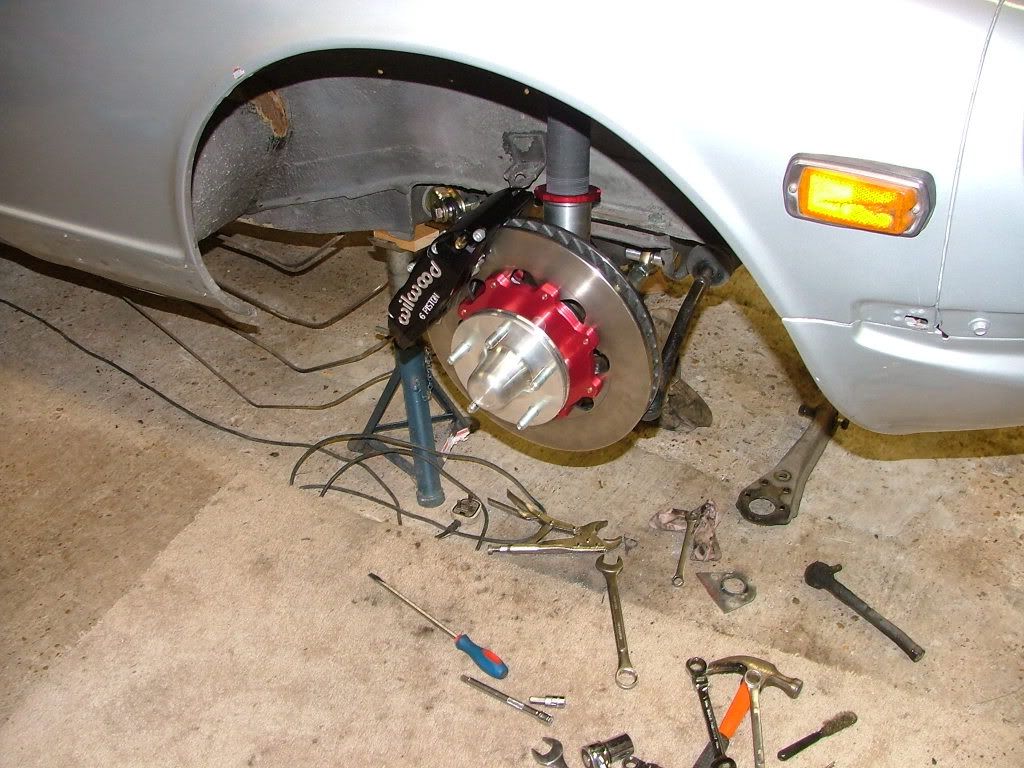
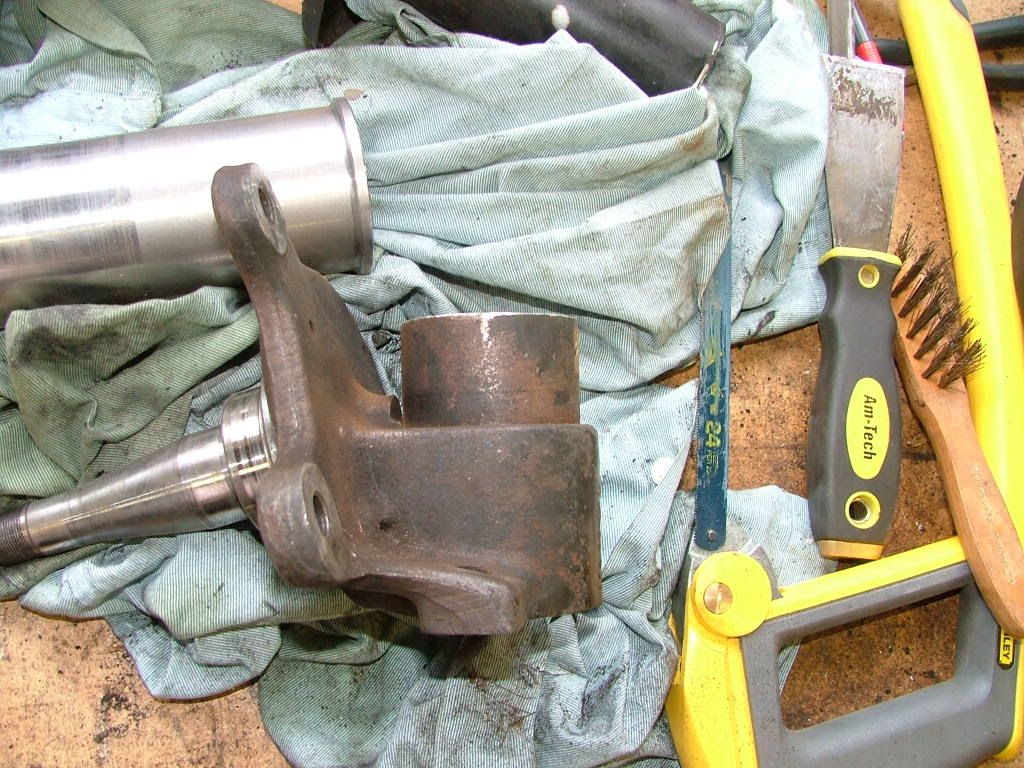
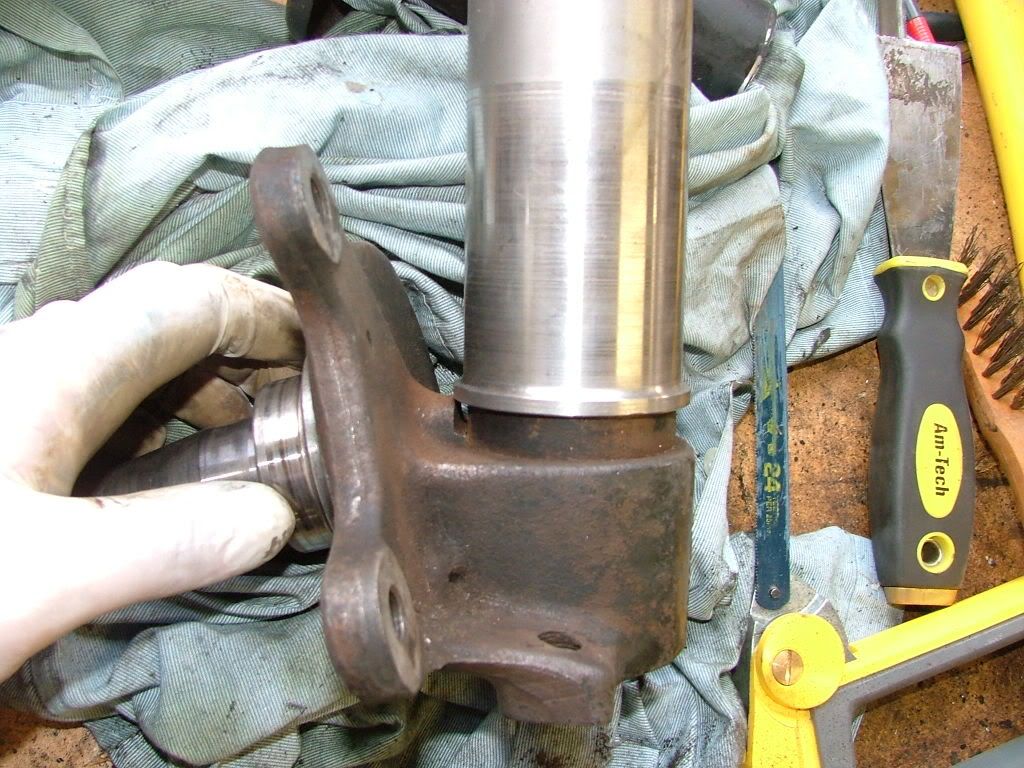
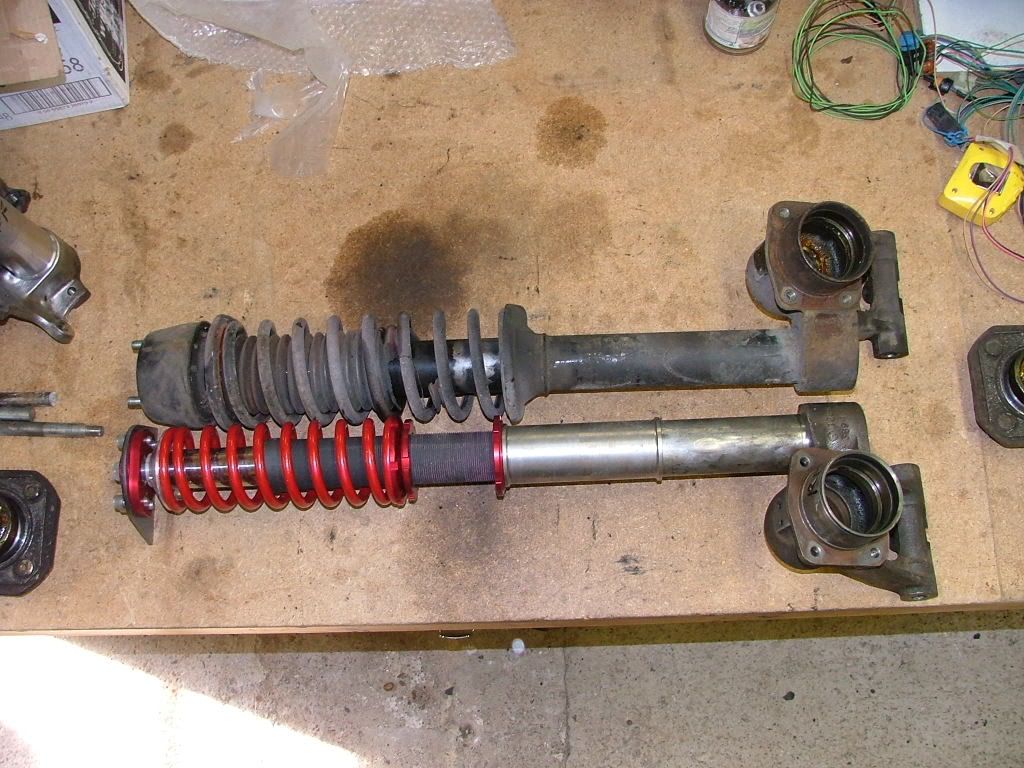
Stripped the suspension off the car, the front taking only 20 mins a side, with everything coming undoing just as it should and the rear taking nearly a day beating and heating the life out of the rear hubs to get the spindle pins out. Finally leaving me with these
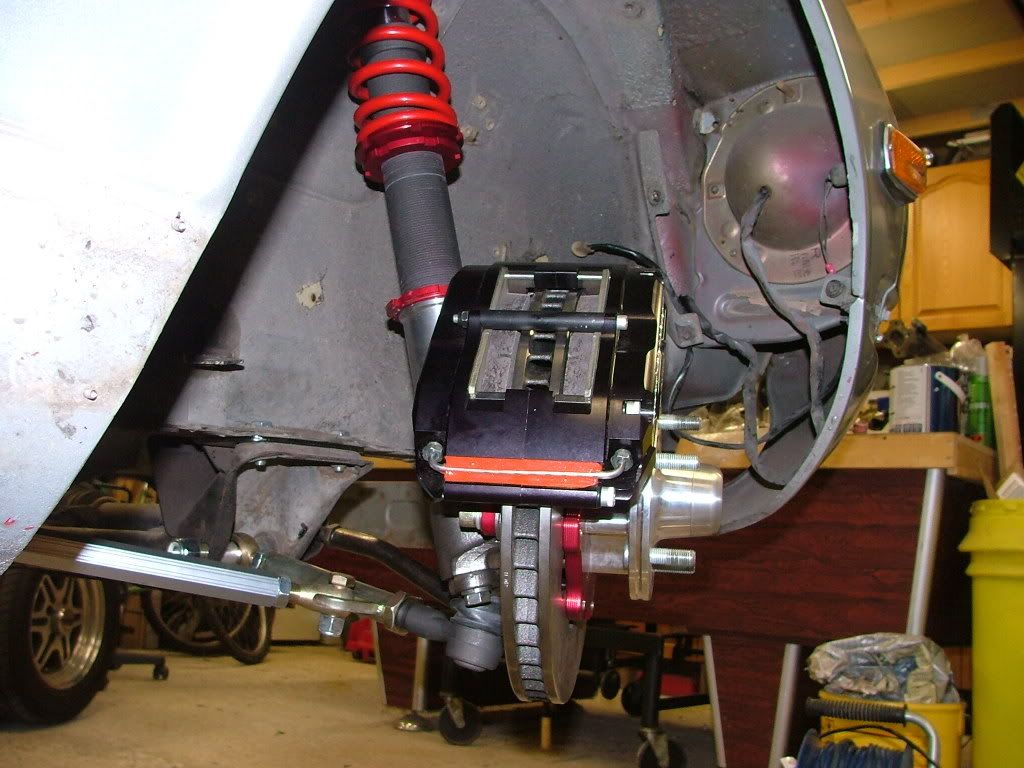
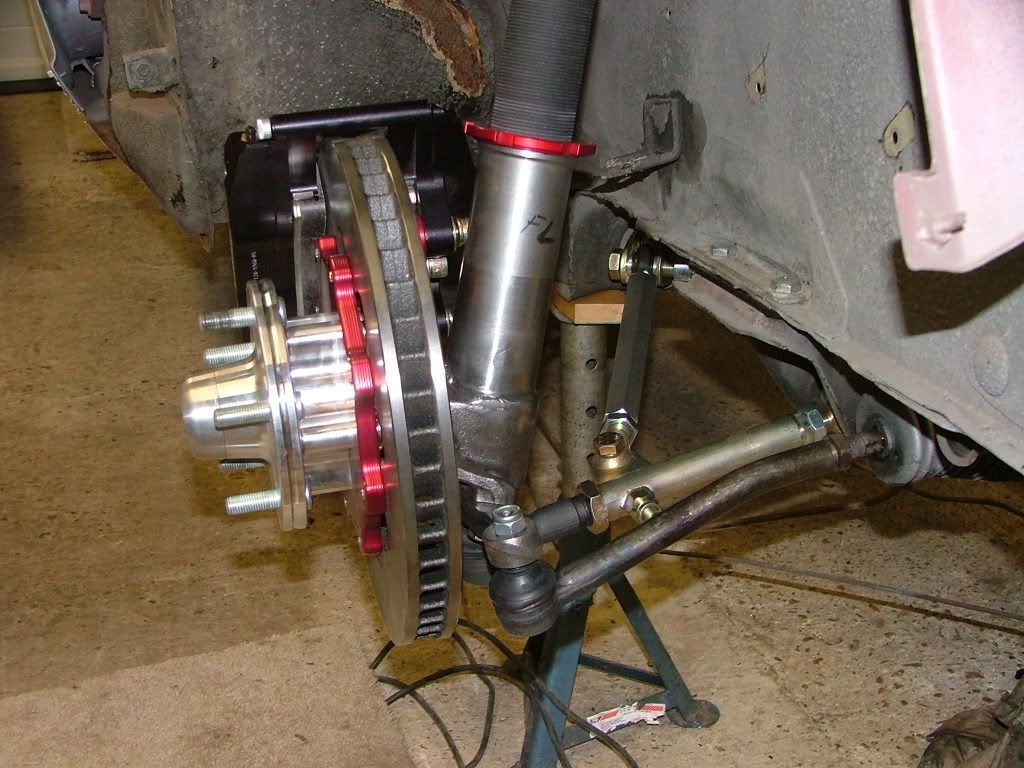
Next job was to demount and remove the old springs and dampers and to fit the strut adapters.
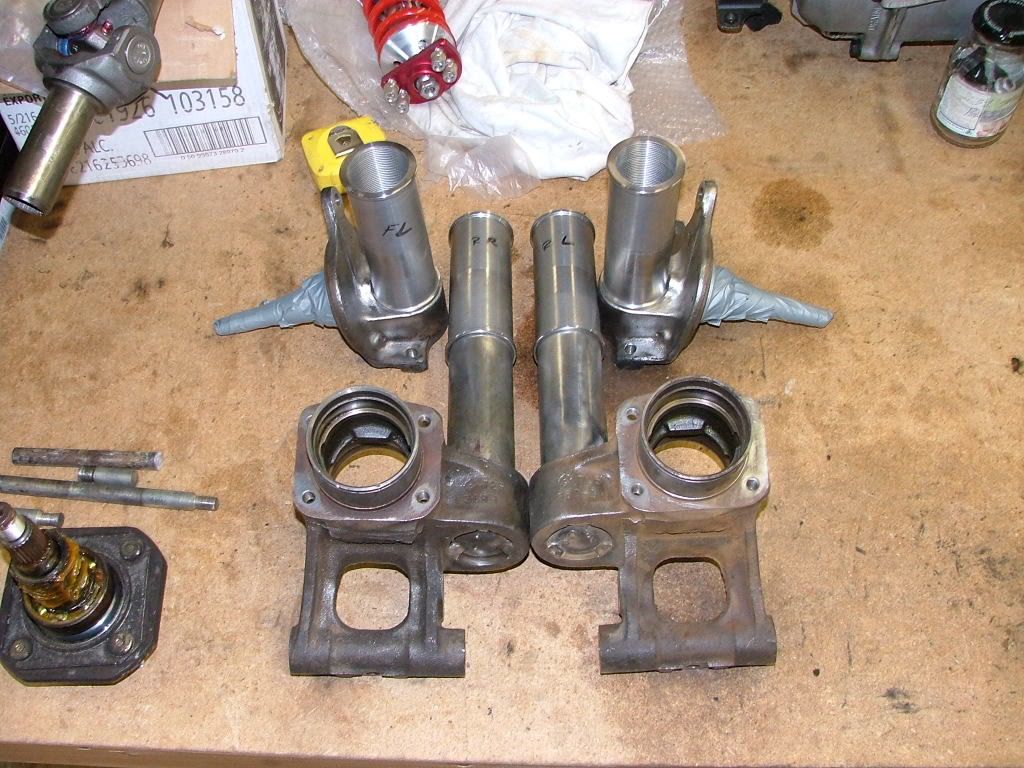
The front struts cut, the new sleeve notched and cleaned up ready for welding

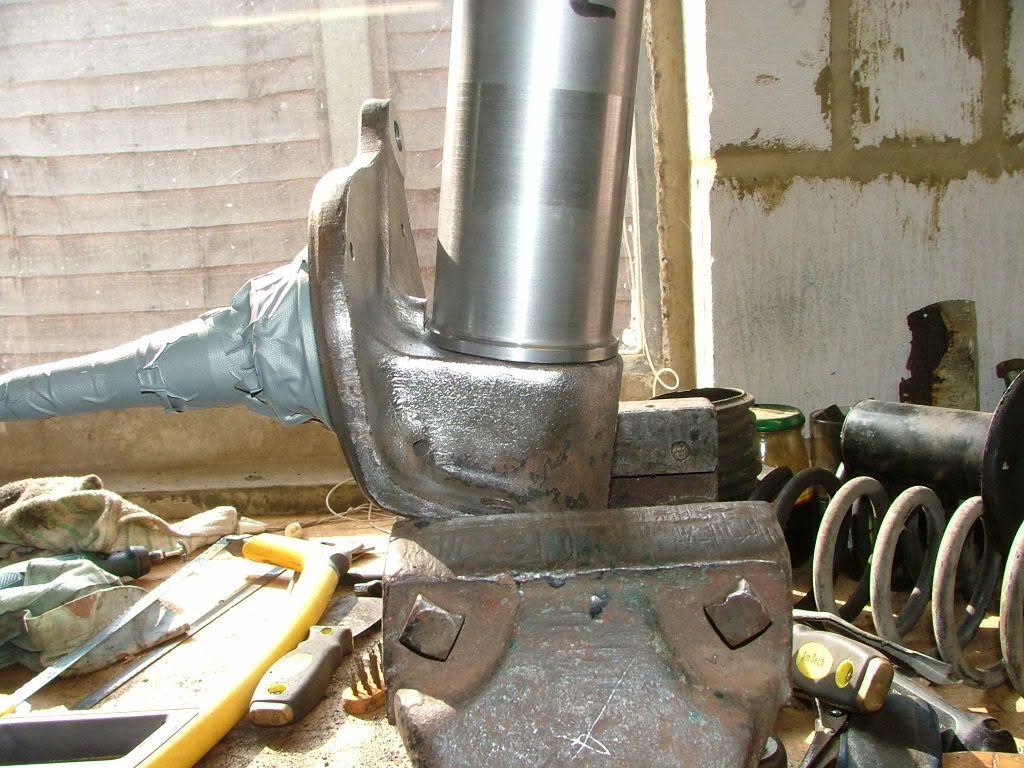
The rears where far more simple to do
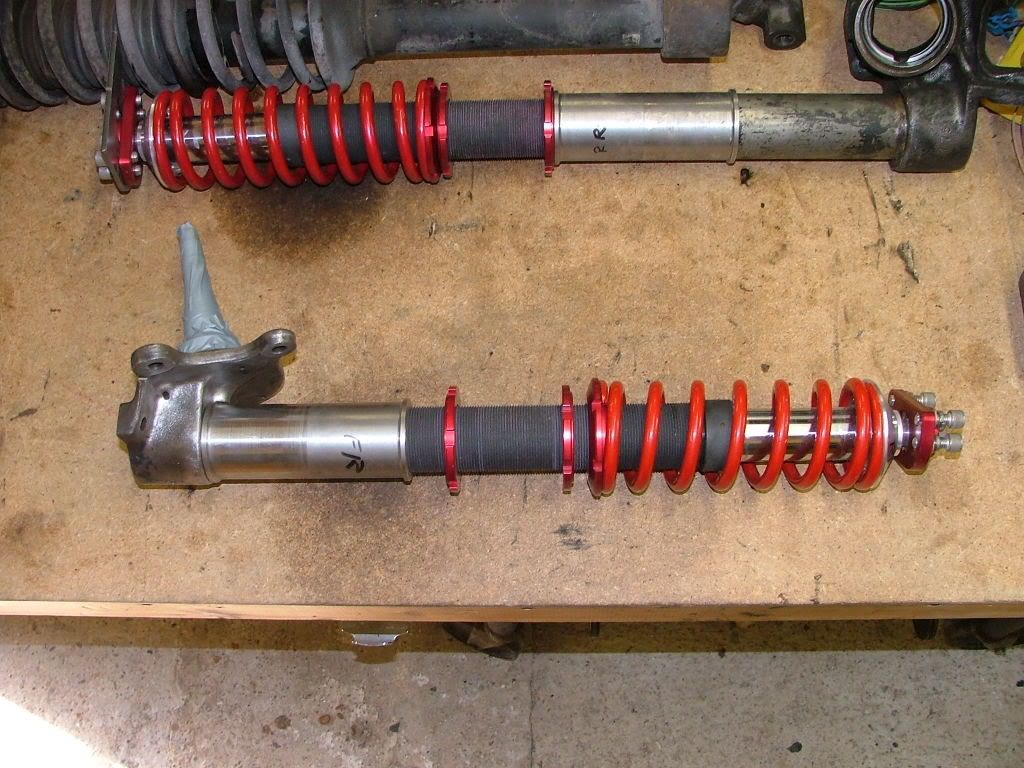
And finally all of the hubs and sleeves ready to go for welding with something that has a little more grunt than my ickle welder
Incidentally the weight difference between old and new is fairly significant considering how much of the hub remains with this upgrade, 6.6lbs for each front strut and 7.2lbs for each rear.
There's hope I'll get this car under 2800lbs yet!
Camber plates and control arms next!
After months of fannying around with other things I have finally made some headway into getting the suspension and brake upgrades fitted.
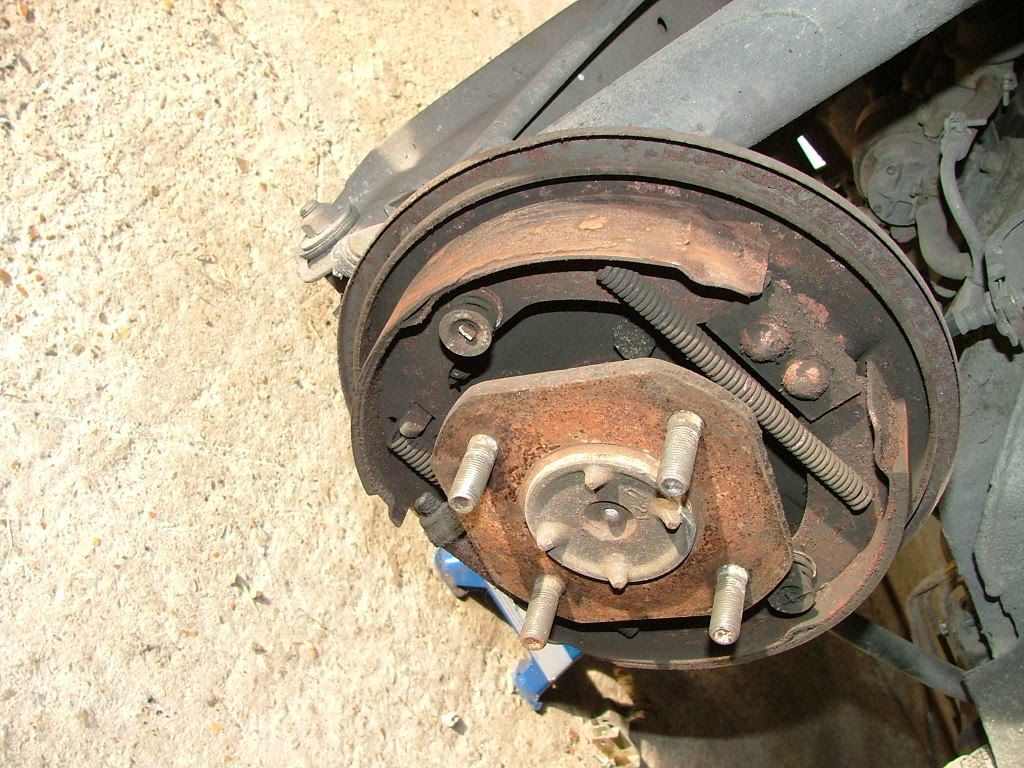
Along the way it was nice to see that my cars's previous US owners 'maintained it regardless of cost'
I also poured more oil out of the strut tubes than was in any of the dampers. I wondered why it was a bit bouncy to drive and would change lane if you hit a bump in the road
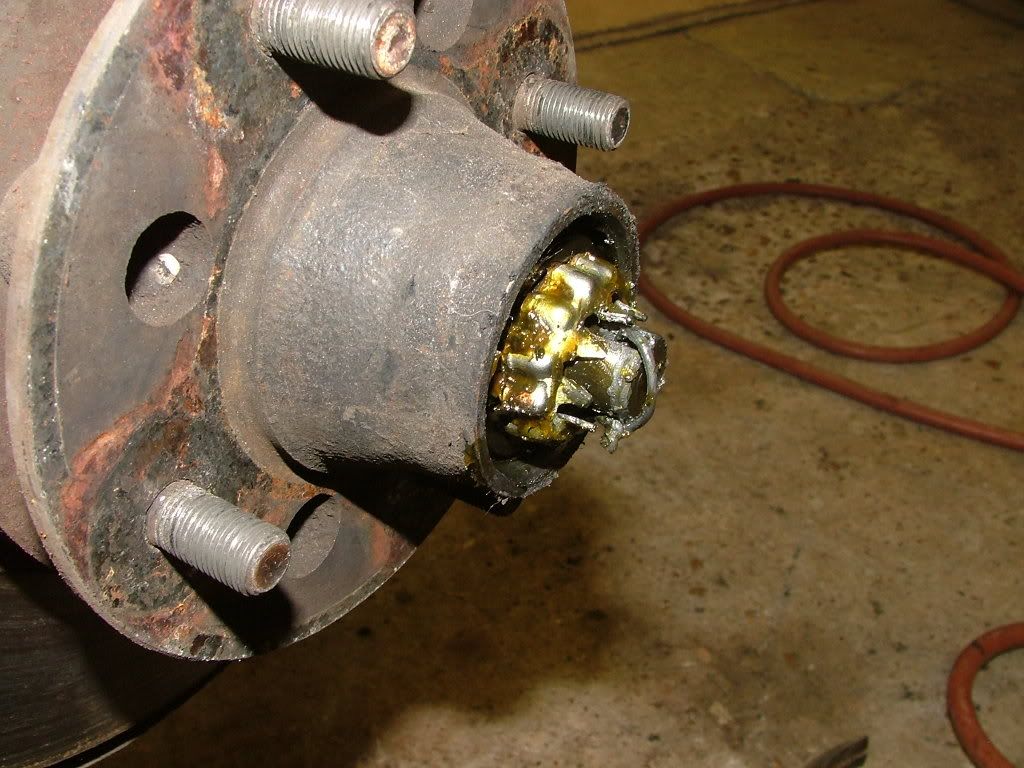
Anyhoo the crowning glory is this cotter pin replacement alternative that we could all learn from......
I believe its rebar tying wire and yes you could pull the castellation cap off over the top! Thank god for tight hub dust caps
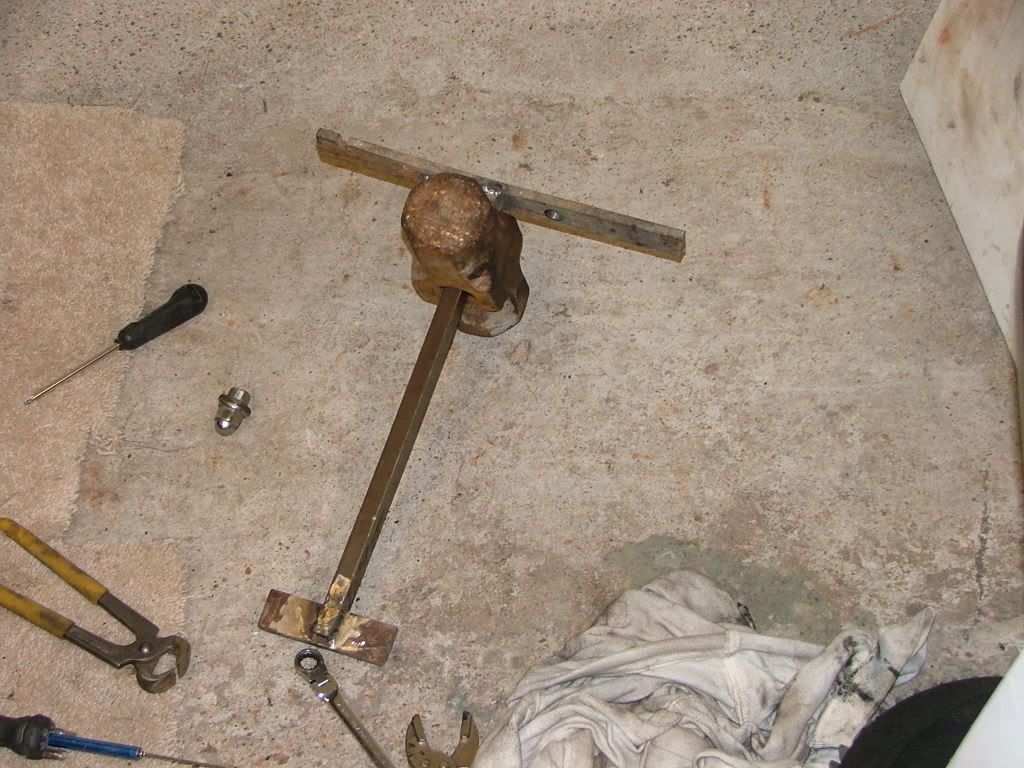
In order to get the rear hubs out I knew I needed to buy a CHEAP slide hammer but couldn't find one so I decided to make my own
Don't think I'll be using it for bodywork somehow
works well on the hubs though! Stripped the suspension off the car, the front taking only 20 mins a side, with everything coming undoing just as it should
and the rear taking nearly a day beating and heating the life out of the rear hubs to get the spindle pins out. Finally leaving me with these
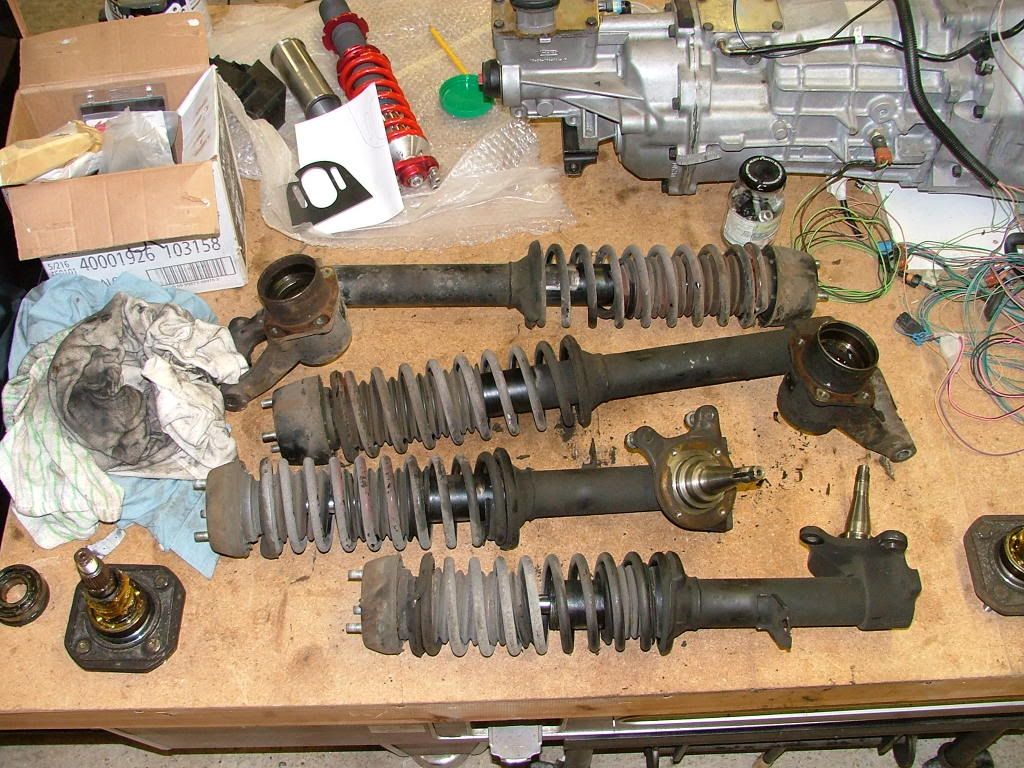
Next job was to demount and remove the old springs and dampers and to fit the strut adapters.
The front struts cut, the new sleeve notched and cleaned up ready for welding
The rears where far more simple to do
And finally all of the hubs and sleeves ready to go for welding with something that has a little more grunt than my ickle welder
Incidentally the weight difference between old and new is fairly significant considering how much of the hub remains with this upgrade, 6.6lbs for each front strut and 7.2lbs for each rear.
There's hope I'll get this car under 2800lbs yet!
Camber plates and control arms next!