-
The Z Club relies on the support of it's paid members - join the club or renew your membership here.
You are using an out of date browser. It may not display this or other websites correctly.
You should upgrade or use an alternative browser.
You should upgrade or use an alternative browser.
Project 630z - V8 powered Z32
- Thread starter Bantambunny
- Start date
Mr.F
Inactive
lightly worried about the heat coming off it
Heat soak and Chevy starter motors is a well known problem - insulate and shield as best you can, then save up for a Tilton starter motor...
Bantambunny
Well-Known Forum User
Thanks guys for your support guys 
Mr F, cheers for the parts the other day you're a star.
Yep i've been told about the starter motors but not sure how i can get around it until i get the pipe rewelded further down.
I have feeling it's going to be a case of get the engine in the car, see where it all goes then get someone to weld me in a couple of lumps to get around the starter motor but not sure where these sit in relation to everything else till next week when the engine goes in.
Well time for an update, there's been alot of frustration, waiting and fabrication gone on.
Main problem has been waiting for money to drop into my account plus waiting for parts to arrive etc.
The front subframe is being picked up tonight with its new pipework attached, that's been a real nightmare to get done but luckily found a good place in coventry called PowerSteeringStore.co.uk - Steering products, hoses, pipes, racks, pumps, boxes., the guy is called Richard and builds pipes twice the rating of standard ps pipes (2500psi!) and it's only set me back £70 for the 4 pipes (pictures up tonight when i get back)
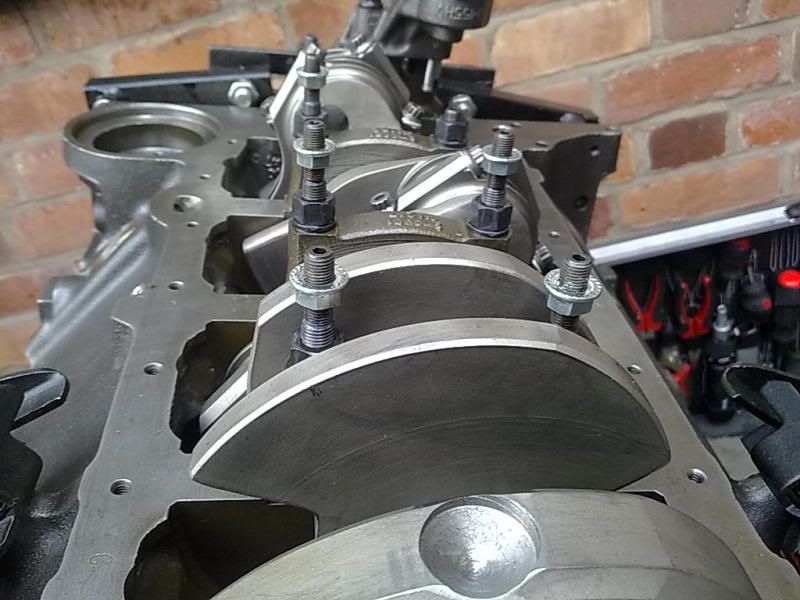
In the meantime i ordered some new big end bearings and finished the clearance work on the block, cleaned it from top to toe to get rid of all the metal particles and built the bottom end up. I finished off all the clearance issues with the manifolds/start motor/sump etc and got some welding done.
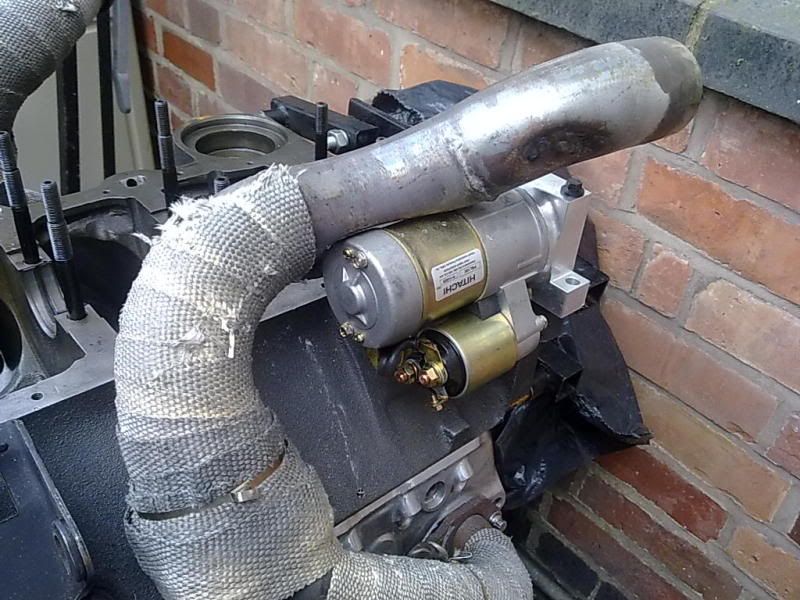
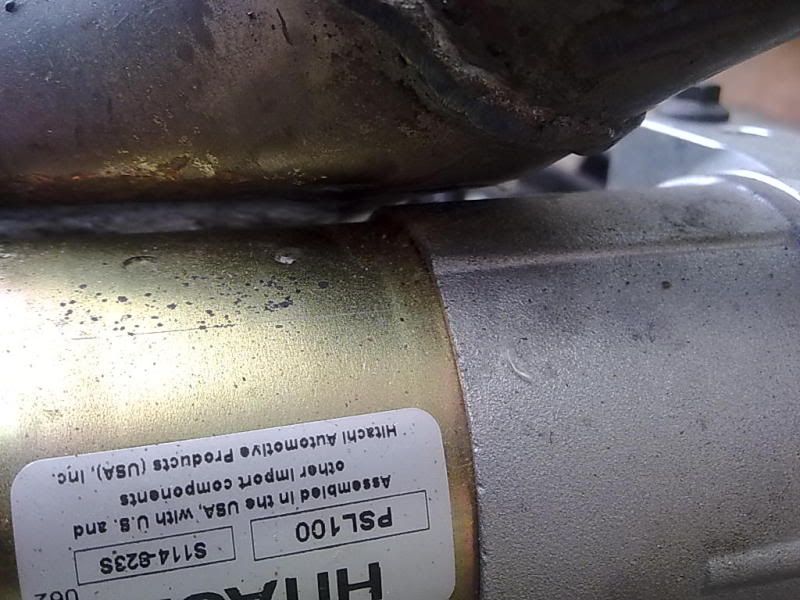
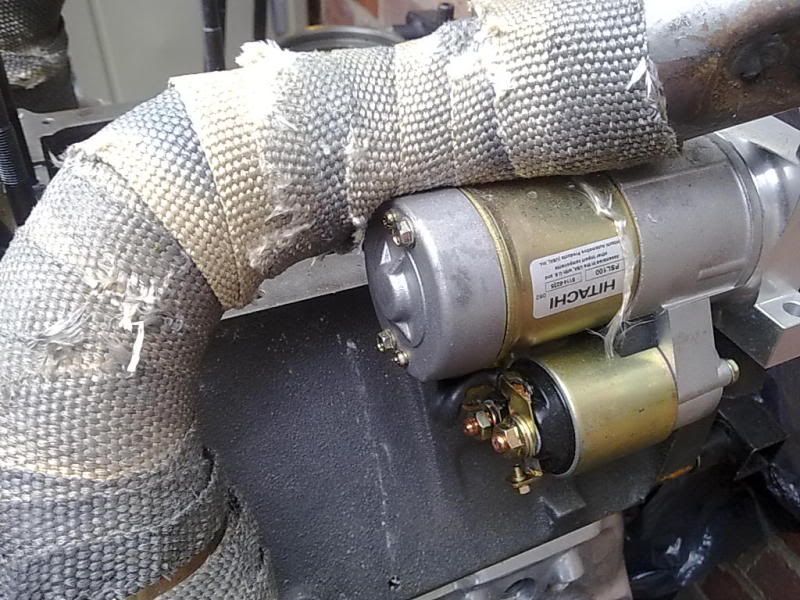
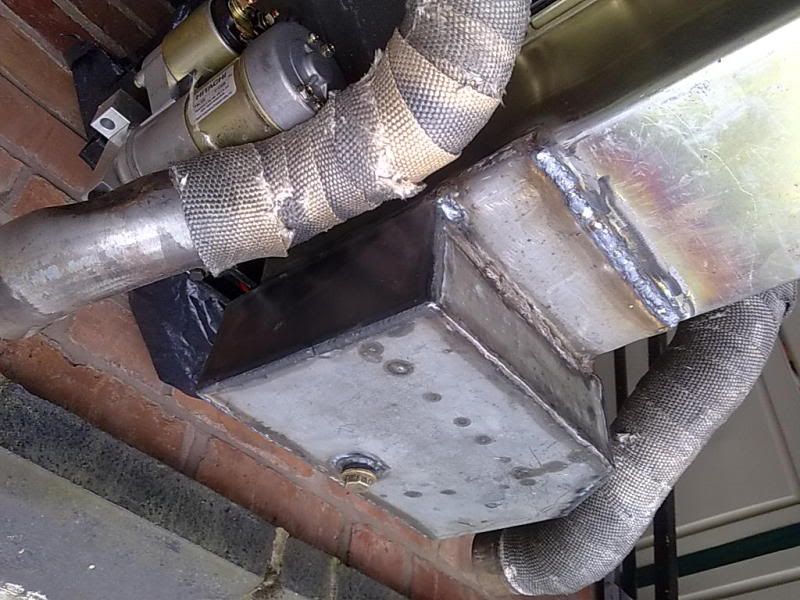
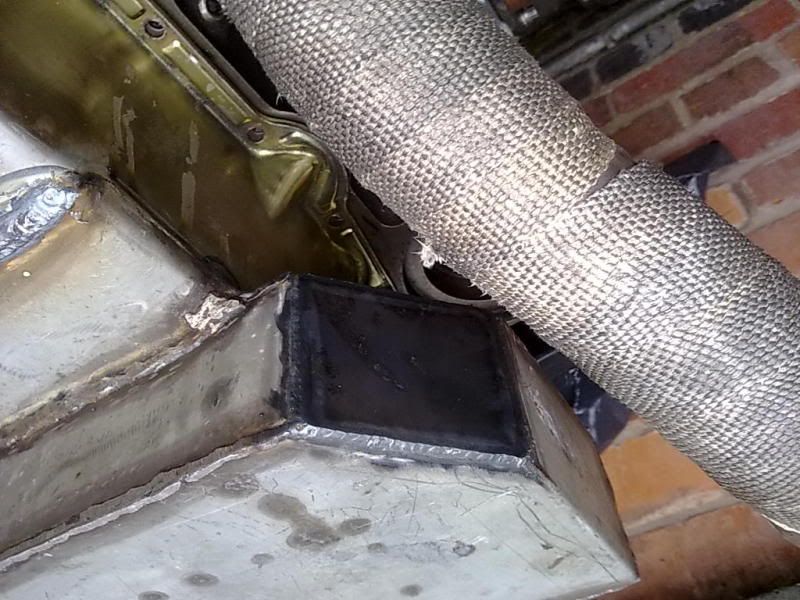
Starter motor required a bit of heating and beating of the manifold to get it to fit with no parts touching, i've reused the ceramic heat wrapping to try and prevent damage to the starter motor itself:
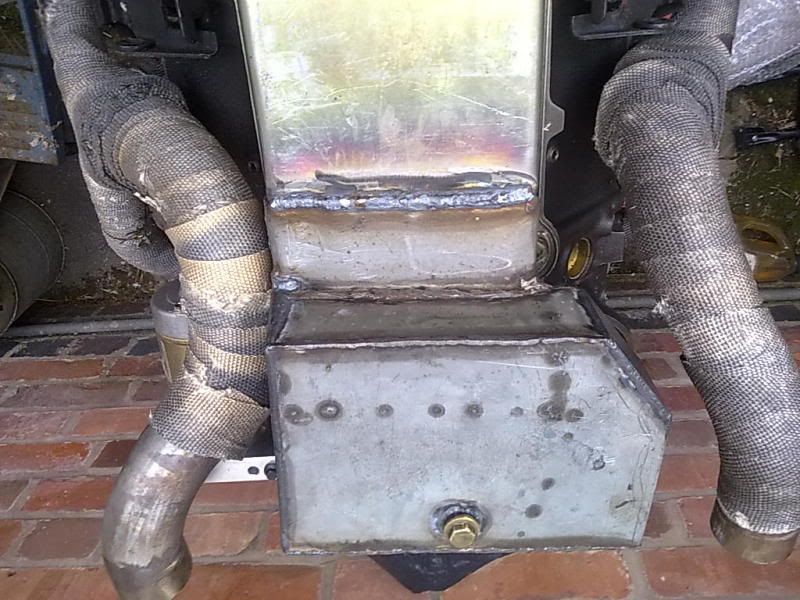
The sump was a bit of a journey, i had to decide between the 3 inch dropped subframe and the one that keith used on his. After a lot of tooing and froing i decided on using the original mounts and subframe but that limited the depth of the sump. After a bit of maths and measuring i chopped off a wing and corner and got it all welded up tight, i've tested it for leaks and it holds about 6.75 litres of oil which should be enough. I know it doesn't look neat but it does the job and it's as straight as can be just not the best welding in the world:
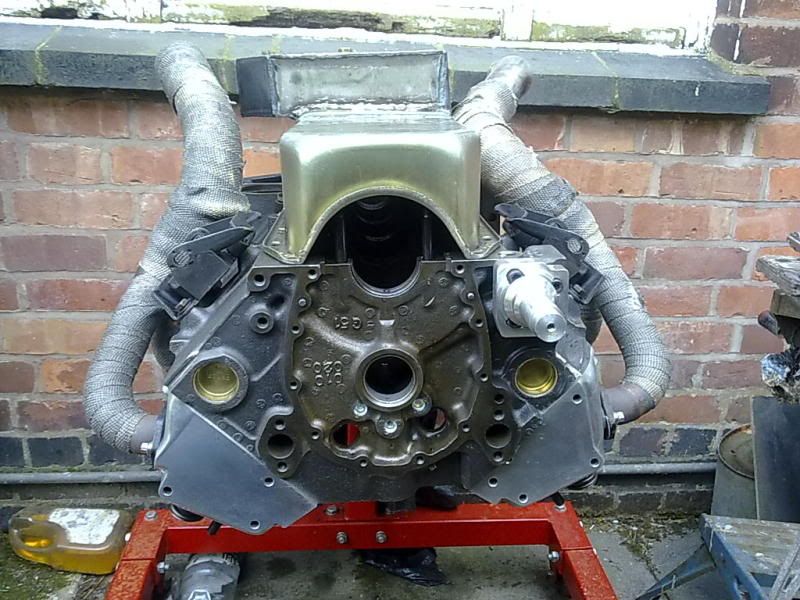
You can see al the grinding work i've had to do to get the channels in place for the con rods to pass the block. I've still got to double check the whole thing swings round without any contact to the sump but fingers crossed it should be alright:
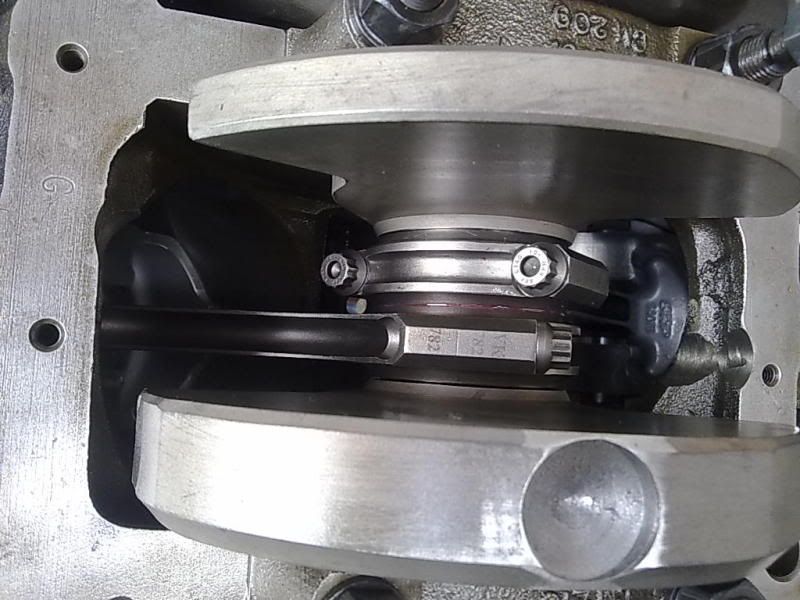
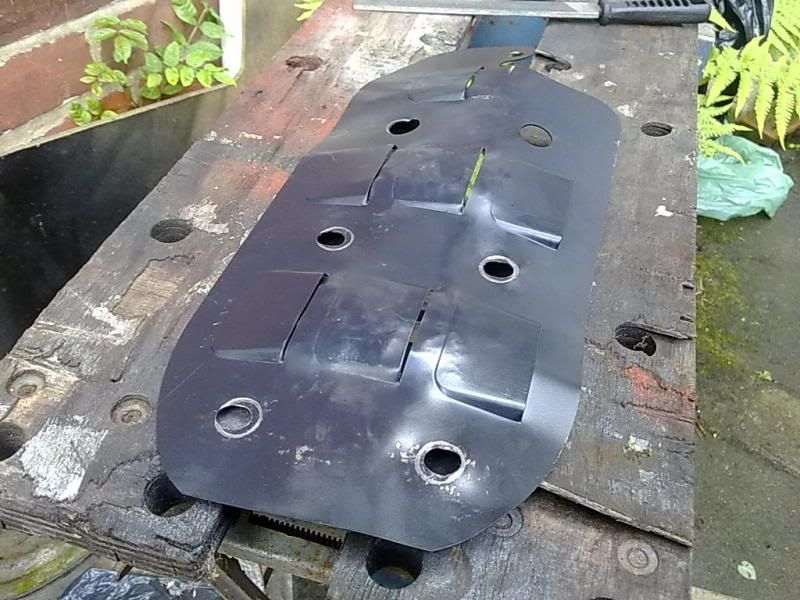
Last job i'm working on before sealing the bottom end is the windage tray which is being beaten and cut to within an inch of its life to clear the rods. Just the final hole to move back to get it to bolt down but then i'll locktight the bolts in place and get that sump on with the one piece rubber gasket and it's off to the workshop to fit the pumps and drop it in the car!:
Mr F, cheers for the parts the other day you're a star.
Yep i've been told about the starter motors but not sure how i can get around it until i get the pipe rewelded further down.
I have feeling it's going to be a case of get the engine in the car, see where it all goes then get someone to weld me in a couple of lumps to get around the starter motor but not sure where these sit in relation to everything else till next week when the engine goes in.
Well time for an update, there's been alot of frustration, waiting and fabrication gone on.
Main problem has been waiting for money to drop into my account plus waiting for parts to arrive etc.
The front subframe is being picked up tonight with its new pipework attached, that's been a real nightmare to get done but luckily found a good place in coventry called PowerSteeringStore.co.uk - Steering products, hoses, pipes, racks, pumps, boxes., the guy is called Richard and builds pipes twice the rating of standard ps pipes (2500psi!) and it's only set me back £70 for the 4 pipes (pictures up tonight when i get back)
In the meantime i ordered some new big end bearings and finished the clearance work on the block, cleaned it from top to toe to get rid of all the metal particles and built the bottom end up. I finished off all the clearance issues with the manifolds/start motor/sump etc and got some welding done.
Starter motor required a bit of heating and beating of the manifold to get it to fit with no parts touching, i've reused the ceramic heat wrapping to try and prevent damage to the starter motor itself:
The sump was a bit of a journey, i had to decide between the 3 inch dropped subframe and the one that keith used on his. After a lot of tooing and froing i decided on using the original mounts and subframe but that limited the depth of the sump. After a bit of maths and measuring i chopped off a wing and corner and got it all welded up tight, i've tested it for leaks and it holds about 6.75 litres of oil which should be enough. I know it doesn't look neat but it does the job and it's as straight as can be just not the best welding in the world:
You can see al the grinding work i've had to do to get the channels in place for the con rods to pass the block. I've still got to double check the whole thing swings round without any contact to the sump but fingers crossed it should be alright:
Last job i'm working on before sealing the bottom end is the windage tray which is being beaten and cut to within an inch of its life to clear the rods. Just the final hole to move back to get it to bolt down but then i'll locktight the bolts in place and get that sump on with the one piece rubber gasket and it's off to the workshop to fit the pumps and drop it in the car!:
Last edited by a moderator:

Bantambunny
Well-Known Forum User
lol, I know well I will be having some extra bends put in to get the manifold away from the starter motor but that's a few weeks away now.
WELL time for a bit update....
Sorry for the delay in updating you what's going on guys. Basically i've moved house rather suddenly, i popped a picture up recently of the new garage, it's brilliant. 35 foot long, double garage and lighting/heating.
Makes life easier, i've got more done this last week than i have in 3 months of working at my parents house in the odd hour when i pop round :nana2:
So where to start, so i've stripped down and cleaned all the metal particles from the block, torqued up the crank, pistons and conrods. The windage tray is all beaten to shape and lock tighted on.
I've now fitted and torqued down the sump in place.
Timing the cam was the hardest part, I used the "inline centre method".
Each cam comes with a card where it says what the distance in degrees is between the TDC (top dead centre) of the piston and inlet valve on cylinder one.
Turn the crank till the piston is at the top of the cylinder using a clock gauge, then attach the degree wheel to the front, make a pointer from a piece of clothes hanger and point it to 0 degrees.
I used a cigar tube to rest on top of the cam, put the clock gauge on top and turned the crank, you see the clock gauge spin round as the lobe comes to its peak, as it stops, turn it 2 spins round on the gauge either way, mark the two degrees and divide by 2 to get the "intake centre line" in this case it should have been 106 degrees.
It wasn't, bloody american engineering :headvswal 102 degrees
Luckily i bought a 9 keyway sprocket set so off everythingcame, adjusted it to 2 degrees retarded to knock it down which then came up at 104 degs.
Nearly there, retarded it a further 2 degrees and i get 111 degs! :headvswal
Now the keyways are off as well, bloody things.
Went on desktop dyno and input all the different timing configurations.
The torque and power curves stretched further and peaked higher as i moved it to 111 degrees so that's how it's going to stay. In fact comp cams advance the timing by 4 degrees to 106 from 110 in the factory so in reality i've only retarded the cam by 1 degree.
Yes my head was spinning after all that maths too
The software reckons 420bhp and 480ftlb of torque at 4000rpm and 400ftlb at 2000rpm rising to 489ftlb at 4500 which is good enough for me.
So onto the rest of the build.
Timing cover went on, end float on the cam was adjusted and the flywheel went on, i shimmed the starter motor to fit and then last night started work polishing up the pulleys and fitting them.
Ordered the missing crank spiggot bearing to accept the ford gearbox and then the gearbox will go on friday night.
Engine WILL be going in this weekend! :hyper:
Now for some pics:


After 7 months the engine is finally ready to go in and has now been fitted! :nana2:


WELL time for a bit update....
Sorry for the delay in updating you what's going on guys. Basically i've moved house rather suddenly, i popped a picture up recently of the new garage, it's brilliant. 35 foot long, double garage and lighting/heating.
Makes life easier, i've got more done this last week than i have in 3 months of working at my parents house in the odd hour when i pop round :nana2:
So where to start, so i've stripped down and cleaned all the metal particles from the block, torqued up the crank, pistons and conrods. The windage tray is all beaten to shape and lock tighted on.
I've now fitted and torqued down the sump in place.
Timing the cam was the hardest part, I used the "inline centre method".
Each cam comes with a card where it says what the distance in degrees is between the TDC (top dead centre) of the piston and inlet valve on cylinder one.
Turn the crank till the piston is at the top of the cylinder using a clock gauge, then attach the degree wheel to the front, make a pointer from a piece of clothes hanger and point it to 0 degrees.
I used a cigar tube to rest on top of the cam, put the clock gauge on top and turned the crank, you see the clock gauge spin round as the lobe comes to its peak, as it stops, turn it 2 spins round on the gauge either way, mark the two degrees and divide by 2 to get the "intake centre line" in this case it should have been 106 degrees.
It wasn't, bloody american engineering :headvswal 102 degrees
Luckily i bought a 9 keyway sprocket set so off everythingcame, adjusted it to 2 degrees retarded to knock it down which then came up at 104 degs.
Nearly there, retarded it a further 2 degrees and i get 111 degs! :headvswal
Now the keyways are off as well, bloody things.
Went on desktop dyno and input all the different timing configurations.
The torque and power curves stretched further and peaked higher as i moved it to 111 degrees so that's how it's going to stay. In fact comp cams advance the timing by 4 degrees to 106 from 110 in the factory so in reality i've only retarded the cam by 1 degree.
Yes my head was spinning after all that maths too
The software reckons 420bhp and 480ftlb of torque at 4000rpm and 400ftlb at 2000rpm rising to 489ftlb at 4500 which is good enough for me.
So onto the rest of the build.
Timing cover went on, end float on the cam was adjusted and the flywheel went on, i shimmed the starter motor to fit and then last night started work polishing up the pulleys and fitting them.
Ordered the missing crank spiggot bearing to accept the ford gearbox and then the gearbox will go on friday night.
Engine WILL be going in this weekend! :hyper:
Now for some pics:
After 7 months the engine is finally ready to go in and has now been fitted! :nana2:
Bantambunny
Well-Known Forum User
Started a bit late today but between me, my dad and my bro we managed to get the engine in in less than 30 minutes but the mounting bracket for the gearbox was what caused all the problems, 5 mm off on one side so had to lengthen all the slot to accomodate and went through f*** knows how many grinding stones to get there
On to the interior next, just need to lengthen the throw of the gear lever and grind out a bit more of the floor to accomodate the throw of the lever but it's in finally after 7 months and jesus does it sit low in the body, the weight it right in line with the centre of the wheels so should handle brilliantly which is what i wanted
More updates next week guys i'm going to put my feet up and watch the telly for a bit :dance: lol
Dad and bro: "What the f*** have we let ourselves in for?"
Bantambunny
Well-Known Forum User
Plenty of angle on that to get it in:

Gear lever came off to get it under the bulkhead but apart from that it slotted straight in without any problems!

Engine in!


Gear lever came off to get it under the bulkhead but apart from that it slotted straight in without any problems!
Engine in!
Bantambunny
Well-Known Forum User
Hows she coming on hope your having a good run on her mate.
Yeah, it's been busy with moving house but finally to a place with a huge garage which means i can be out there every night working away. I've done more in the past 7 days on this project than i've done in 7 months it seems!
No problem of weather or packing away my tools every time i do something or light so it's great!

Lots of work to do yet but in the long rung i don't think it's going to take me more than a month to get 90% of the final bits done.
Just some bits to sell off to get some money in the bank and i'll be sorted to by in the lifters/rockets and the last bits to finish!
JakTheRuby
Club Member
There seems to be a small cave above your engine! With the centre of gravity that low, it should (in theory) handle better in the corners. Not that it's that important as you're gonna be lighting up the blacktop. It's good to see some light at the end of the tunnel dude. Can't wait to hear the finished article!
Bantambunny
Well-Known Forum User
Cheers buddy, I honestly can't remember it sitting that low when i brought it back with me but the lower the better on the main roads
From a bit of a weigh in between the chevy and the z32 block the chevy is actually lighter! (only by about 10lb) so should mean that handling it should be very similar but less of a lean in the corners, it's been lowered 35mm too so no speedbumps for me lol
It's all getting very exciting now and once i put the heads on tonight that should be the last worry over and done with when i know that the lift of the valves won't interfere with the pistons.
I'll use the clock gauges to work out the space on the maximum lift of the valve on a 1.5 ratio rocker then the distance left when it's closed to see if there's any overlap using a bit of trignometry, head angles etc.
The only real way to test is to put some blutack in the pistons and see how the valves indent but i can only do that with the pushrods in and if i do that then i end up ruining a perfectly good pair of head gaskets when i take them off. Any ideas or is using a graph going to be enough?
Wyn
Club Member
If onlySorry for the delay in updating you what's going on guys. Basically i've moved house rather suddenly, i popped a picture up recently of the new garage, it's brilliant. 35 foot long, double garage and lighting/heating.
Have you a spare room in that garage lol

btw, top job on your build, that does look the part now !!
... and hats off to pops
Or is it Kenny Rogers
Does he burst into song whilst helping
Bantambunny
Well-Known Forum User
Looking fantastic matey good luck with the valves. Keep up the great work!!!
Good luck mate, keep the photos coming.
Cheers guys, updates as and when they happen
If only
Have you a spare room in that garage lol
btw, top job on your build, that does look the part now !!
... and hats off to pops
Or is it Kenny Rogers
Does he burst into song whilst helping
pmsl if anyone looks like kenny rogers it's Mr F! :lol:
Bantambunny
Well-Known Forum User
Well just in the process of finishing off the gearbox install, need to lengthen the throw by 2cm to get it dead centre and also grind a little more out of the floor to stop the stick fouling on 3rd gear but other than that it's spot on and a nice clean shift - tremek tko500 mustang box

Then i decided to do the thing i've been wanting to do the last couple of days, see how the final engine will look so quickly popped everything into place (i'm such a child lol)


...and still fits under a stock bonnet - sleeper wahoo!

More to do tomorrow night but off down the pub this evening folks - i need a break!
Then i decided to do the thing i've been wanting to do the last couple of days, see how the final engine will look so quickly popped everything into place
(i'm such a child lol)
...and still fits under a stock bonnet - sleeper wahoo!
More to do tomorrow night but off down the pub this evening folks - i need a break!
Mr.F
Inactive
if anyone looks like kenny rogers it's Mr F!
There you go again!
If I were you, maybe you should know that through the years you've had the best of me!
Don't worry, I won't take my love to town...
Bantambunny
Well-Known Forum User
fpmsl hahaha
hahaha