Longest 240z restoration ever?

Paul Henley

Club Member
I thought it was about time I started a thread on my 240Z restoration, but first a little history and background on the car. I started looking for a Z to restore in the mid 90's first joining the Z Club to help find one and meet other enthusiasts. I had little success finding anything both affordable and salvageable, I did buy one in the Southampton area only to tow it all the way home to Cumbria to find when I stripped it, that it was a complete rot box.
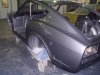
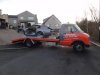
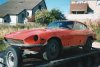
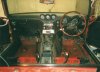
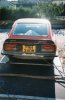
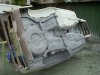
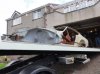
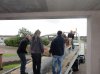
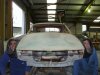
In 1998 a friend of mine in the Z Club, Steve Bicknell called to say that he was going to view a Z in New Deer (near Aberdeen) and planned to break his journey from the South with an overnight stay at mine where I could join him on his visit. When we arrived we met the cars owner Anthony Hedges how had owned the car for 22 years after buying it in London from it’s one previous owner when it was 2 years old. Anthony had ran the car for a few years then stored it with a view to refreshing it. Unfortunately he didn’t have the time to do this so the car was up for sale. Although the engine was seized from standing and the outer panels showing corrosion, it was quickly evident that the basic shell was in extremely good original condition and well worth a restoration. Steve bought the car and we set off back to Cumbria where the car would stay until Steve could arrange to transport it home south. Fortunately for me that night I was able to persuade Steve to resell the car to me and therefore save him the hassle of transporting it so far. I now had a Z.
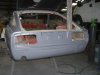
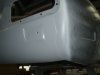
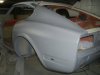
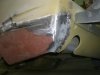
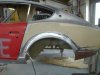
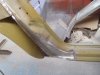
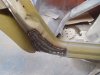
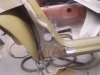
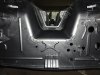
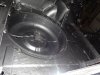
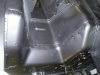
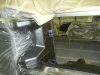
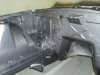
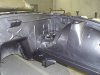
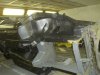
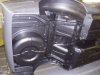
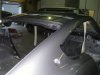
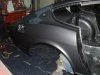
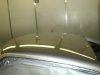
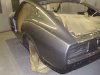
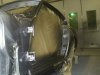
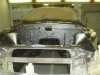
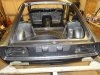
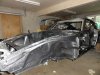
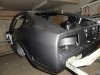
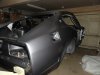
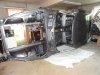
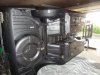
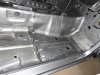
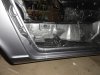
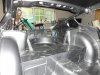
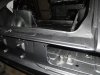
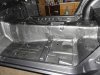
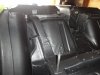
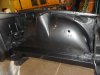
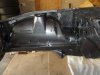
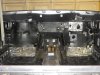
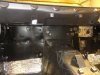
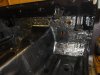
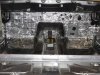
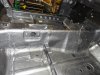
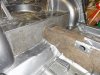
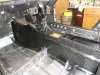
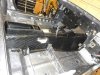
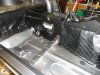
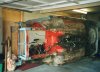
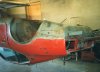
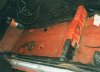
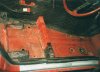
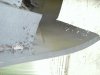
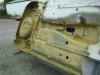
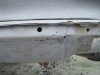
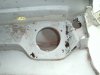
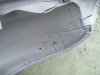
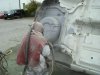
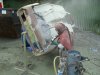
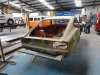
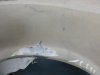
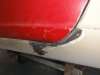
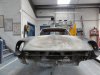
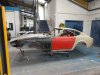
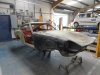
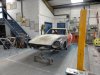
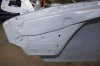
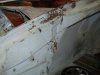
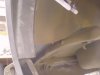
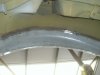
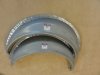
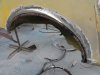
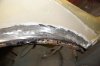
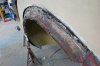
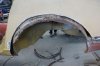
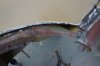
I set about dismantling the Z and put it into a rotisserie that I then had, so that I could totally strip the shell. I removed all the underseal from the under floors and was delighted to find the floors, inner wings, front/rear panels, chassis legs etc were in excellent, original unwelded condition. There was some corrosion on the rear wheel arches and “thinning” of the metal around the exhaust outlet at the bottom of the rear panel but nothing major. I painted the underneath with a rust inhibitor and set about looking for a body shop to do the repairs needed and paint the shell. I found a local garage that was prepared to undertake the work on “fallback work “ basis. This suited me as it would keep the price down and give me time to source new parts. This was around 1999/2000. Last summer (2012) the garage owner admitted that although his garage had done some repairs, he would be unable to complete the work and the shell came back home to me and I started to source another body shop. I have to admit that although I would periodically enquire about progress, I never pushed the work as my own family were growing and my priorities had changed. By 2012 my sons were now grown up and my priorities and finances had changed to allow me to progress with my restoration. My time had not been wasted however, despite leaving the “Z scene” and Z club, I had been amassing parts from within the UK across the Atlantic for when the work would resume….
 

Attachments

  • img002.jpg
    img002.jpg
    433.4 KB · Views: 312
  • img012.jpg
    img012.jpg
    399.9 KB · Views: 224
  • img011.jpg
    img011.jpg
    387.7 KB · Views: 209
  • img005.jpg
    img005.jpg
    410.6 KB · Views: 218
  • img004.jpg
    img004.jpg
    399.5 KB · Views: 232
  • img003.jpg
    img003.jpg
    426.5 KB · Views: 243
  • img001.jpg
    img001.jpg
    484.3 KB · Views: 254

Paul Henley

Club Member
Once I'd found a new body shop to take on the work, my body shell was sent out. Unfortunately they were unwilling to accept that it was largely rust free (this turned out to be a good decision) and advised the shell should be sand blasted to reveal its full condition. They also showed me that the standard of work carried out by the previous body shop was of a poor standard (it's true, you get what you pay for) and that replacement wheel arches had been welded onto the existing arches, trapping any previous rust. The sand blasting would also go onto reveal the inner arches had some corrosion and therefore both inner and outer rear arches would need to be cut out and replaced. The rear lower corners were showing signs of corrosion and would also need to be replaced as well as other minor areas of rust that would need to be cut out and replaced, but generally the shell was still in exceptionally good condition. The following pictures show the shell leaving my house, being sand blasted and the area's of corrosion identified.
 

Attachments

  • DSCI0280.JPG
    DSCI0280.JPG
    192.9 KB · Views: 166
  • DSCI0273.JPG
    DSCI0273.JPG
    188.1 KB · Views: 182
  • DSCI0265.JPG
    DSCI0265.JPG
    188.1 KB · Views: 164
  • DSCI0262.JPG
    DSCI0262.JPG
    183.3 KB · Views: 176
  • Copy of DSCI0259.JPG
    Copy of DSCI0259.JPG
    190.2 KB · Views: 169
  • DSCI0258.JPG
    DSCI0258.JPG
    192.5 KB · Views: 183
  • DSCI0242.JPG
    DSCI0242.JPG
    179.1 KB · Views: 163
  • DSCI0241.JPG
    DSCI0241.JPG
    188.2 KB · Views: 174
  • DSC01603r.jpg
    DSC01603r.jpg
    1.6 MB · Views: 187
  • DSC01592r.jpg
    DSC01592r.jpg
    1.1 MB · Views: 196

Paul Henley

Club Member
Panel alignment checks

Another task carried out by the body shop was to test fit the various panels that I had accumulated, these included a pair of new wings from Nissan purchased through Mike F, a pair of doors imported from California and other various parts sourced through Ebay such as light pods, scuttle panel etc. They also established that at some point in it's earlier life, it had suffered a slight impact to the front passenger corner, resulting in slight creasing of the inner wing (pic below, followed by one with the repair carried out), this would require straightening on a jig to ensure correct panel alignment. The following pic's were taken at this stage and also show the vast amount of filler that the previous body shop had used on the wheel arch "repairs".
 

Attachments

  • DSC01617.JPG
    DSC01617.JPG
    3.8 MB · Views: 151
  • DSC01621.JPG
    DSC01621.JPG
    3.3 MB · Views: 141
  • DSC01622.JPG
    DSC01622.JPG
    3.8 MB · Views: 139
  • DSCI0233.JPG
    DSCI0233.JPG
    179.3 KB · Views: 1,027
  • DSC01614.JPG
    DSC01614.JPG
    3.8 MB · Views: 151
  • DSC01610.JPG
    DSC01610.JPG
    3.8 MB · Views: 164
  • DSC01609.JPG
    DSC01609.JPG
    3.6 MB · Views: 157
  • DSC01607.JPG
    DSC01607.JPG
    3.9 MB · Views: 169
  • DSC01666.jpg
    DSC01666.jpg
    633 KB · Views: 169
  • 3.JPG
    3.JPG
    192.9 KB · Views: 167

Paul Henley

Club Member
Wheel arch replacements

These next pic detail the cutting out and replacement of the rear inner and outer arches.
 

Attachments

  • DSCI0207.JPG
    DSCI0207.JPG
    175.6 KB · Views: 108
  • DSCI0243.JPG
    DSCI0243.JPG
    181.8 KB · Views: 111
  • DSCI0368.JPG
    DSCI0368.JPG
    175.6 KB · Views: 104
  • DSC02618.JPG
    DSC02618.JPG
    3 MB · Views: 110
  • DSCI0206.JPG
    DSCI0206.JPG
    191.3 KB · Views: 115
  • DSC02583.JPG
    DSC02583.JPG
    3.6 MB · Views: 132
  • DSC01675.jpg
    DSC01675.jpg
    808.2 KB · Views: 111
  • DSC01643.jpg
    DSC01643.jpg
    868.7 KB · Views: 111
  • DSC01641.jpg
    DSC01641.jpg
    861.5 KB · Views: 122
  • DSC01640.jpg
    DSC01640.jpg
    895.8 KB · Views: 132

morbias

Well-Known Forum User
It looks like a great base to start with, I think I commented on your floors before in another thread if I remember right! The quality of the repairs looks to be top notch too, it's going to be really nice when finished.

I wish I had done a proper panel alignment before sending my car off to paint, I have since found out my passenger door has a slight tweak in the bottom rear corner and the replacement hatch has a small bend in the top corner. Tiny things that probably no-one will notice but will nonetheless bug me now.

I like this one, I don't think these head lights will pass the MOT :)
attachment.php
 

candy red

Club Member
Looks like some good skilled work going into this,good job you had it blasted but not too much tinwork keep the pics coming and well done :thumbs:

Derrick:)
 

nzeder

Forum User
hmm 99-now....still not as long as mine :( 97-now and I still need to assemble - problem with having a car like that and then moving OS for work, moving back to New Zealand then purchasing/building houses, having a family - but at least we still have them ;) I have 2 now one for each of my boys - now I just need to get another 2 for my 2 girls

Well done on hanging in there.
 

shak130

Well-Known Forum User
this is my 5th year of resto. TBH, the first 1.5 years was all about part sourcing. But people like Duncan (ZFarm), PMAC and Mr F have all been fantastic. I have had to also extend my garage so I have somewhere to work on it, so again extra cost and more time. Finally, she is back from the paint shop in Ford Frozen White ready for reassembly. I have already put all suspension ,brakes, fuel/brake lines in. Should have her up and running by new year!

Hopefully it will be worth it, and I cannot wait to rock up at some meets next year!!
 

Paul Henley

Club Member
More Pic's

Thought I'd show a few pics of the rust damage that was revealed when the shell was sand blasted, these pics reveal the damage to the rear inner quarters and petrol filler pipe piece, the inners were subsequently replaced (along with the outers) and a replacement filler pipe manufactured and fitted.
The rear lower parts of the rear quarters were also found to be perforated, so these were also replaced.DSC01707.JPG

DSC01708.JPG

DSC01709.JPG

DSC01711.JPG

DSC01714.JPG

DSC01721.JPG

DSCI0262.JPG

DSCI0358.JPG

DSCI0359.JPG

DSCI0360.JPG
 

Paul Henley

Club Member
More Pic's

The sand blasting also revealed a previously unknown repair to an inner wing that needed tidying. There was also the start of corrosion on a shock tower that needed cutting out and a plate fitting and the start of corrosion to the DSCI0284.JPG

DSCI0315.JPG

DSCI0342.JPG

DSCI0265.JPG

DSCI0266.JPG

DSCI0545.JPG

DSCI0546.JPG

DSCI0345.JPG

DSCI0346.JPG

IMG_0161.JPGsills that meant their replacement was required.
 

Paul Henley

Club Member
More Pic's

The drivers side lower door pillar was also found to have corrosion which needed cutting out and a replacement part made and fitted. Also shown here is the corrosion to the rear lower quarters and subsequent replacements.
 

Attachments

  • DSCI0066.JPG
    DSCI0066.JPG
    178.5 KB · Views: 89
  • DSCI0068.JPG
    DSCI0068.JPG
    175.6 KB · Views: 87
  • DSCI0067.JPG
    DSCI0067.JPG
    175.6 KB · Views: 87
  • DSCI0551.JPG
    DSCI0551.JPG
    190.3 KB · Views: 87
  • DSCI0367.JPG
    DSCI0367.JPG
    188.7 KB · Views: 95
  • DSCI0280.JPG
    DSCI0280.JPG
    192.9 KB · Views: 82
  • 11.JPG
    11.JPG
    191.8 KB · Views: 86
  • 10.JPG
    10.JPG
    192.1 KB · Views: 89
  • 12.JPG
    12.JPG
    191.9 KB · Views: 94

Paul Henley

Club Member
more pic's

Once all the welding/panel repairs/replacements were carried out then the shell was prepped for paint. Basically the shell is being prepped/painted in two stages. Stage one is to remove all corrosion and repair as required, replace and improve the sealing between the panels, then recoat the underneath with new underseal. Then prime the interior, engine bay and exterior. The engine bay and interior are then painted to a finished standard with the exterior painted but still requiring the final coat. The shell then comes back to me for the rebuild. Once fitted out (engine, running gear, suspension, brakes, electrics,interior etc, the car goes back for stage 2 painting. This consists of fitting all the exterior panels, doors, hatch, cowels bonnet etc etc. These have been previously align tested during stage 1. The panels and exterior then receive the final coating. It then comes back to me again for exterior fit out, badges, bumpers, glass, lights decals etc to the finished standard, well that's the plan any way :) These next pictures capture priming and 1st stage painting of the underneath and engine bay that was carried out once the underneath had been resealed . Incidently the underseal contained the finished paint colour to blend in with the finished look.
 

Attachments

  • DSC03364.JPG
    DSC03364.JPG
    3.8 MB · Views: 100
  • DSC03354.JPG
    DSC03354.JPG
    4.1 MB · Views: 99
  • DSCI0160.JPG
    DSCI0160.JPG
    181.5 KB · Views: 99
  • DSCI0159.JPG
    DSCI0159.JPG
    183.7 KB · Views: 100
  • DSCI0154.JPG
    DSCI0154.JPG
    193.8 KB · Views: 101
  • DSCI0153.JPG
    DSCI0153.JPG
    181.7 KB · Views: 105
  • DSCI0130.JPG
    DSCI0130.JPG
    182 KB · Views: 114
  • DSCI0131.JPG
    DSCI0131.JPG
    192.7 KB · Views: 95

Paul Henley

Club Member
More Pic's

These next pictures capture the painting of the exterior of the shell prior to me picking it up.
 

Attachments

  • DSCI0205.JPG
    DSCI0205.JPG
    182.6 KB · Views: 87
  • DSCI0204.JPG
    DSCI0204.JPG
    194.4 KB · Views: 93
  • DSCI0202.JPG
    DSCI0202.JPG
    194.8 KB · Views: 98
  • DSCI0200.JPG
    DSCI0200.JPG
    175.6 KB · Views: 93
  • DSCI0199.JPG
    DSCI0199.JPG
    182.6 KB · Views: 97
  • DSCI0198.JPG
    DSCI0198.JPG
    190.7 KB · Views: 92
  • DSCI0158.JPG
    DSCI0158.JPG
    179.5 KB · Views: 103

Paul Henley

Club Member
Coming Home Pic's :)

These pics show the shell coming back home with fresh paint, only about 14 years after I stripped it :) Also a few pics showing the shell in various angles back in the rotisserie.
 

Attachments

  • DSC03331.JPG
    DSC03331.JPG
    4 MB · Views: 102
  • DSC03360.JPG
    DSC03360.JPG
    4 MB · Views: 92
  • DSC03344.JPG
    DSC03344.JPG
    3.9 MB · Views: 93
  • DSC03341.JPG
    DSC03341.JPG
    3.6 MB · Views: 101
  • DSC03339.JPG
    DSC03339.JPG
    3.4 MB · Views: 94
  • DSC03301.JPG
    DSC03301.JPG
    3.8 MB · Views: 103
  • DSC03297.JPG
    DSC03297.JPG
    4.2 MB · Views: 106
  • DSC03285.JPG
    DSC03285.JPG
    3.7 MB · Views: 113
  • DSC03282.JPG
    DSC03282.JPG
    4 MB · Views: 114
  • DSC03280.JPG
    DSC03280.JPG
    3.8 MB · Views: 118

Paul Henley

Club Member
A few detailed close up pics
 

Attachments

  • DSC03350.JPG
    DSC03350.JPG
    4.1 MB · Views: 94
  • DSC03351.JPG
    DSC03351.JPG
    4 MB · Views: 93
  • DSC03353.JPG
    DSC03353.JPG
    3.8 MB · Views: 94
  • DSC03356.JPG
    DSC03356.JPG
    4 MB · Views: 87
  • DSC03345.JPG
    DSC03345.JPG
    4.1 MB · Views: 99
  • DSC03319.JPG
    DSC03319.JPG
    4.3 MB · Views: 105
  • DSC03317.JPG
    DSC03317.JPG
    4.3 MB · Views: 112
  • DSC03294.JPG
    DSC03294.JPG
    3.8 MB · Views: 118
  • DSC03293.JPG
    DSC03293.JPG
    3.9 MB · Views: 117
  • DSC03291.JPG
    DSC03291.JPG
    3.9 MB · Views: 127

Paul Henley

Club Member
Best Pic's of all

These are currently my best 2 pic's, one shows a new emblem fitted to the quarter panel, it's not actually fitted, just sitting in the hole, but I couldn't wait to see what it would look like against my colour choice :), the second is the first new part I've refitted to the shell for it's rebuild - a new ID Plate. The plate is from Australia (bought before Peter Mac was supplying them) and it's screws from Canada, a few of the world wide resourced parts for this project. I do still have the original plate, but it doesn't look new. Thinking of framing it for posterity.
 

Attachments

  • DSC03367.JPG
    DSC03367.JPG
    3.7 MB · Views: 96
  • DSC03374.JPG
    DSC03374.JPG
    3.8 MB · Views: 87

Paul Henley

Club Member
Spending a lot of time in the garage over the Xmas break :) concentrating on getting the hydraulics and brake lines fitted while the shell is still In the rotisserie. Dug out the original brake master cylinder to find it in a seized sorry state. Fortunately I found a Tokico repair kit that I'd bought years ago, so decided to strip, clean, polish and install the new parts. I also found an alternative new Master Cylinder that I'd bought years ago. Although not the same, it did have the identical new rare bowls clips and caps. Unfortunately the caps have since corroded and will need to be replaced but the bowls and clips are excellent. I finally got the shuttles out of the cylinder after soaking with WD40, the remaining brake fluid had turned to a kind of crystalised substance over the years. The original seals on the shuttles didn't seem to bad, but as I had a full set of spares I changed them regardless. The rubbers on the shuttle valves on the other hand were a different story and had turned to mush... Again new parts were in the spares kit. I spent some time polishing the housing and it looks a lot better but will need further detailing. After I got it all put together I tried it and it seems to work like a dream :) but the final test will be once it has some fluid through it and pipes fitted. I've attached some pics but haven't learnt yet how to add text between different pics so Im afraid they come as a job lot, but I think they show what I've said. Hopefully I'll get on to the Vac Booster before the holls finish :)
 

Attachments

  • DSC03408.JPG
    DSC03408.JPG
    3.9 MB · Views: 76
  • DSC03405.JPG
    DSC03405.JPG
    3.8 MB · Views: 63
  • DSC03398.JPG
    DSC03398.JPG
    3.8 MB · Views: 62
  • DSC03394.JPG
    DSC03394.JPG
    3.6 MB · Views: 60
  • DSC03392.JPG
    DSC03392.JPG
    3.6 MB · Views: 63
  • DSC03388.JPG
    DSC03388.JPG
    3.6 MB · Views: 61
  • DSC03383.JPG
    DSC03383.JPG
    3.8 MB · Views: 67
  • DSC03406.JPG
    DSC03406.JPG
    3.7 MB · Views: 72

Paul Henley

Club Member
Bulkhead Insulation

Thought I'd give an update on the progress I've made to the bulkhead insulation. Although I want to keep the car mainly stock, I may as well make use of some improvements that have been developed since 1974 without altering the cars appearance. I went with Silent Coat vibration/insulation matts, after reading some favourable reports on this forum. After refitting the wiring harness's and footwell relays, I cut and fitted the pads to suit the bulkhead than then glued on the original Jute covering over the top. I then found the original transmission tunnel and end panel insulation and vinyl coverings, which were in really good original condition since I last removed them years ago. These were also fixed in place an aerosol contact adhesive. Next I cleaned up the centre console which came up great, fitted a new choke cable bulkhead grommet and fitted that into place.
 

Attachments

  • 3.jpg
    3.jpg
    1.4 MB · Views: 81
  • 2a.JPG
    2a.JPG
    1.2 MB · Views: 87
  • 2.jpg
    2.jpg
    1.6 MB · Views: 86
  • 1r.jpg
    1r.jpg
    1.3 MB · Views: 94
  • 7.jpg
    7.jpg
    1.3 MB · Views: 82
  • 6.jpg
    6.jpg
    1.4 MB · Views: 82
  • 5.jpg
    5.jpg
    1.3 MB · Views: 82
  • 4.jpg
    4.jpg
    1.8 MB · Views: 86
  • 9.jpg
    9.jpg
    1.7 MB · Views: 83
Last edited by a moderator:

Paul Henley

Club Member
more pics

Few more pics
 

Attachments

  • 10.jpg
    10.jpg
    1.5 MB · Views: 89
  • 11.jpg
    11.jpg
    1.7 MB · Views: 82
  • 12.JPG
    12.JPG
    1.7 MB · Views: 90
  • 13.JPG
    13.JPG
    1.5 MB · Views: 85
  • 14.JPG
    14.JPG
    1.8 MB · Views: 85
Top