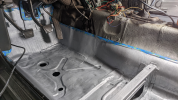
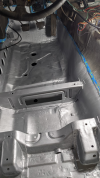
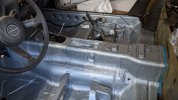
Sunbaked '76 Cali 280z

SacCyclone

Club Member
It's just a lot of hard work isn't it.....but when it's done you know what you have.

Make sure to take lots of pics along the way to show what you have been doing.

BTW, I used those same gloves when I was doing the Mustang floors....love those.

4GqyTDOHTUqHuG1r2tINeQ.jpg
 

Robotsan

Club Member
It's just a lot of hard work isn't it.....but when it's done you know what you have.

Make sure to take lots of pics along the way to show what you have been doing.

BTW, I used those same gloves when I was doing the Mustang floors....love those.

View attachment 53580
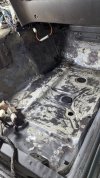
I'm definitely taking lots of photos, more for my own satisfaction than anything but will also be good if I ever sell the car.

Haha, I spent way too long trying to find slightly thicker nitrile gloves than the average ones. They're decent, only split after a few hours' hard labour rather than 5 min.
 

Robotsan

Club Member
Passenger floor all sanded back, hoovered and cleaned/degreased. What a ballache. Ready for some Hydrate 80 rust converter ALLLL over it now. Then driver's floor tomorrow.

By the way, how the fuck do you get the biggest rubber grommet in the middle of each floor out? Got all the rest but these are refusing to budge. Maybe I could use a trolley jack with something like a fat socket on it to push it through?

PXL_20220918_152818868.jpg
 

Robotsan

Club Member
Looks good. The grommets just pry out, don't they?

Cheers! And I'm sure they do - the rest did! I just couldn't get that specific pair to budge. Jammed a chisel under them and pryed with all my might, but they just seem to flex and stay put. I reckon the aforementioned jack method will pop them out though... Will try tomorrow.
 

MCBladeRun

Club Member
Cheers! And I'm sure they do - the rest did! I just couldn't get that specific pair to budge. Jammed a chisel under them and pryed with all my might, but they just seem to flex and stay put. I reckon the aforementioned jack method will pop them out though... Will try tomorrow.
I'd say a pry bar and bull nose pliers would make short work of that
 

Robotsan

Club Member
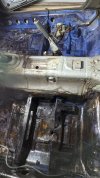
Managed to get both floors done with the rust converter today - completing my aim of getting the floors all de-rusted, sanded and rust converted in one long weekend - her Maj would be proud!

The Bilt Hamber Hydrate 80 looks mad when you're painting it on - very bright blue - and then it dries to a kind of shiny looking black/bronze.

This shows the left side almost dry and the right side with a fresh coat on:

PXL_20220919_162952331.jpg

Might give both a second coat tomorrow night, and then it'll be a couple of weeks until I have time to epoxy prime the floors.
 

Attachments

  • PXL_20220919_150916922.jpg
    PXL_20220919_150916922.jpg
    398.1 KB · Views: 4

MCBladeRun

Club Member
Managed to get both floors done with the rust converter today - completing my aim of getting the floors all de-rusted, sanded and rust converted in one long weekend - her Maj would be proud!

The Bilt Hamber Hydrate 80 looks mad when you're painting it on - very bright blue - and then it dries to a kind of shiny looking black/bronze.

This shows the left side almost dry and the right side with a fresh coat on:

View attachment 53611

Might give both a second coat tomorrow night, and then it'll be a couple of weeks until I have time to epoxy prime the floors.
Bright blue to see where you've applied and where you haven't I'd wager.
 

Robotsan

Club Member
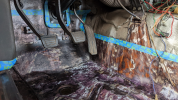
What is this pipe under the dash? It goes through the firewall just above the accelerator pedal. Heater related I'm guessing? Whatever it is clad in has turned to shit and crumbles into dust when touched! Is that a problem?

PXL_20220920_173004306~2.jpgPXL_20220920_173029288.jpg
 

Attachments

  • PXL_20220920_173004306~2.jpg
    PXL_20220920_173004306~2.jpg
    159.9 KB · Views: 0

SacCyclone

Club Member
I think that is a air con related pipe that gets really cold when air con is on so has to be insulated.
You could prob just remove the insulation if it is disintegrated anyway. Depending on what you will use for air con in the future, factory system or after market system, this may be something you will remove anyway.
 

Robotsan

Club Member
I think that is a air con related pipe that gets really cold when air con is on so has to be insulated.
You could prob just remove the insulation if it is disintegrated anyway. Depending on what you will use for air con in the future, factory system or after market system, this may be something you will remove anyway.

Thanks Mike, that makes sense. I'll just remove it all then.
 

uk66fastback

Club Member
Definitely air con as I had one the same in mine (240z) - originally fitted by the selling dealer (air con was not a factory-fitted option when new).

Is the rest of the AC gubbins still in the engine bay?
 

Robotsan

Club Member
Definitely air con as I had one the same in mine (240z) - originally fitted by the selling dealer (air con was not a factory-fitted option when new).

Is the rest of the AC gubbins still in the engine bay?
Ah ok, thanks. No, Mike removed it all for me as it was knackered, so we saved some weight!
 

Robotsan

Club Member
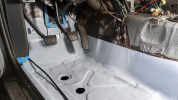
Been making good progress with the floors.

Keyed all the rust converter-treated metal, ready for primer:

1665132664087.png


Then 2 coats of Lechler Lechsys 29107 2k Epoxy Primer:

1665132728056.png


And finally a coat of Hammerite Smooth Silver (thanks @richiep for the suggestion):

1665132873573.png

Looked quite 'stripey' when wet, in that way Hammerite does, but now its dried its better. Not that it matters at all, as it will all be covered!

1665132998604.png


Quite tempted to do the trans tunnel too to make it all look the same!

Next I'm going to order the 1.8mm DodoMat Hex (about 2.8 sqM should be fine if I'm aiming for 50% coverage) and then to go on top of the Hex stuff on the floors, trans tunnel and roof, the 5mm closed cell Super Liner (3 sqM - should be enough I reckon).

The Hex should be adding around 7kg, but not sure what the closed cell stuff weighs - maybe more. Either way, hopefully I'm not going to add more than 20kg!
 

Geoff-R

Club Member
Looks good. The closed cell liner foam is quite light, it's lighter than the hex matt. Good combo, I've got for the same. Just be sure where your sticking the closed cell foam, once it's stuck it's properly stuck and rips if you try to remove it.
 

Robotsan

Club Member
Looks good. The closed cell liner foam is quite light, it's lighter than the hex matt. Good combo, I've got for the same. Just be sure where your sticking the closed cell foam, once it's stuck it's properly stuck and rips if you try to remove it.

Thanks! Great to hear the foam is lighter. So shouldn't be adding much weight at all then.

And yeah, I expected it will be tricky stuff like that. Is it easy enough to cut with scissors or do you need a stanley knife? What about the hex mat?

I was imagining I'd be making templates from card or thick paper for the hex mat, then cutting it out and sticking it.

Then with the foam was hoping to be able to skip the template stage and just line it up and cut on the fly?

And did you make holes for the rubber bungs in the floor or just go over them?
 

Geoff-R

Club Member
Thanks! Great to hear the foam is lighter. So shouldn't be adding much weight at all then.

And yeah, I expected it will be tricky stuff like that. Is it easy enough to cut with scissors or do you need a stanley knife? What about the hex mat?

I was imagining I'd be making templates from card or thick paper for the hex mat, then cutting it out and sticking it.

Then with the foam was hoping to be able to skip the template stage and just line it up and cut on the fly?

And did you make holes for the rubber bungs in the floor or just go over them?

I bought a good quality pair of scissors for the foam, partly because I wanted a good pair of scissors when retrimming the rest of the interior but a cheap pair of scissors will do the job just fine on the hex matt and the foam. You could use a stanley knife though. With the hex matt I just measured out roughly and cut the hex matt then offered it up before removing the backing. As it's quite rigid there is no need to make templates, you can do all the markings and cutting before removing the backing. Just make sure you get a roller for the hex matt to ensure it meets all the contours and adheres properly.

I went over the holes in the floor initially and then used a blade to lightly cut the hex matt, careful not to damage the paint underneath and lifted the edge of the cut out to remove the holes ready for the grommets to go back in. Of course this is the way I've done it, it worked for me, but others may have other ways of doing it.
 

Robotsan

Club Member
I bought a good quality pair of scissors for the foam, partly because I wanted a good pair of scissors when retrimming the rest of the interior but a cheap pair of scissors will do the job just fine on the hex matt and the foam. You could use a stanley knife though. With the hex matt I just measured out roughly and cut the hex matt then offered it up before removing the backing. As it's quite rigid there is no need to make templates, you can do all the markings and cutting before removing the backing. Just make sure you get a roller for the hex matt to ensure it meets all the contours and adheres properly.

I went over the holes in the floor initially and then used a blade to lightly cut the hex matt, careful not to damage the paint underneath and lifted the edge of the cut out to remove the holes ready for the grommets to go back in. Of course this is the way I've done it, it worked for me, but others may have other ways of doing it.

Nice one thanks for the tips Geoff. I don't quite understand how you were able to cut and lift the holes out for the grommets though if you'd stuck the hex mat down already?
 

Robotsan

Club Member
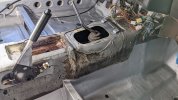
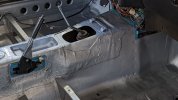
Trans tunnel given a coat of Hammerite. Considering there was no primer on it I'm chuffed with how nicely it went on!

Quick before pic:

PXL_20221008_124005791.jpg

And after:

PXL_20221008_140409593~2.jpg

Makes the whole interior look neat and tidy. All pretty pointless seeing as I'm going to cover it in sound deadening, but it makes me happier knowing it's all good underneath!

PXL_20221008_140338219.jpg
 
Top