monkeymagic86
Active Forum User
So, this is gonna be quite a long post, but I'll just start with the last 3 months of ownership of this caugur.
No idea why I haven't started a topic on this great forum yet. I even found quite an old for sale ad of my car on this forum")
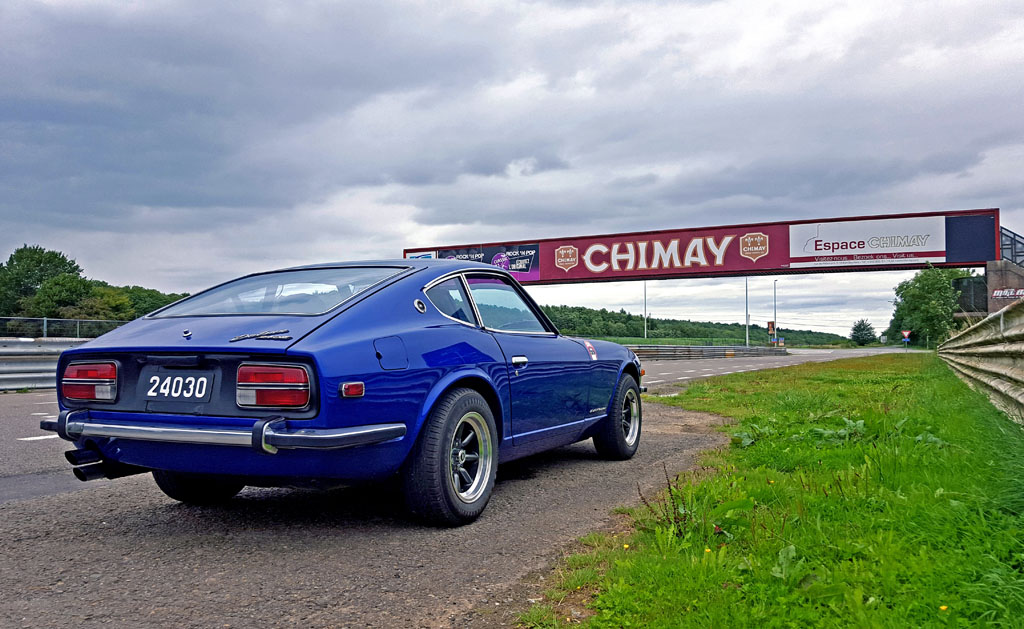
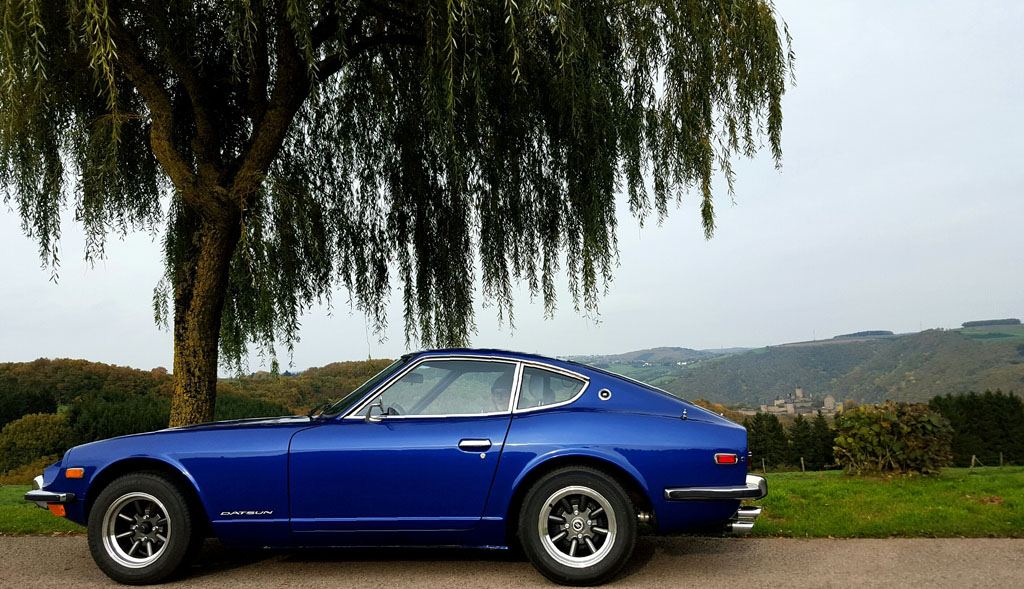
At the 25th of august a longtime dream came true. I often wrote on my blog http://monkeymagic86.wordpress.com "one day I will own...". I do fantasize about a S30 for at least 10 years now. And the august 25th was the day, I got myself a Datsun 240Z. It was imported from the US to Europe in 2011. It is a 1973 model, and I love it!
Car came from Chesapeake VA. Was then imported to Belgium, and now it lives in Luxembourg.
On the second try I managed to pass technical inspections and got the car registered. Thanks again Eric for borrowing me the stock-ish wheels.
Instantly did a tune up (spark plugs and wires; distributor cap, finger, points and condensator; ignition coil and ballast; fuel pump). Soon I will get the carb setted again. And then it's a go for modding and restoring piece after peice. Think i will start by optimizing and restoring the interior and modding the suspension.

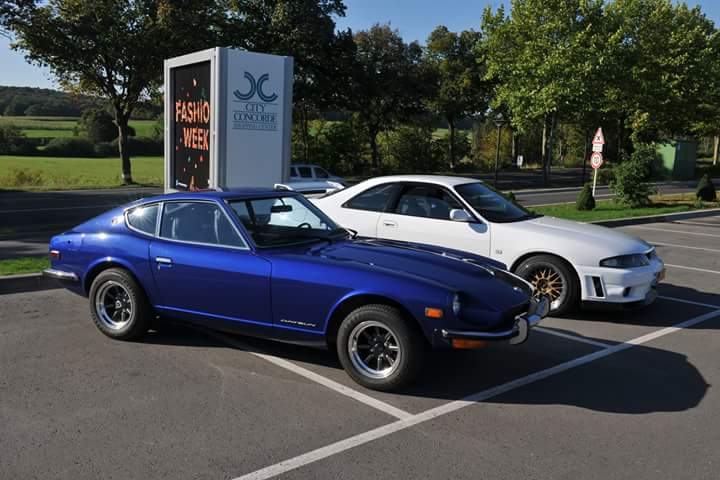
And 2 pics from cars and coffee this weekend. I love driving this car. And I try to do it as much as possible to find as much weak points as possible. So I know what to change, modify, make better this winter.

This winter I'll do my best to restore the interior and the suspension to where I want it. Than drive it next spring to autumn and do the engine/gearbox the following winter.
Interior will be reconverted to as stock-ish as possible, exept some retro bucket seats, so I don't get thrown out of the stock seats while havig fun on the curvy roads around here. And so the headrest actually reaches my head (6ft5) Got the same seats in my trackday Alfa-Romeo and I just love em.
As my first order for the Datsun has arrived at my doorstep I did some tune up and refresh:
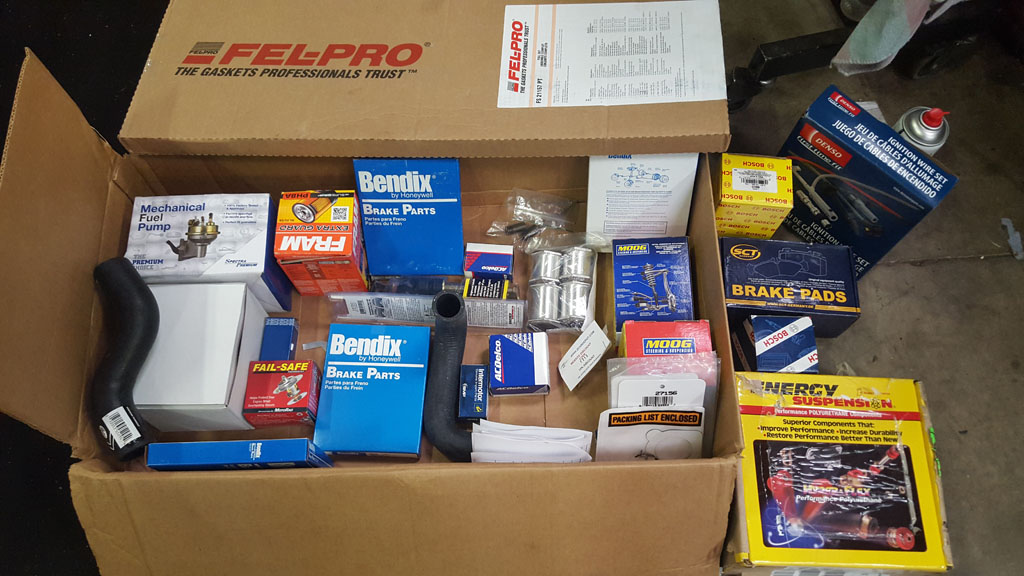
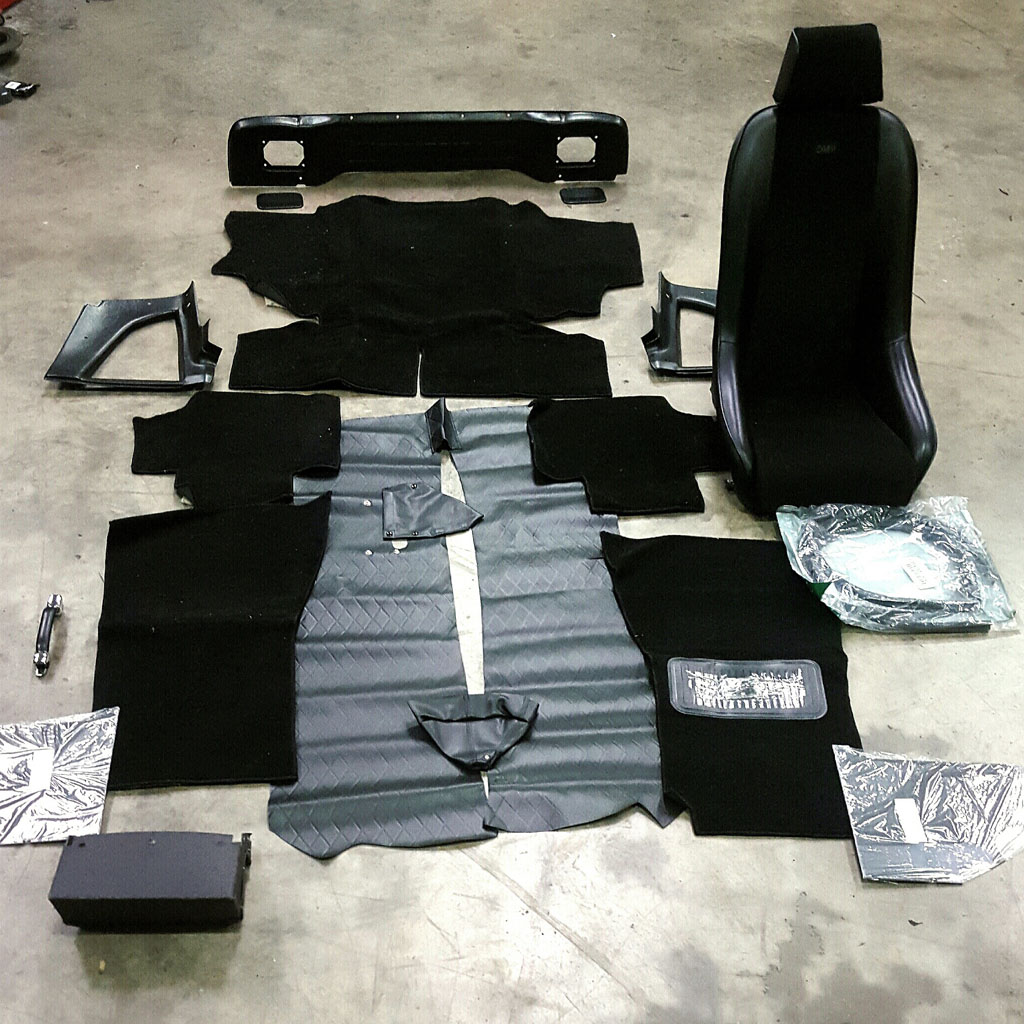
Few days later the delivery guy showed up again. Got a real large box from MSA, have to wait for the Tax receipt, but yeah, here you go. Ordered lots of rubbers, bushings, ... But most important, some parts to refresh the interior:
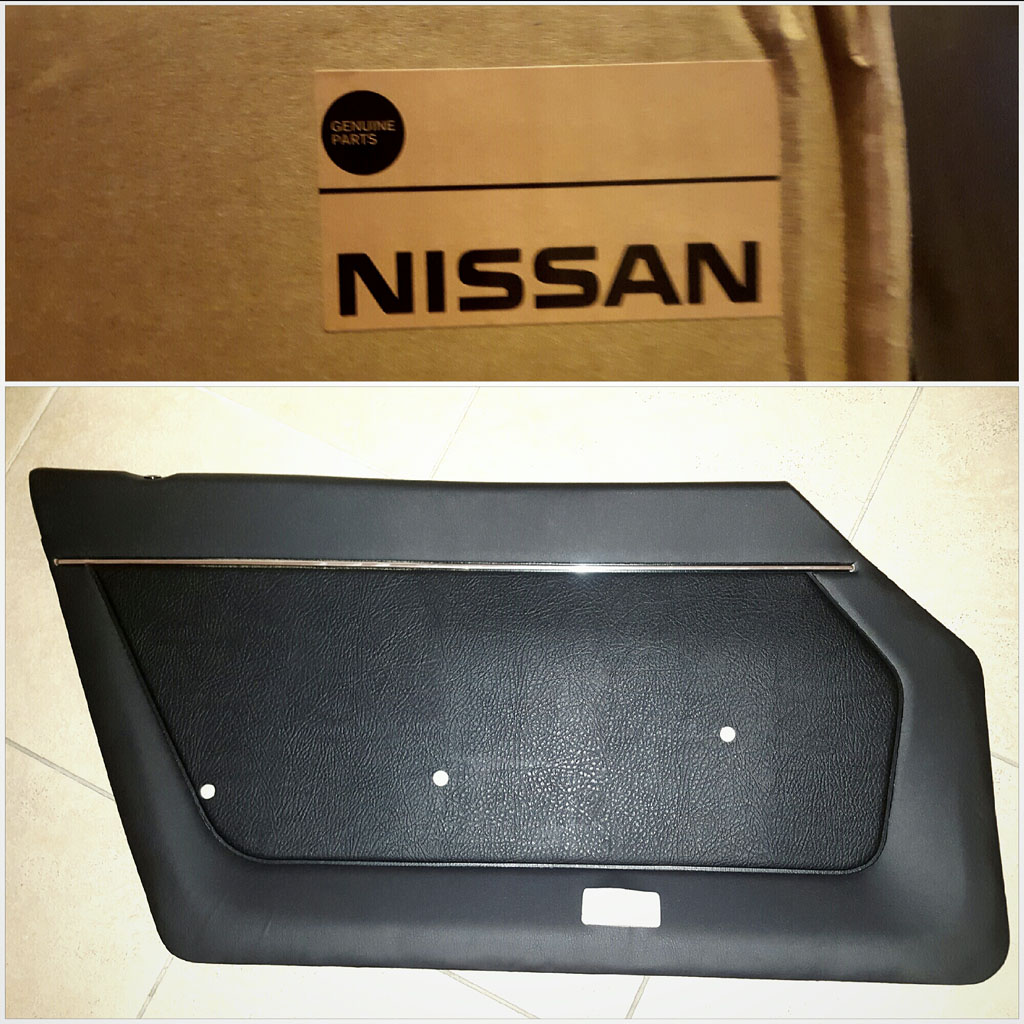
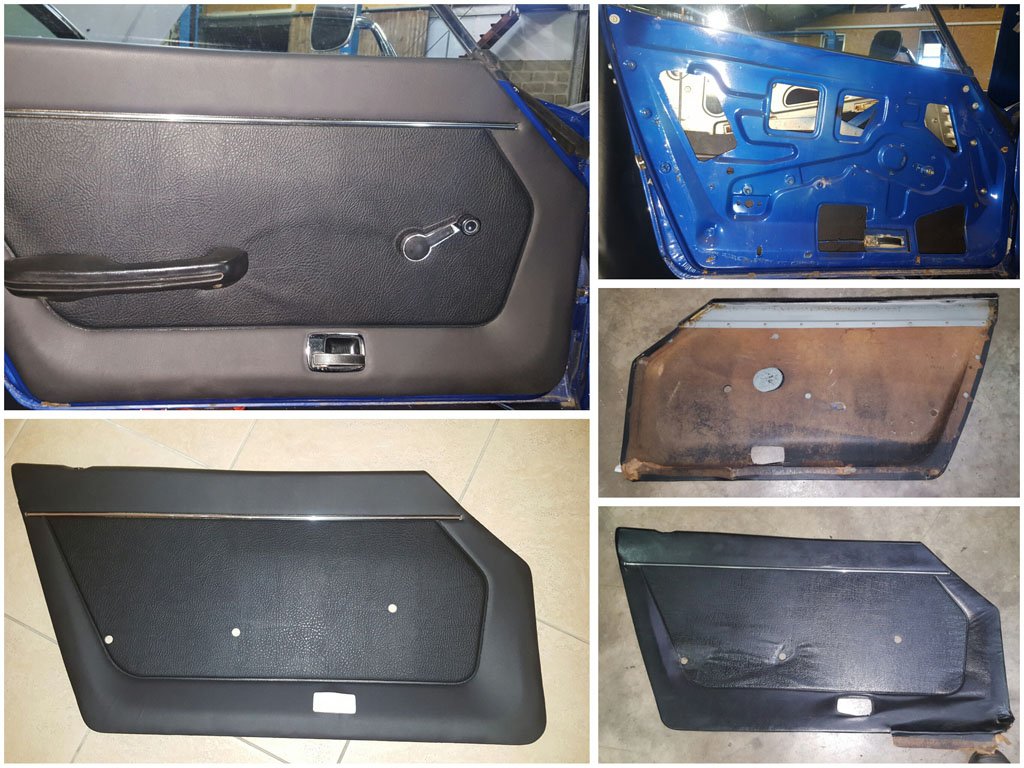
Shortly after this delivery I got another box, from JAPAN. Freakin new driver side doorpanel. YEAH! Bought this on yahoo auctions for "only" 27000Yen or 225US$
As winter is approaching here in Europe, I decided to do a last ride for 2015 and started working:
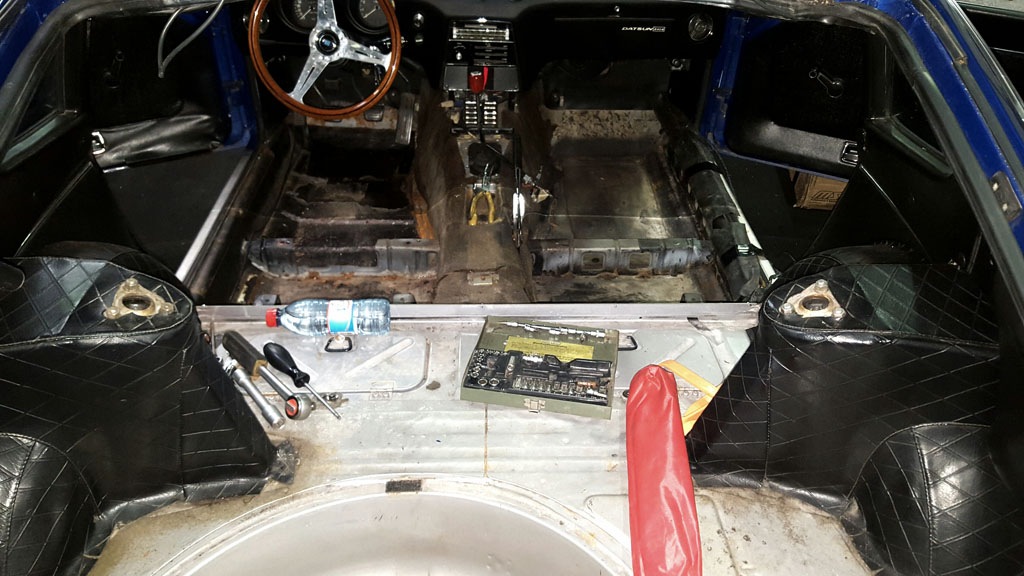
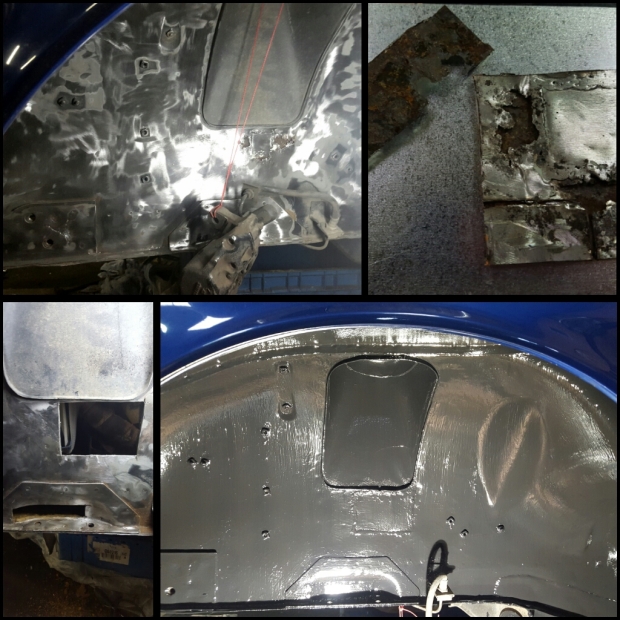
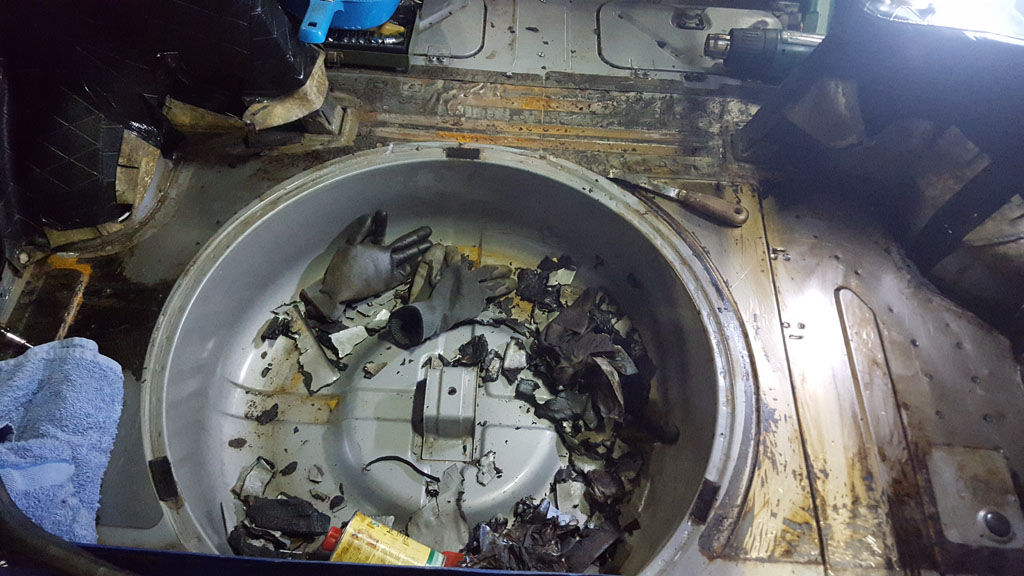
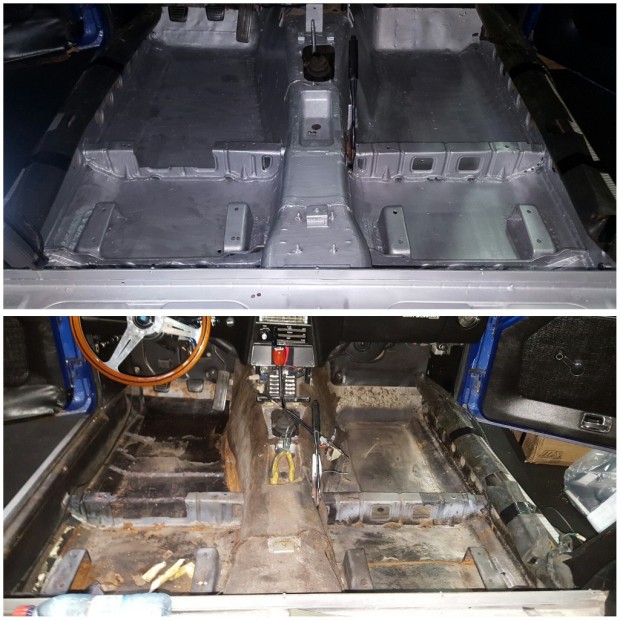
And here is a pic from yesterday, after several hours i finally removed all that tar $^!# from the interior. Floors, tunnel and boot. Check back for updates
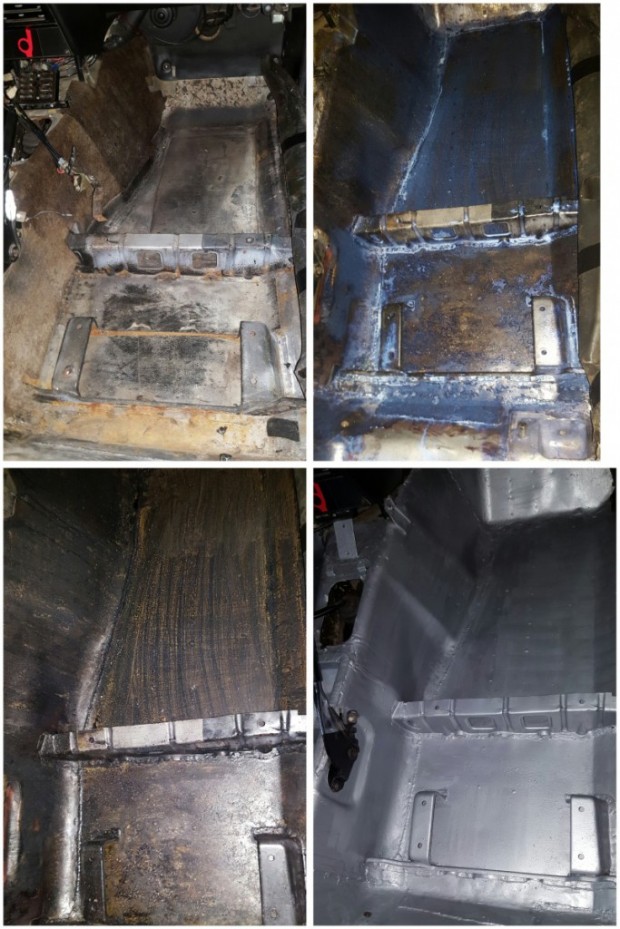
Next step, removing surface rust. Rust treatment, primer and new paint.
Boot is done.
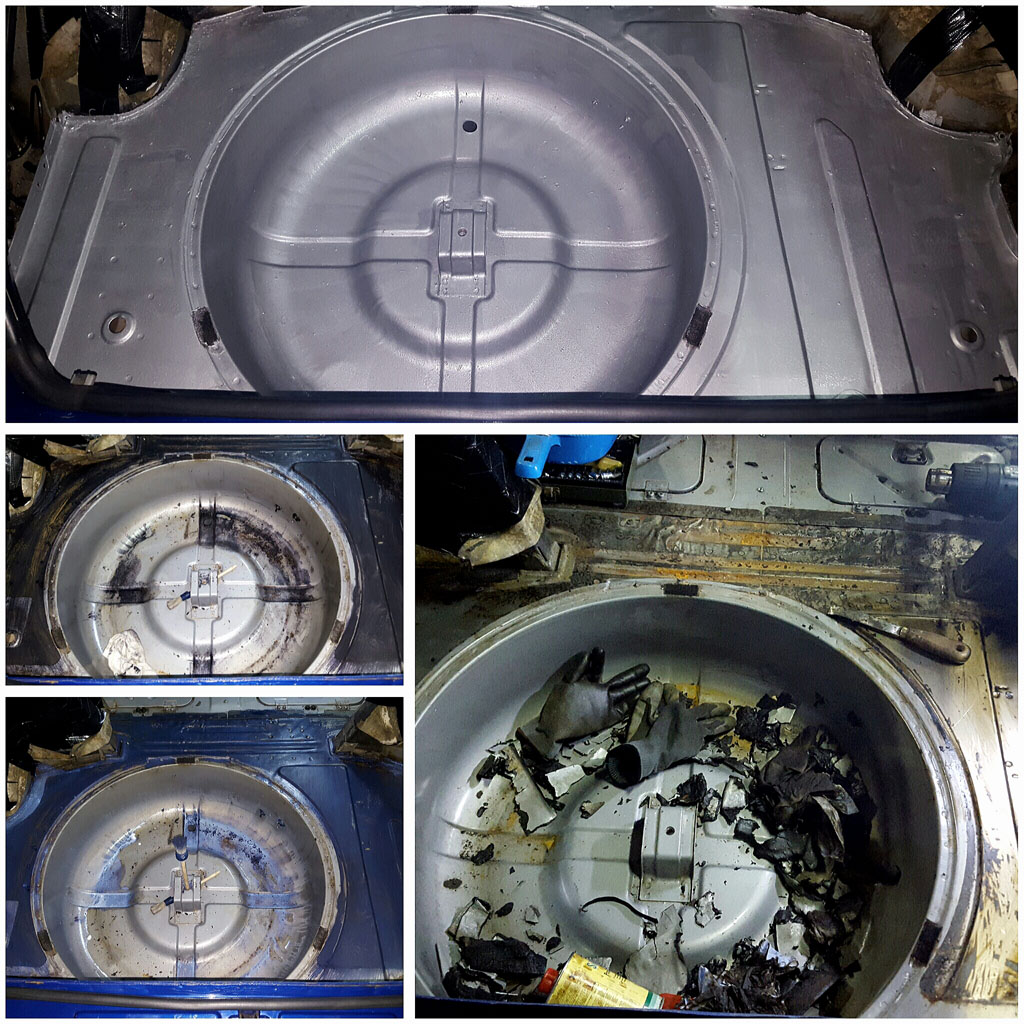
Removed all the sound deadening mats, mechanically treated the rust, chemically treated the surface against all rust with 'Kovermi', primered and painted with 'Brantho Korrux'.
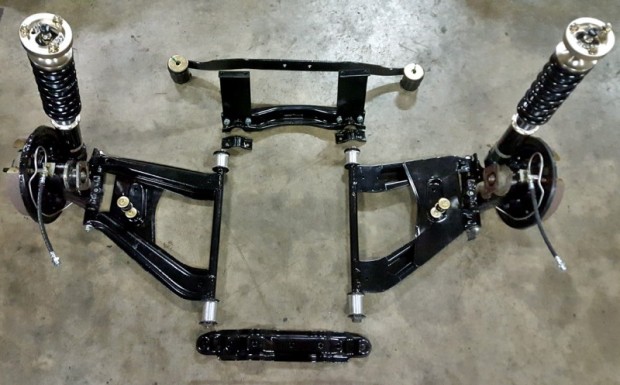
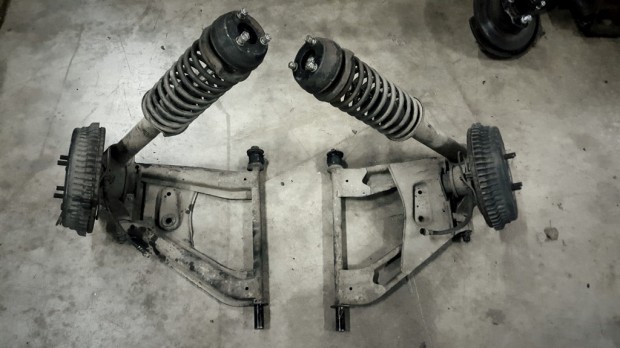
So, while I’m waiting a few days for the interior paint to dry completely before applying the second layer I used some spare time to disassemble the car a bit more. So I hung up the engine in the bay and removed the complete front axle including the engine subframe,…
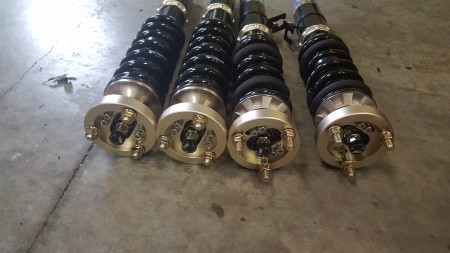
Plans for these parts: clean up, rust treatment, repaint them. Buying coilovers, welding up the struts, new bushings, lower inner camber bushes. Then remount everything to the car.
Oh and btw I have the same plan for the rear axle
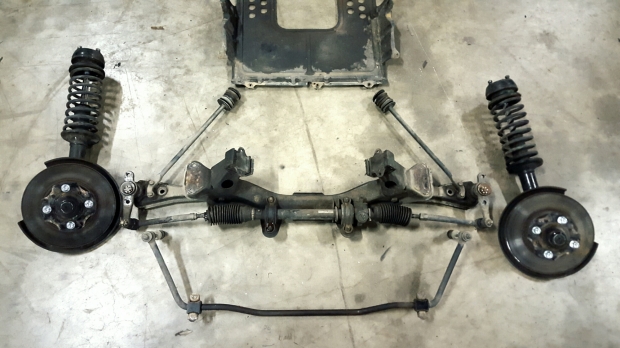
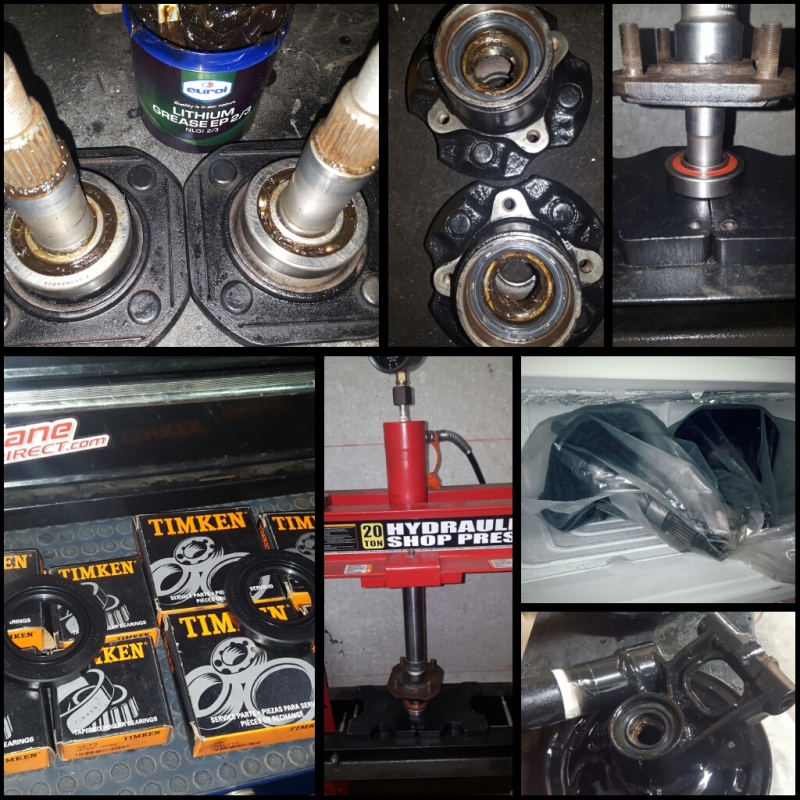
And after removing the front axle, I removed the rear axle, at least parts of it. So here is the rear suspension out.
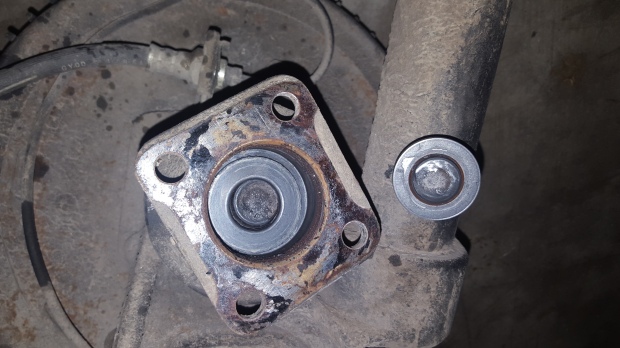
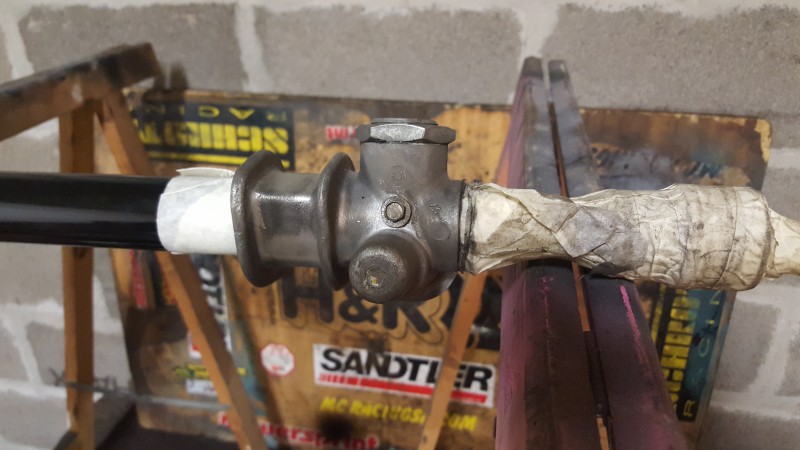
Had quite an OMG moment when I undid the rear drive shaft from the stub axle on the passenger side. The big nut wich holds the stub axle in place just fell on the floor once I unbolted the drive shaft. And it had the threaded portion of the stub axle in it. So it was broken for quite some time. Lucky me the drive shaft didn’t came lose or the car did not loose a wheel.
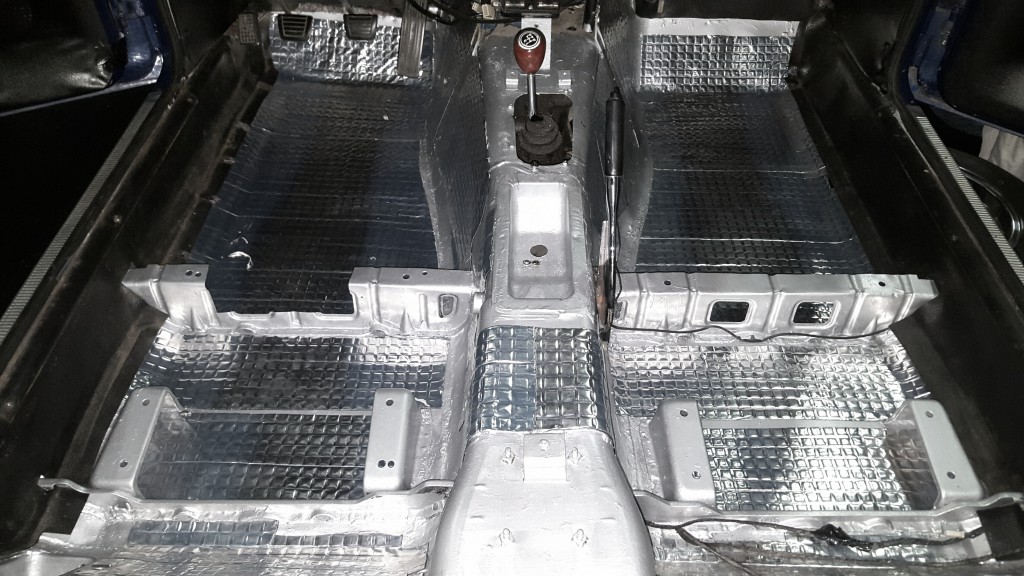
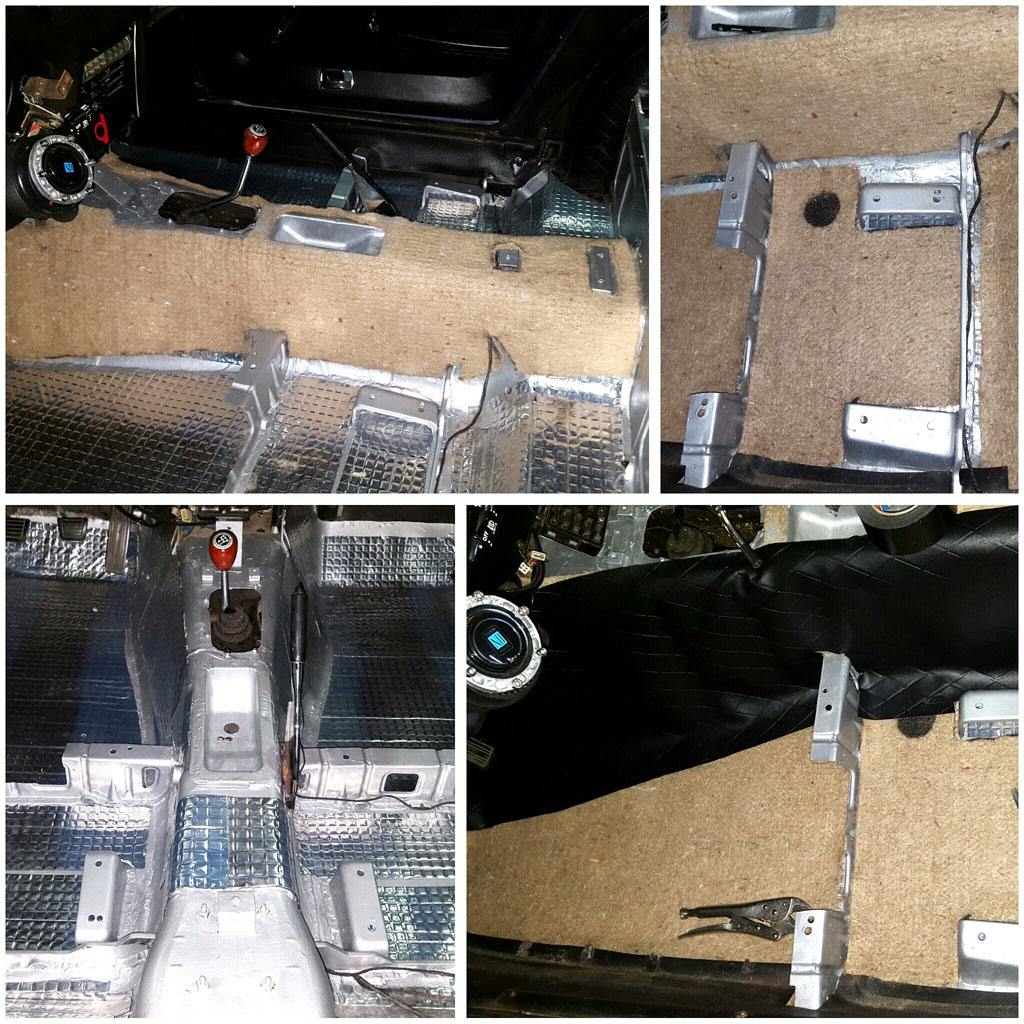
After the paint had dried I started rebuilding the interior layer by layer.
Sound deadening:
Some more insulation and some new vinyl from MSA:
Oh and I rebuilt the drivers side door with a brand spanking new NOS door card
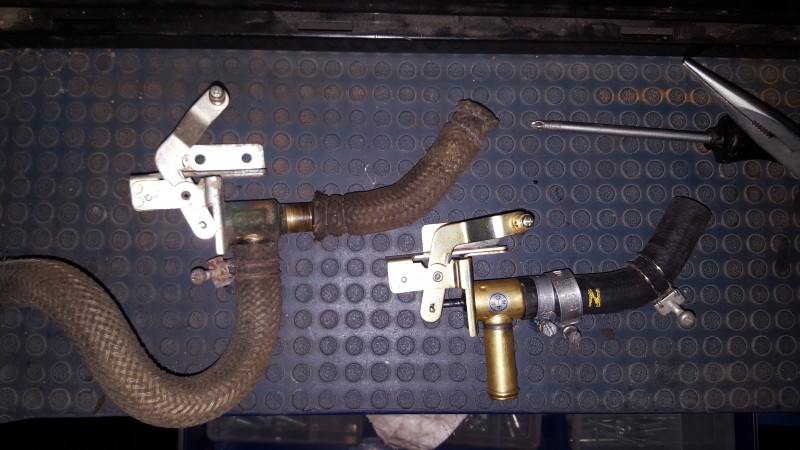
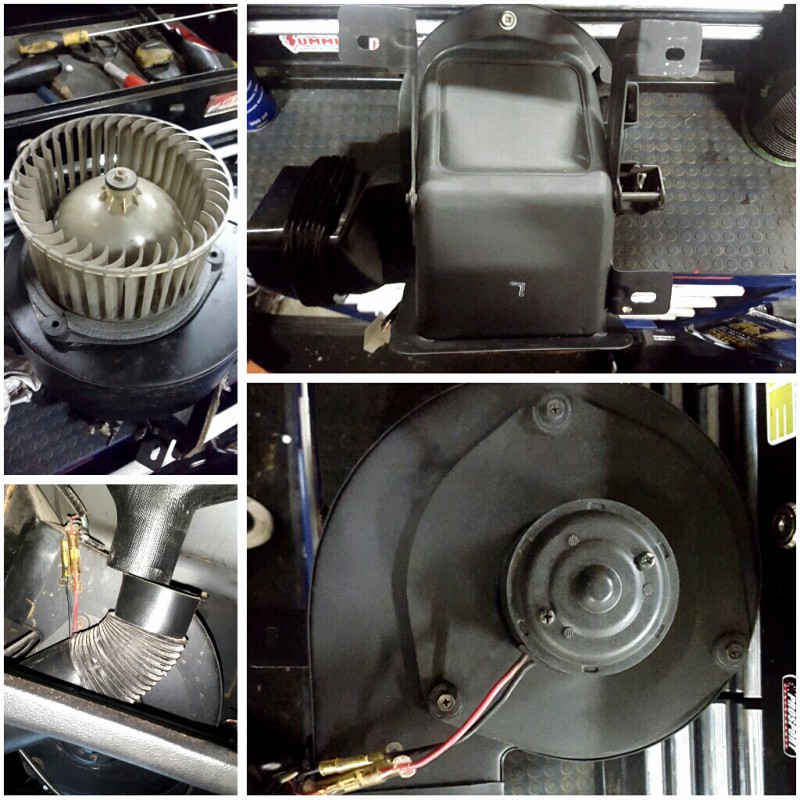
I did some of the boring and time consuming stuff, like changing all the heater hoses, greasing choke cables, sorting and removing all sorts of wires from all the previous owners (what a mess). Redid a blower motor loom as mine was butchered,...
I also changed the inner glovebox for a new part from MSA. I really think this part was never meant to be changed without removing the dash, what a PITA!
Some refreshening of the blower motor:
Same for the steering:
No idea why I haven't started a topic on this great forum yet. I even found quite an old for sale ad of my car on this forum
At the 25th of august a longtime dream came true. I often wrote on my blog http://monkeymagic86.wordpress.com "one day I will own...". I do fantasize about a S30 for at least 10 years now. And the august 25th was the day, I got myself a Datsun 240Z. It was imported from the US to Europe in 2011. It is a 1973 model, and I love it!
Car came from Chesapeake VA. Was then imported to Belgium, and now it lives in Luxembourg.
On the second try I managed to pass technical inspections and got the car registered. Thanks again Eric for borrowing me the stock-ish wheels.
Instantly did a tune up (spark plugs and wires; distributor cap, finger, points and condensator; ignition coil and ballast; fuel pump). Soon I will get the carb setted again. And then it's a go for modding and restoring piece after peice. Think i will start by optimizing and restoring the interior and modding the suspension.
And 2 pics from cars and coffee this weekend. I love driving this car. And I try to do it as much as possible to find as much weak points as possible. So I know what to change, modify, make better this winter.
This winter I'll do my best to restore the interior and the suspension to where I want it. Than drive it next spring to autumn and do the engine/gearbox the following winter.
Interior will be reconverted to as stock-ish as possible, exept some retro bucket seats, so I don't get thrown out of the stock seats while havig fun on the curvy roads around here. And so the headrest actually reaches my head (6ft5)
Got the same seats in my trackday Alfa-Romeo and I just love em.As my first order for the Datsun has arrived at my doorstep I did some tune up and refresh:
Few days later the delivery guy showed up again. Got a real large box from MSA, have to wait for the Tax receipt, but yeah, here you go. Ordered lots of rubbers, bushings, ... But most important, some parts to refresh the interior:
Shortly after this delivery I got another box, from JAPAN. Freakin new driver side doorpanel. YEAH! Bought this on yahoo auctions for "only" 27000Yen or 225US$
As winter is approaching here in Europe, I decided to do a last ride for 2015 and started working:
And here is a pic from yesterday, after several hours i finally removed all that tar $^!# from the interior. Floors, tunnel and boot. Check back for updates
Next step, removing surface rust. Rust treatment, primer and new paint.
Boot is done.
Removed all the sound deadening mats, mechanically treated the rust, chemically treated the surface against all rust with 'Kovermi', primered and painted with 'Brantho Korrux'.
So, while I’m waiting a few days for the interior paint to dry completely before applying the second layer I used some spare time to disassemble the car a bit more. So I hung up the engine in the bay and removed the complete front axle including the engine subframe,…
Plans for these parts: clean up, rust treatment, repaint them. Buying coilovers, welding up the struts, new bushings, lower inner camber bushes. Then remount everything to the car.
Oh and btw I have the same plan for the rear axle
And after removing the front axle, I removed the rear axle, at least parts of it. So here is the rear suspension out.
Had quite an OMG moment when I undid the rear drive shaft from the stub axle on the passenger side. The big nut wich holds the stub axle in place just fell on the floor once I unbolted the drive shaft. And it had the threaded portion of the stub axle in it. So it was broken for quite some time. Lucky me the drive shaft didn’t came lose or the car did not loose a wheel.
After the paint had dried I started rebuilding the interior layer by layer.
Sound deadening:
Some more insulation and some new vinyl from MSA:
Oh and I rebuilt the drivers side door with a brand spanking new NOS door card
I did some of the boring and time consuming stuff, like changing all the heater hoses, greasing choke cables, sorting and removing all sorts of wires from all the previous owners (what a mess). Redid a blower motor loom as mine was butchered,...
I also changed the inner glovebox for a new part from MSA. I really think this part was never meant to be changed without removing the dash, what a PITA!
Some refreshening of the blower motor:
Same for the steering: