-
The Z Club relies on the support of it's paid members - join the club or renew your membership here.
You are using an out of date browser. It may not display this or other websites correctly.
You should upgrade or use an alternative browser.
You should upgrade or use an alternative browser.
JDM mirrors sourced at last!
- Thread starter Ped
- Start date
Ped
Club Member
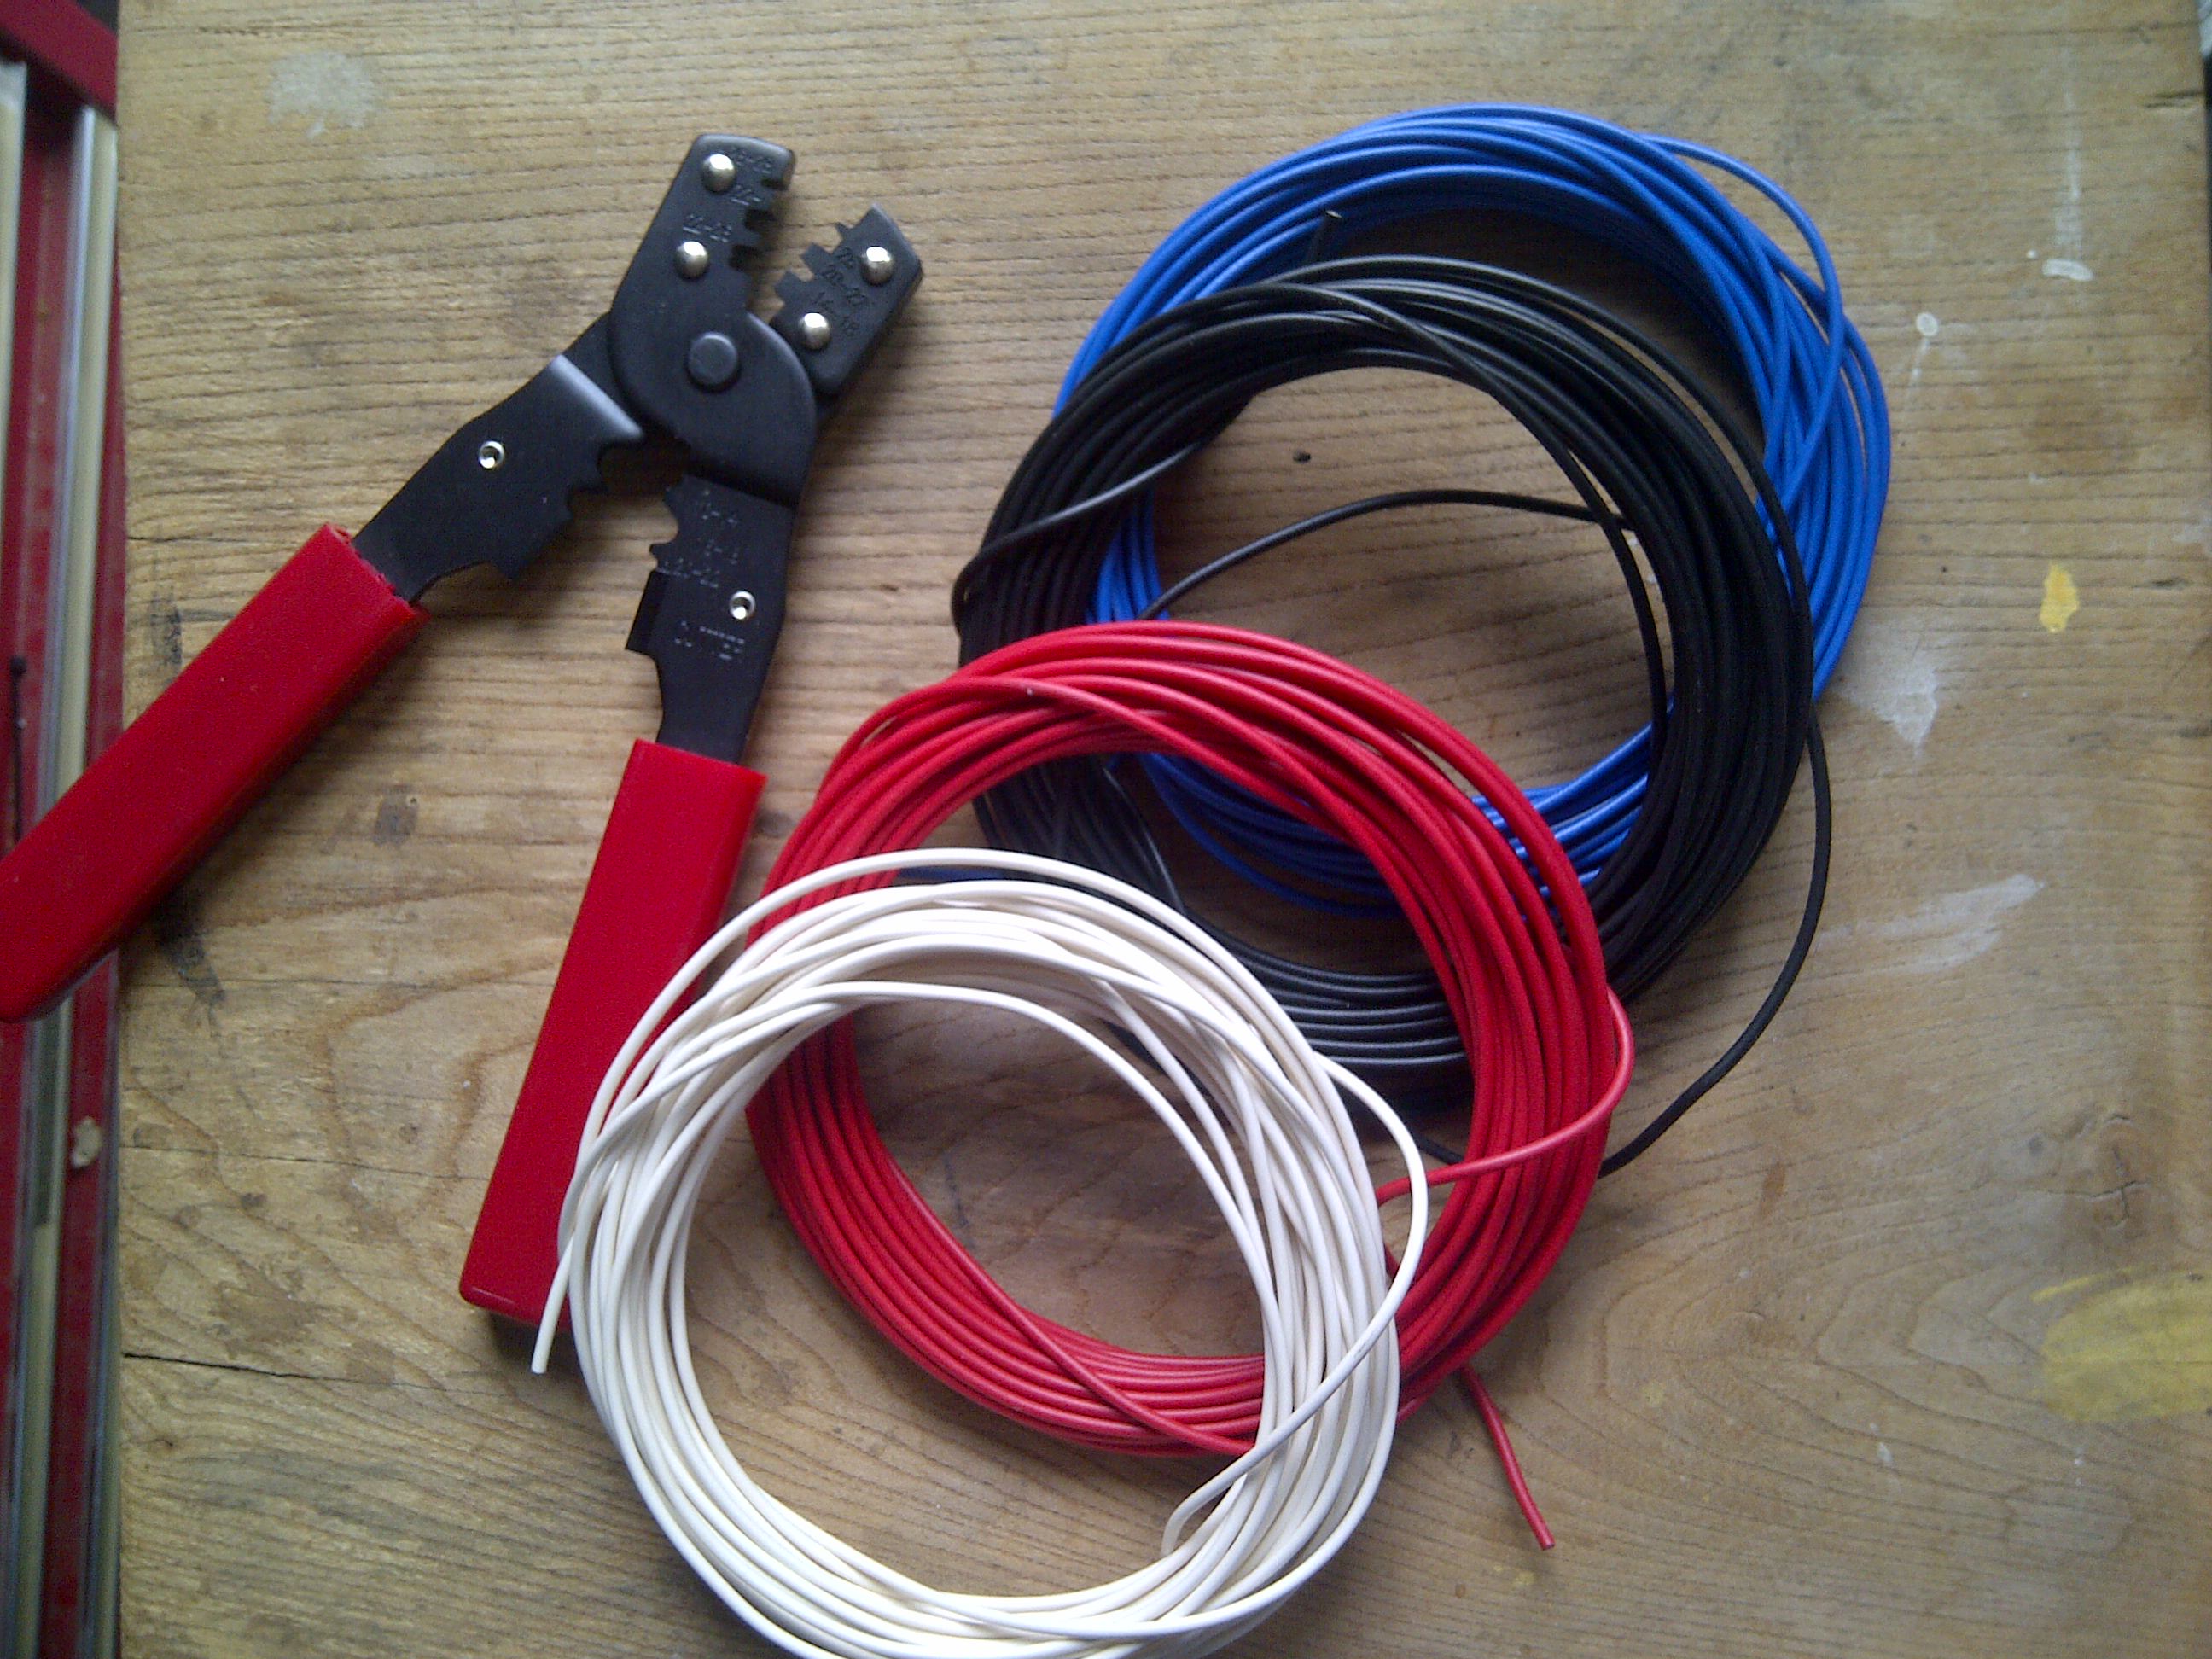
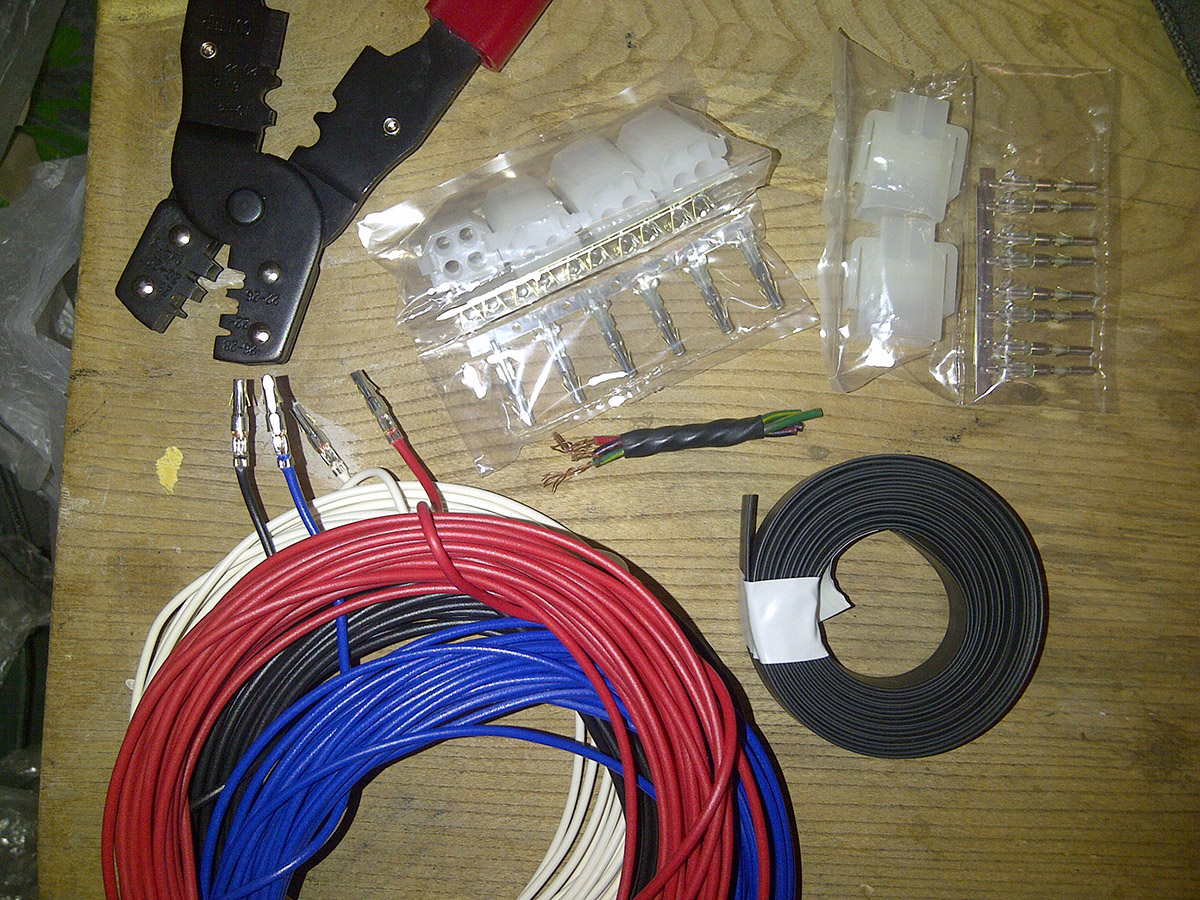
The heat shrink and connectors arrived today in the post (that was quick!), so I have got all the bits I need. Did a quick test on the shrink wrap and its ideal. Tried out the crimping tool and it works a treat, much better than me soldering. 
The metal base plate primed again after being welded, last thing will be a couple of top coats of black and then lashings of wax when fitting.
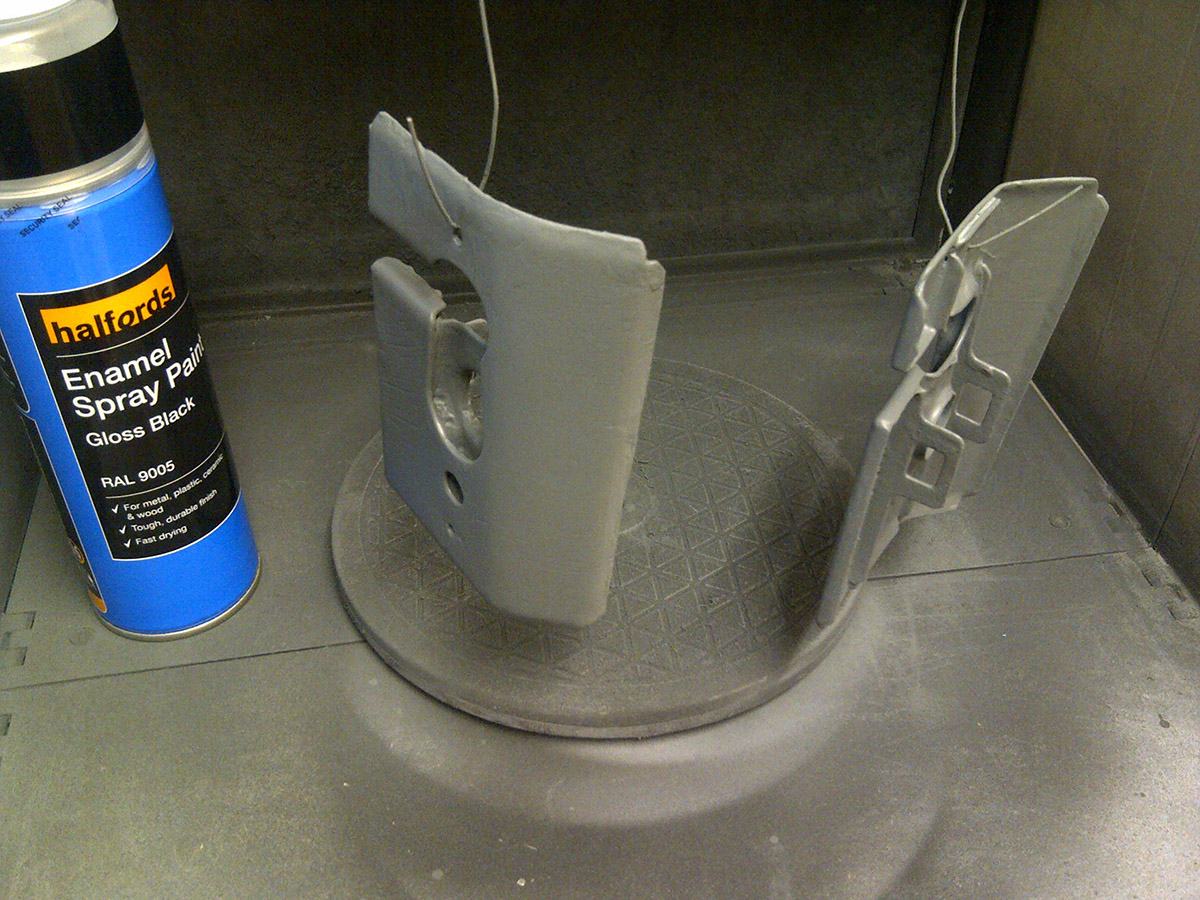
The metal base plate primed again after being welded, last thing will be a couple of top coats of black and then lashings of wax when fitting.
Ped
Club Member
Wow! I never appreciated how much work goes into converting over to these mirrors. I had a couple of ZX's where these mirrors were "deleted" in favour of the door mount ones. I had one car with the fender mirrors on and loved them!
The last car I drove with wing mirrors was a 1971 Hillman Avenger and that was a while ago.
Ped
Club Member
More progress on the mirror wiring.
So I have now drilled both wings and run the wiring from under the dash to the wheel arches. Got to use my new crimper again too , they are really good quality and only cost £12.
Anyway, I ran out of daylight and heat shrink sleeving, so will need to finish tomorrow, if I get time and if I can pick up some more.
Here are some pics:
No turning back now
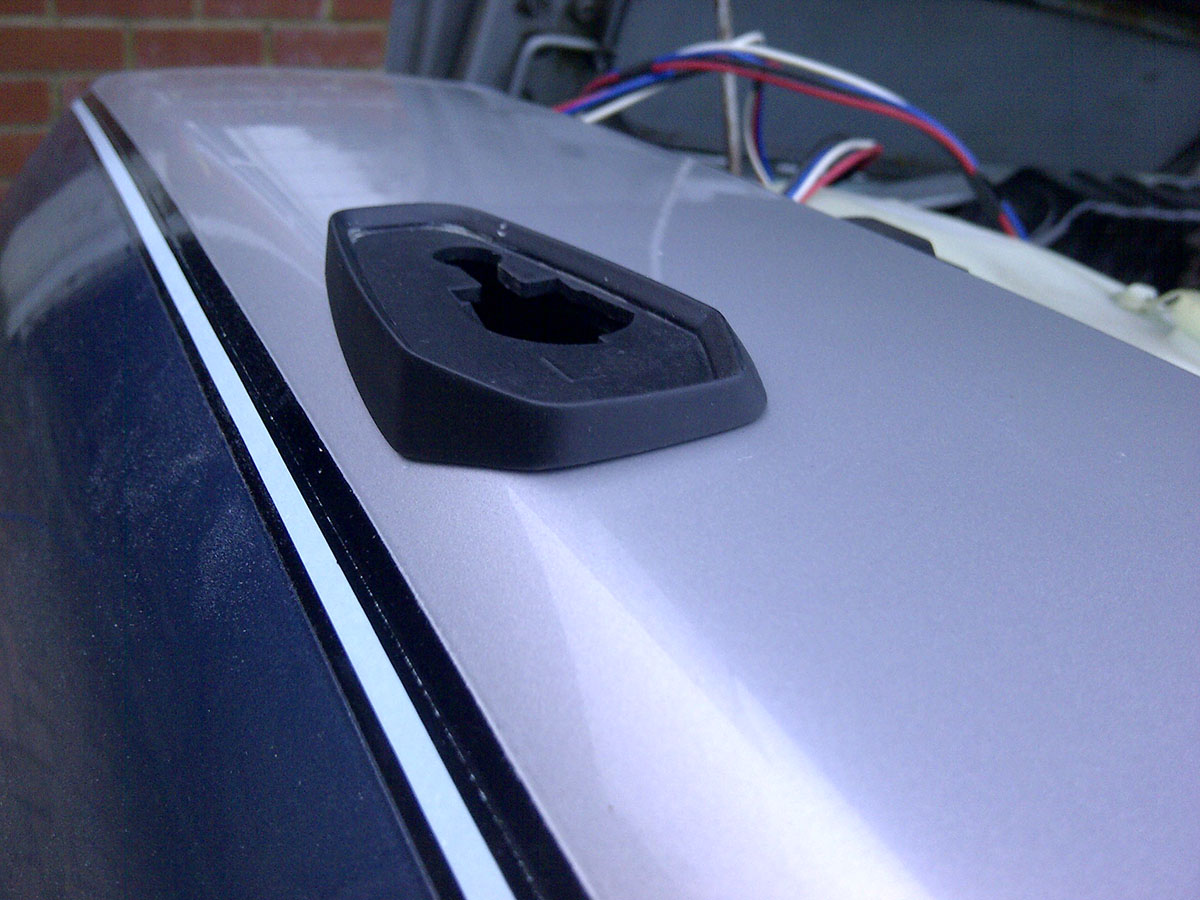
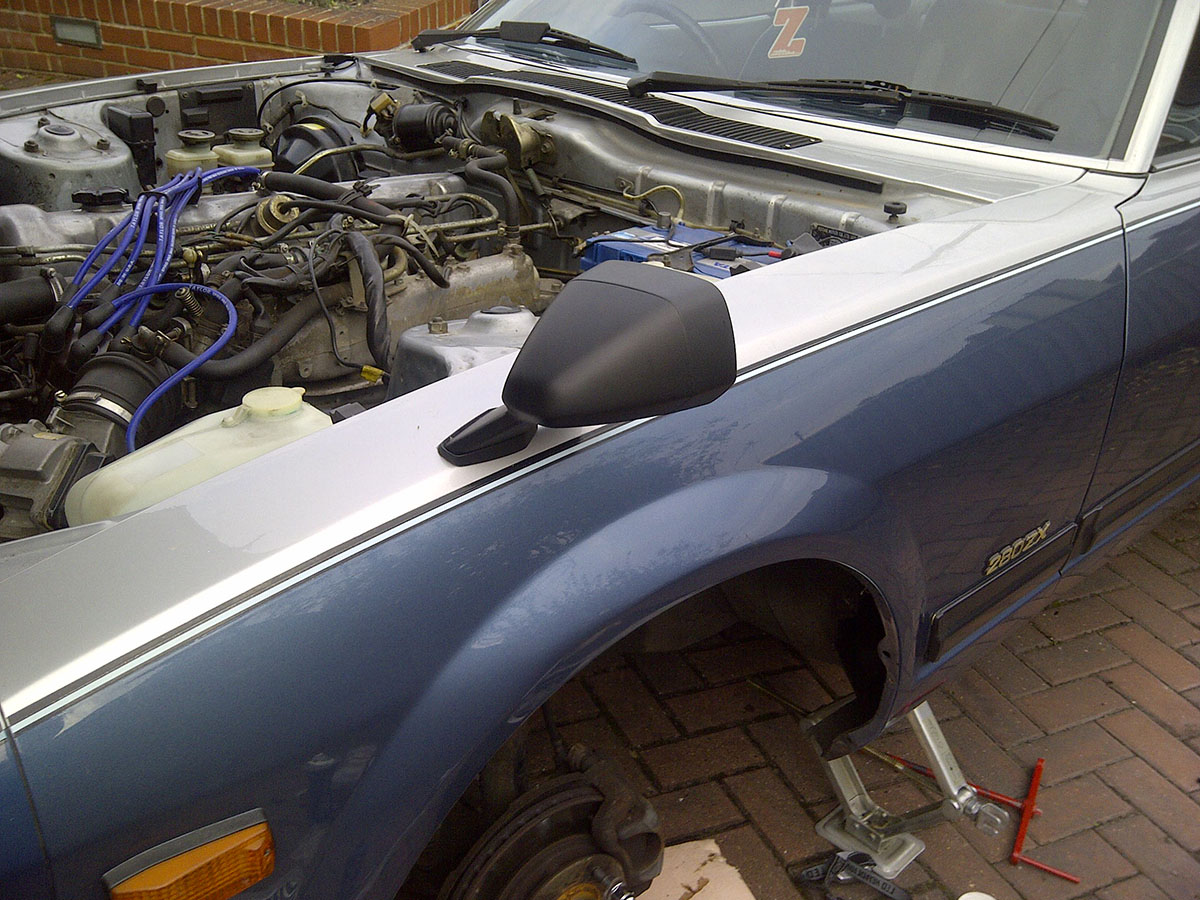
Phew! It fits to the shape of the wing.
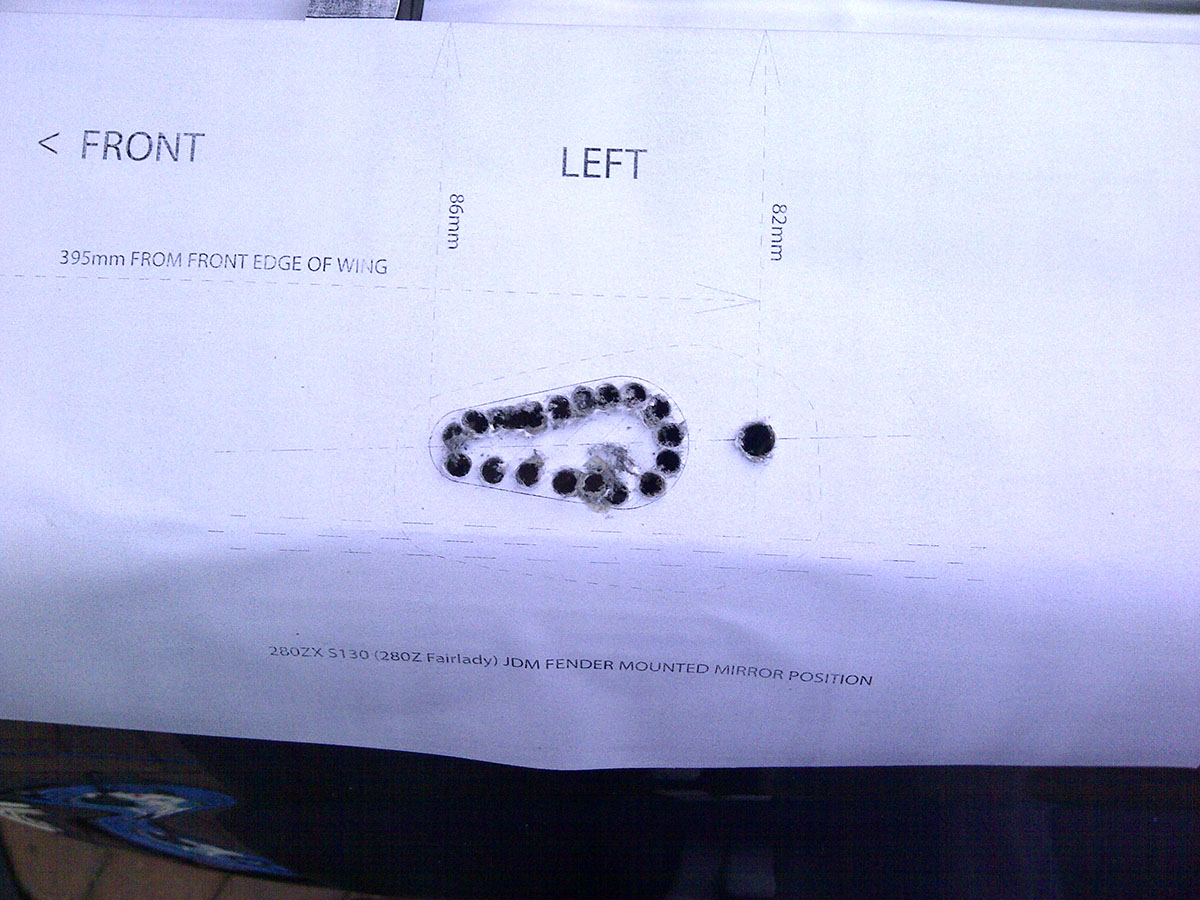
I'm glad I took my time to get the template right otherwise there is no way it would have fitted neatly.
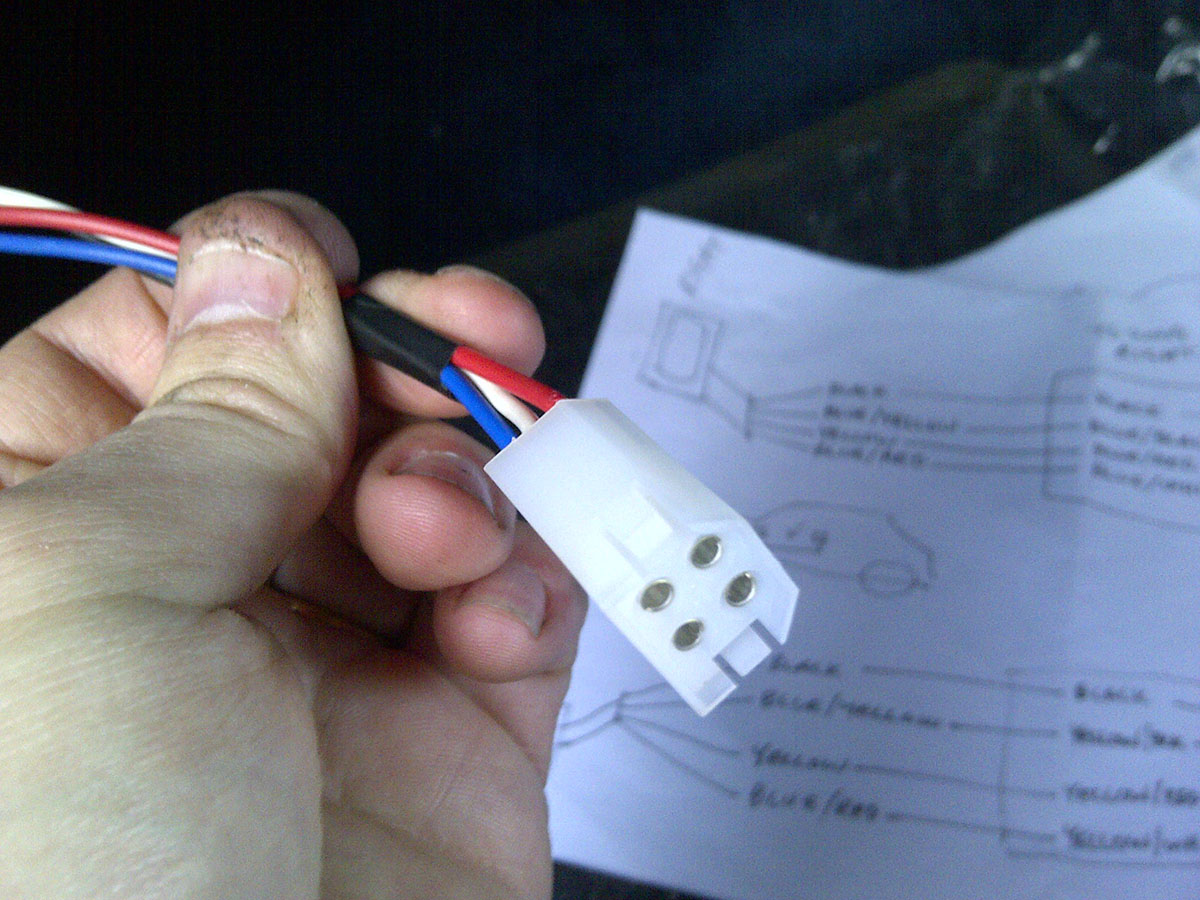
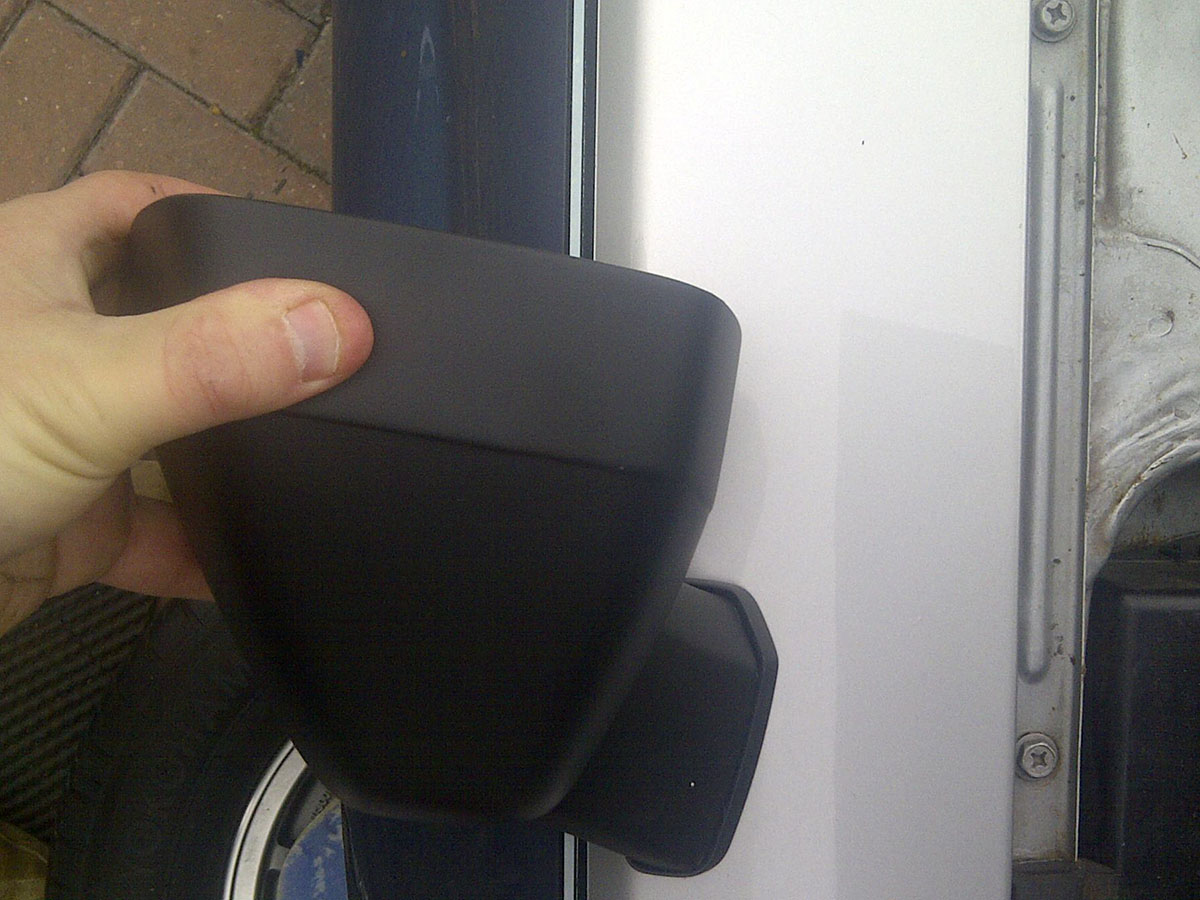
New connector just needs plugging in.
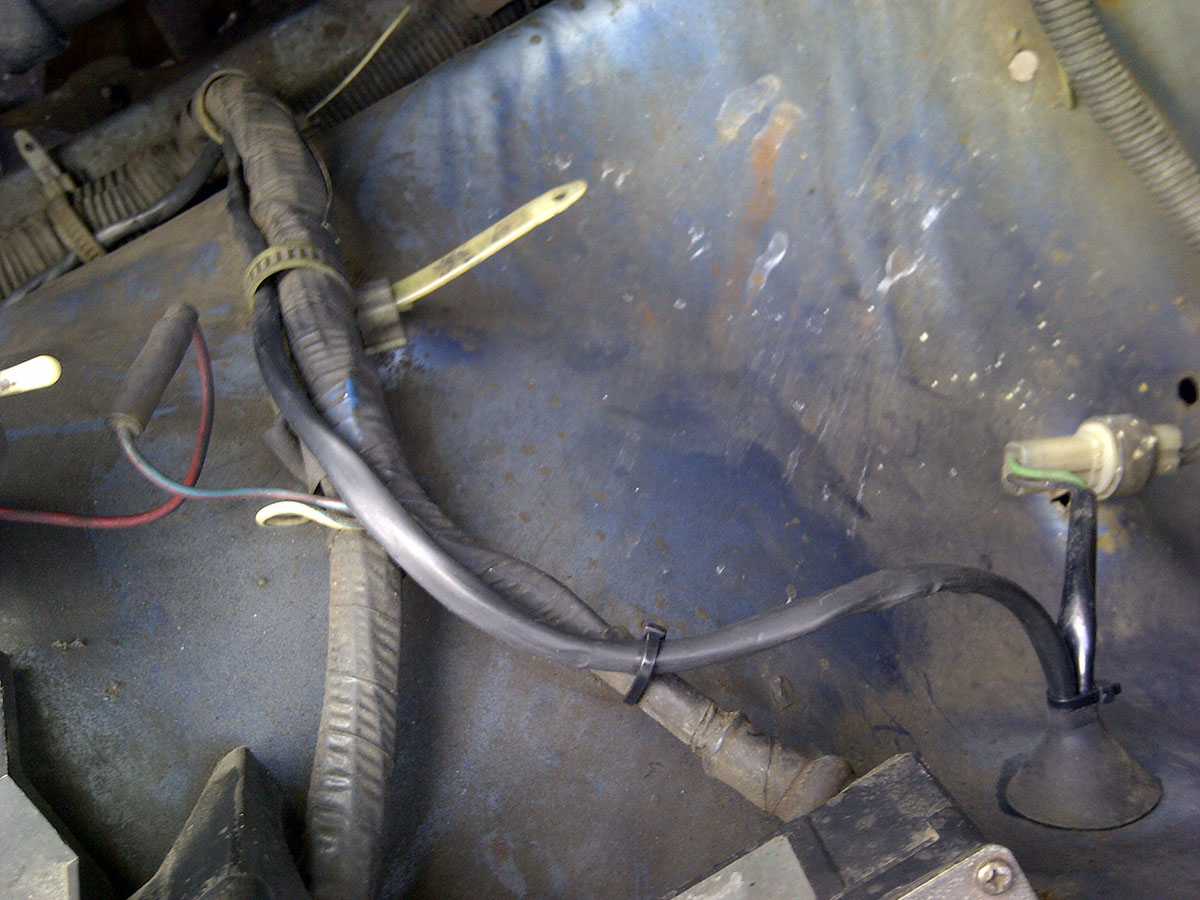
Connected up and through the bulkhead.
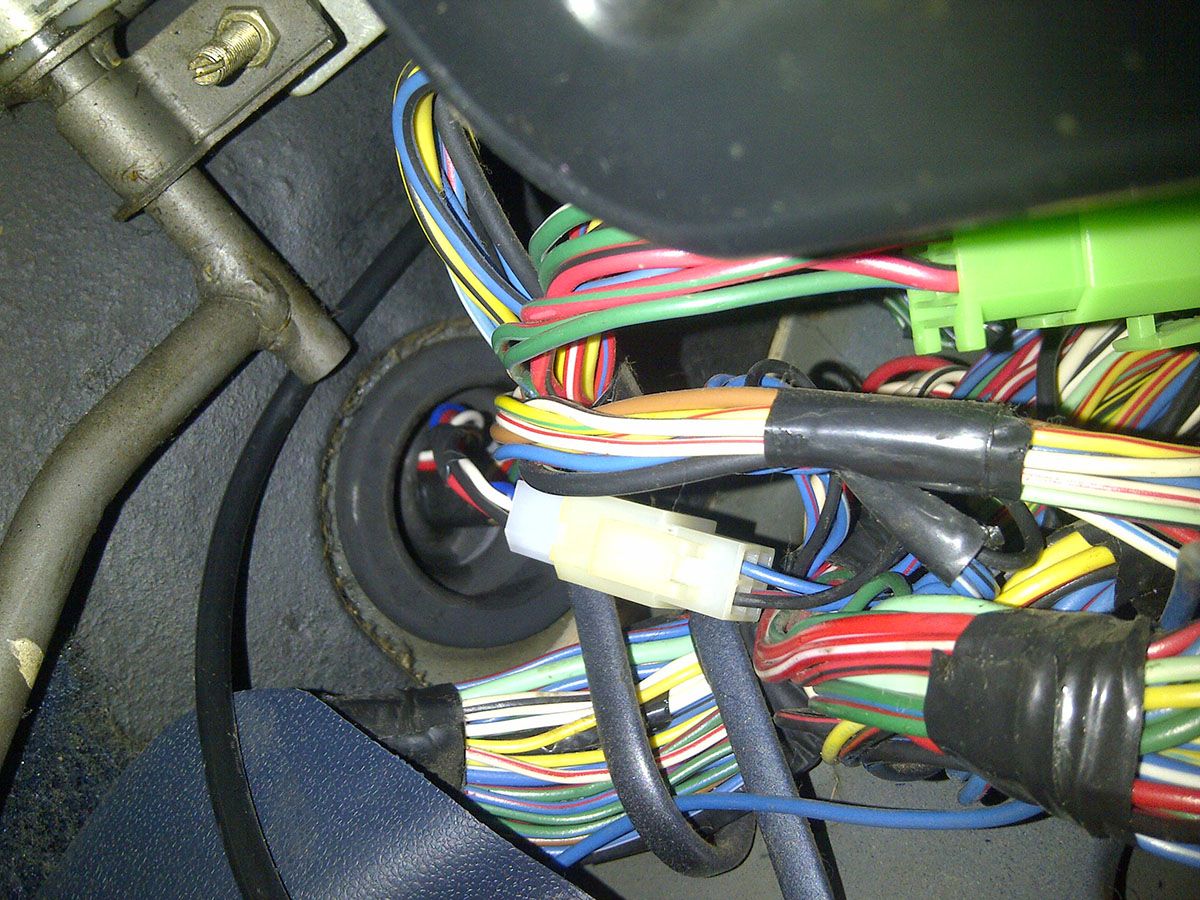
Here it is out in the engine bay, I just followed the main harness forward.
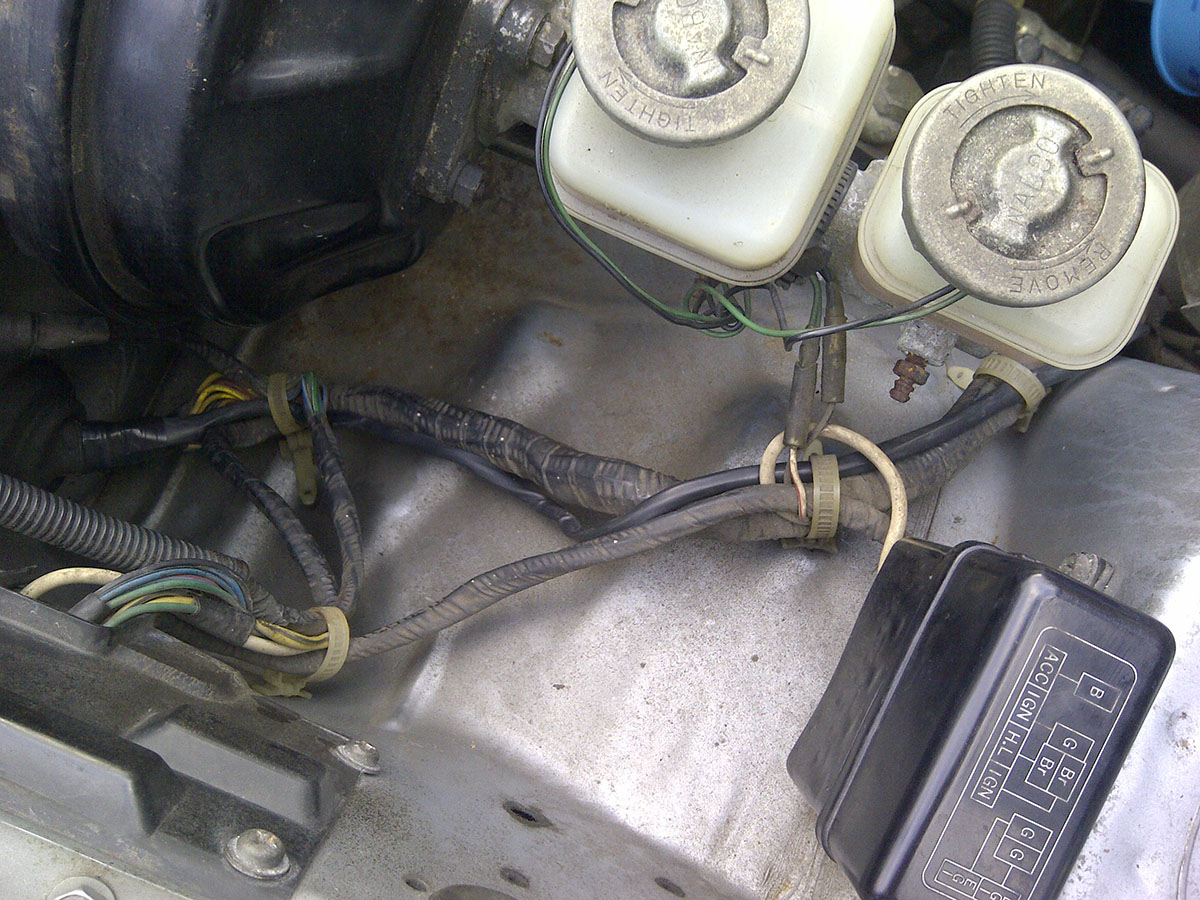
There were no holes through from the engine bay to the wheel arch, so I ran the wire through the side indicator grommet. It is then less than a foot away from the mirror. Pretty much the same route for the wiring on the other side.
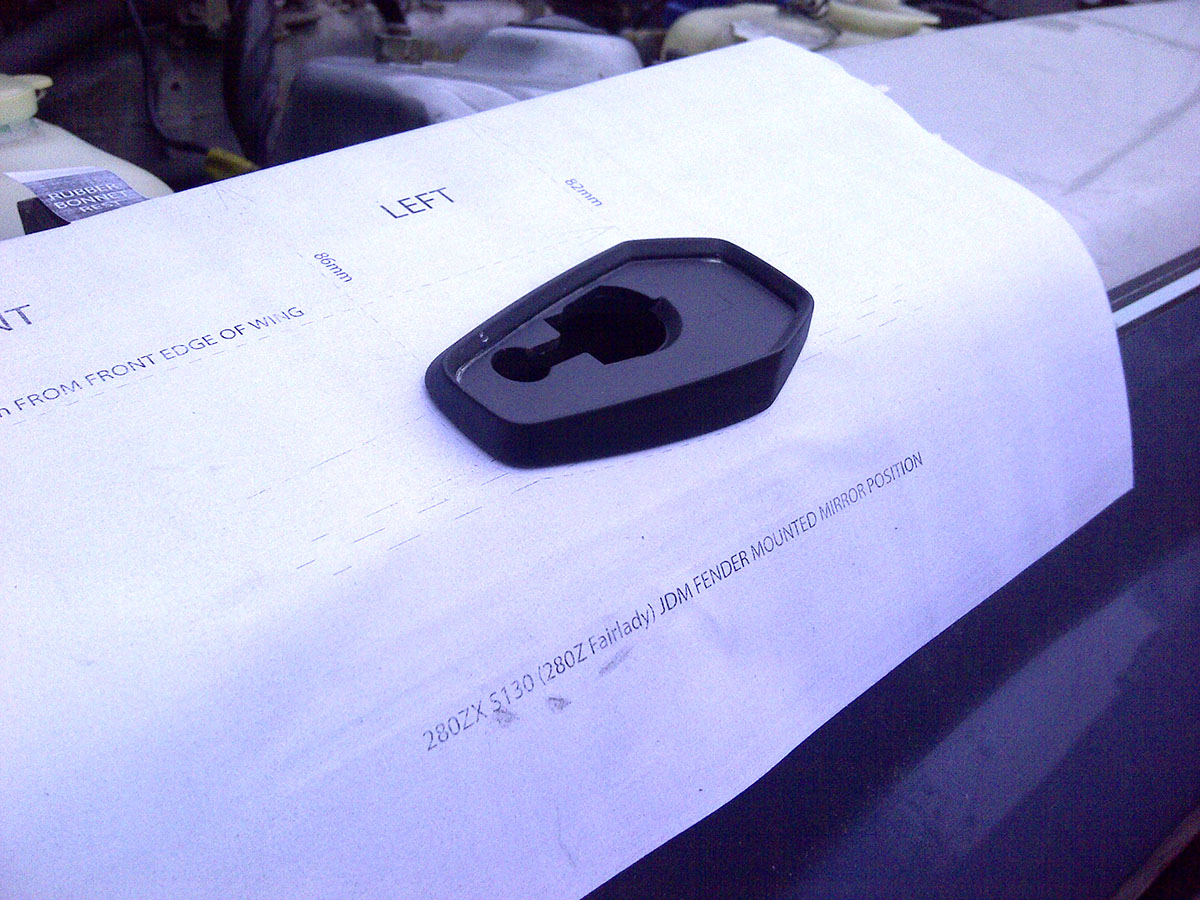
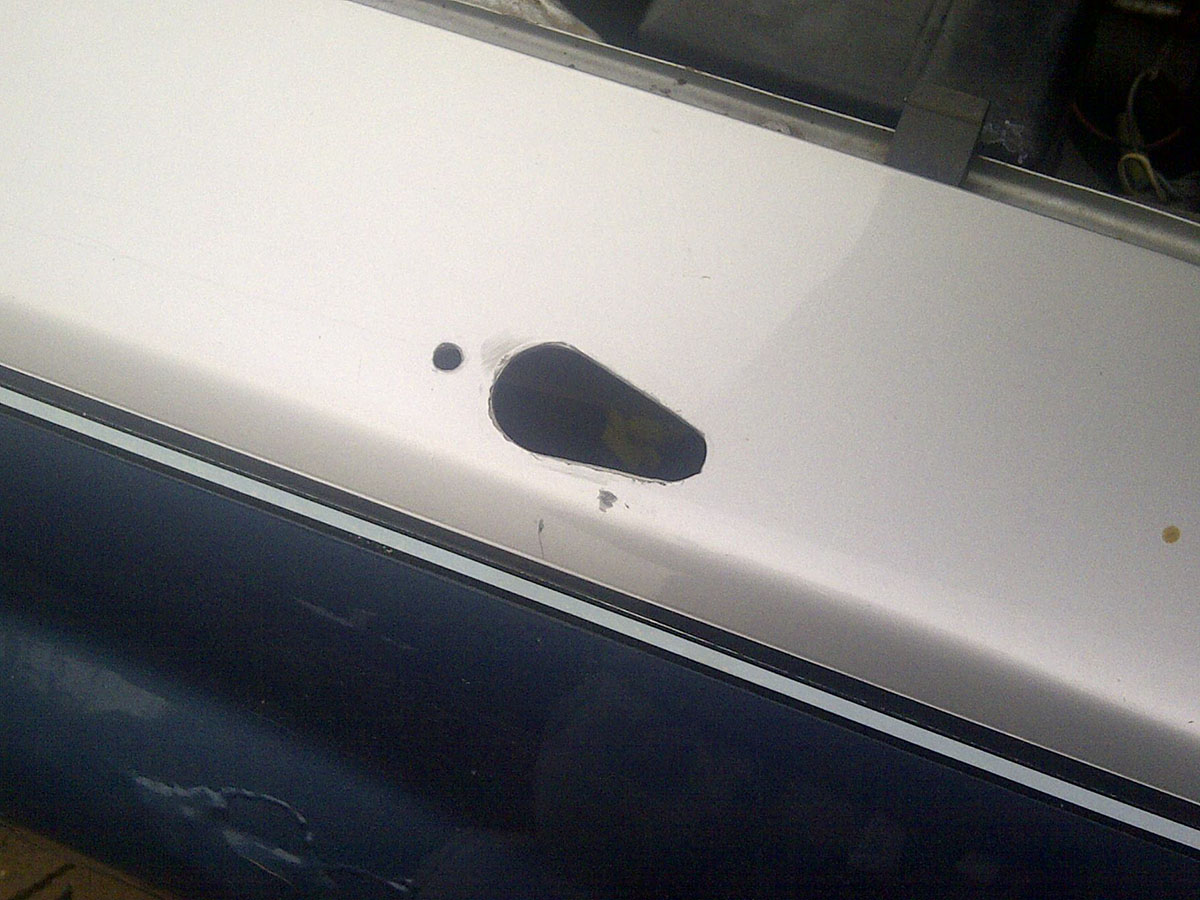
Right hand wing hole cutout and ready.
Looking good
I have primed the cut outs in the wing and it will get a load of wax too for final fit.
So I have now drilled both wings and run the wiring from under the dash to the wheel arches. Got to use my new crimper again too
, they are really good quality and only cost £12. Anyway, I ran out of daylight and heat shrink sleeving, so will need to finish tomorrow, if I get time and if I can pick up some more.
Here are some pics:
No turning back now
Phew! It fits to the shape of the wing.
I'm glad I took my time to get the template right otherwise there is no way it would have fitted neatly.
New connector just needs plugging in.
Connected up and through the bulkhead.
Here it is out in the engine bay, I just followed the main harness forward.
There were no holes through from the engine bay to the wheel arch, so I ran the wire through the side indicator grommet. It is then less than a foot away from the mirror. Pretty much the same route for the wiring on the other side.
Right hand wing hole cutout and ready.
Looking good
I have primed the cut outs in the wing and it will get a load of wax too for final fit.
Ped
Club Member
Got back onto the zed this afternoon after having to go out to Maplin to pick up 1m of heat shrink to finish off the wiring under thing wings. Then had to stop off at Halfords for a new battery for the Volvo. Its all the shuffling about of the cars, plus a bit of cold weather finally did for it.
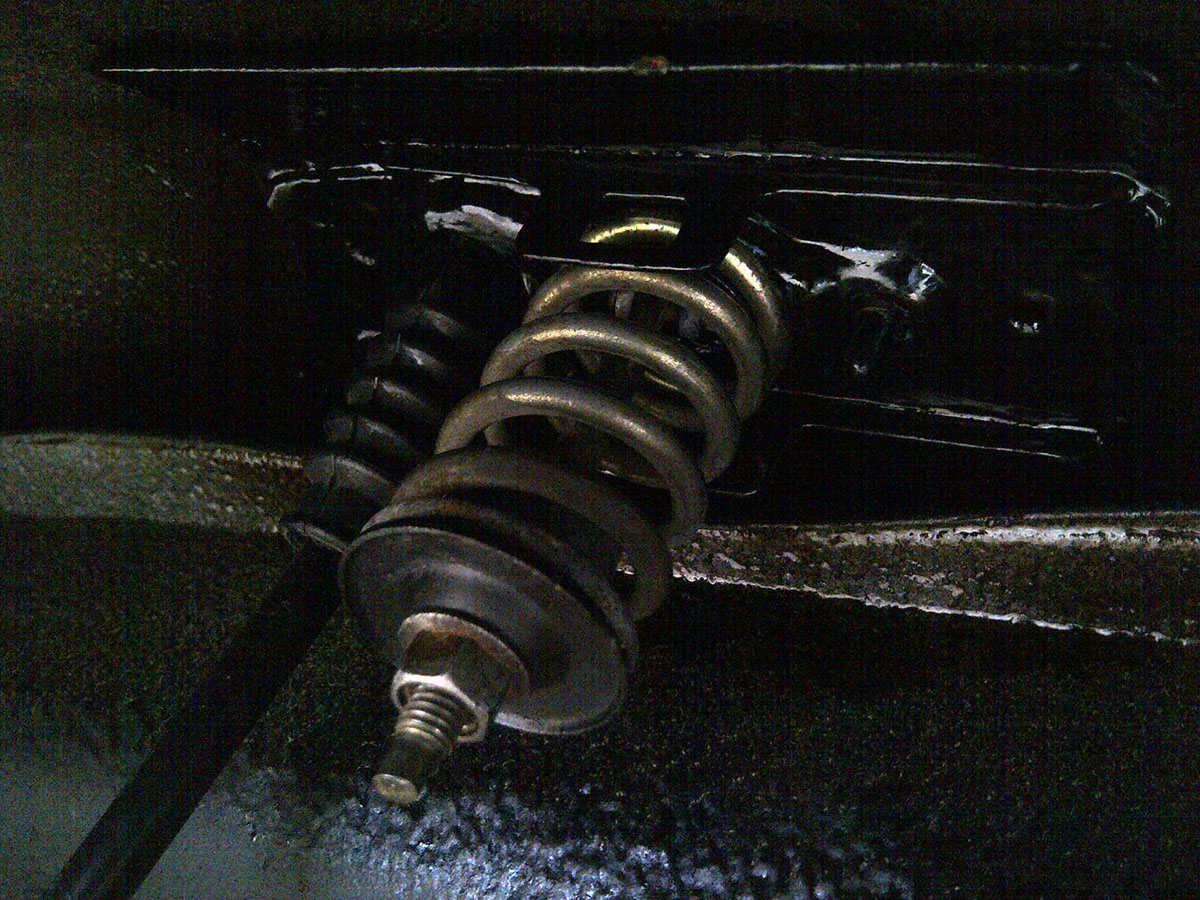
So… here is a shot of the underside with the base plate fitted. It would have been a lot easier to if I had another pair of hands when fitting this. Got a load of wax before and after. There is a plastic shroud around the spring which went on last. If you ever wondered why there was a curved edge on the inner wing area note metal around the base plate.
More heat shrink, crimping, connector blocks and the first side is done. Decided to use a the connector block I got from Japan under the wings, for future ease of removal. I taped up the connector pretty well, plus it gets protected by the inner wings. I don't drive it in the wet anyway.
On the right hand mirror I had to extend the wiring, its just how I got them. I was going to use the Red heat shrink butt join crimp thingys, but they did not arrive in the post in time and I was worried they would be too bulky to fit through the trim so… decided to solder them instead with heat shrink over the top (que another trip to Halfords for correct thinkness heat shrink tubing). Then the 4 wires were encased in heat shrink tubing from top to bottom.

By the time I did all that it was dark, so had to break out a lamp to put the inner wings and road wheel back on.
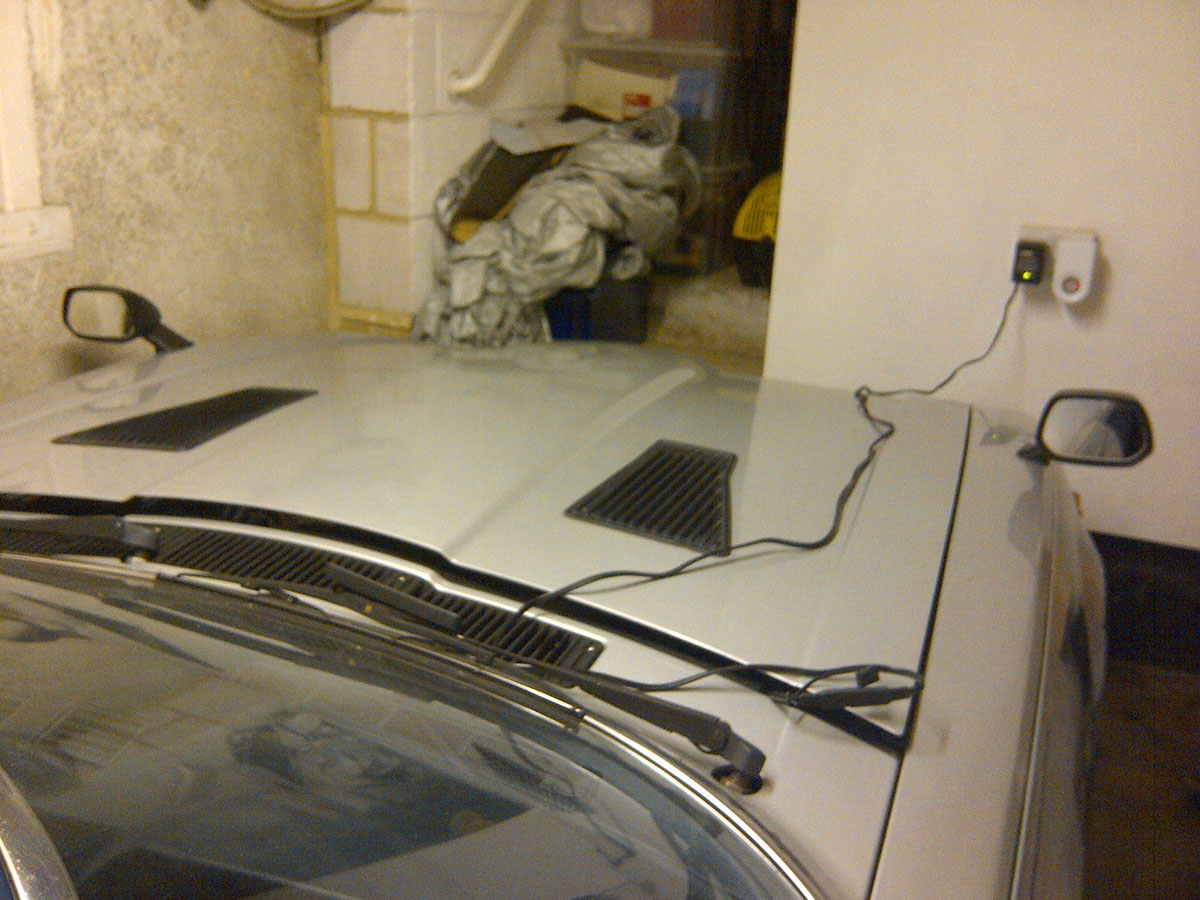
Here it is in the garage, will need to get some decent pics in daylight.
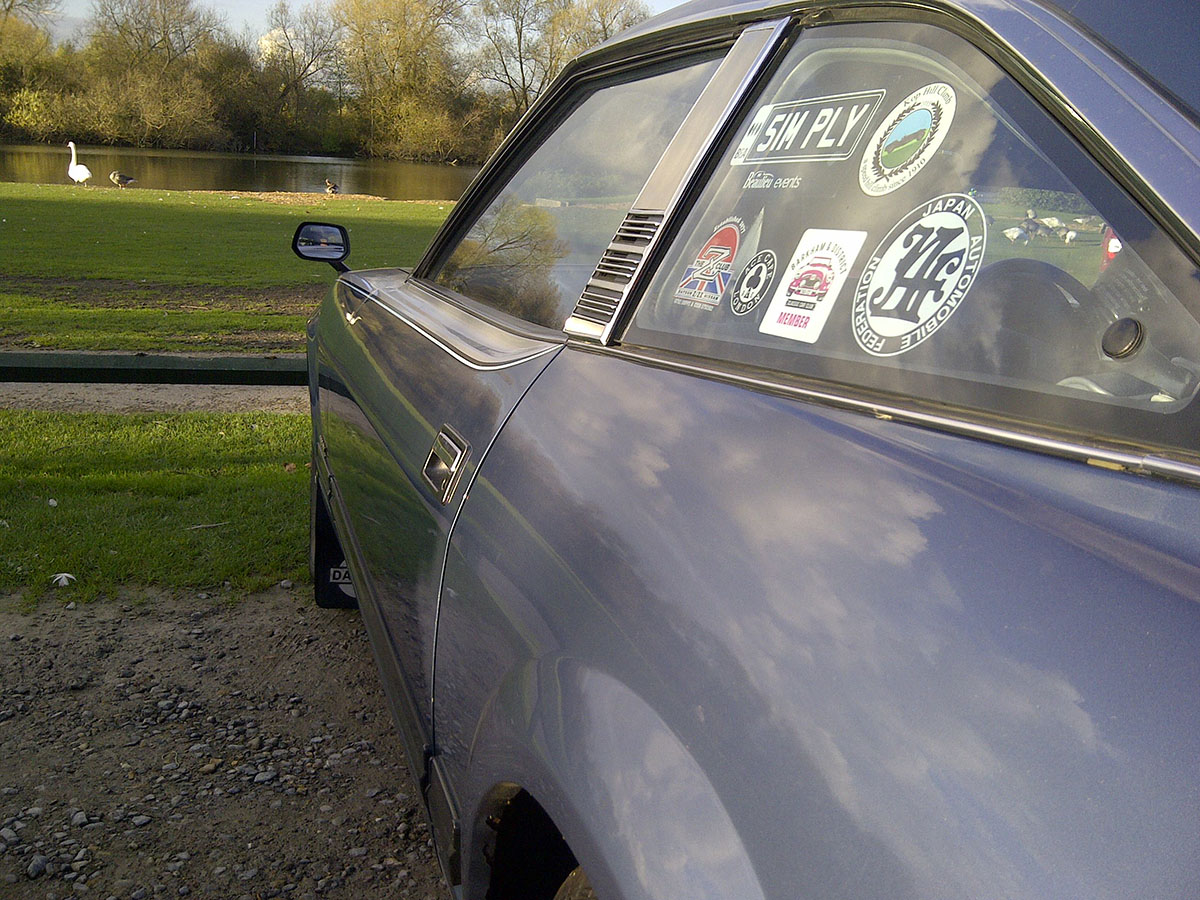
They work too!
And after all that I had to change the battery in the Volvo and of course it started to rain.
So… here is a shot of the underside with the base plate fitted. It would have been a lot easier to if I had another pair of hands when fitting this. Got a load of wax before and after. There is a plastic shroud around the spring which went on last. If you ever wondered why there was a curved edge on the inner wing area note metal around the base plate.
More heat shrink, crimping, connector blocks and the first side is done. Decided to use a the connector block I got from Japan under the wings, for future ease of removal. I taped up the connector pretty well, plus it gets protected by the inner wings. I don't drive it in the wet anyway.
On the right hand mirror I had to extend the wiring, its just how I got them. I was going to use the Red heat shrink butt join crimp thingys, but they did not arrive in the post in time and I was worried they would be too bulky to fit through the trim so… decided to solder them instead with heat shrink over the top (que another trip to Halfords for correct thinkness heat shrink tubing). Then the 4 wires were encased in heat shrink tubing from top to bottom.
By the time I did all that it was dark, so had to break out a lamp to put the inner wings and road wheel back on.
Here it is in the garage, will need to get some decent pics in daylight.
They work too!
And after all that I had to change the battery in the Volvo and of course it started to rain.
Ped
Club Member
What are you going to do about the door mirrors and holes in the door?
Huw
There is only one door mirror (fitted from new), which is part of the reason I did this project. I have not even got round to taking it off yet. Initially I am hoping to fill the holes with rubber grommets, but longer term they will get removed and painted up. I still want to get the bodywork sorted out, especially the rust bubble on the front wing.
Well done Ped.
A great job 'carried through' and I can tell you are proud of yourself - so you should be.
A great job 'carried through' and I can tell you are proud of yourself - so you should be.
Ped
Club Member
Nice work Ped they look great you must be well pleased
Derrick
Must admit I am chuffed with the outcome. Have learned quite a bit doing it too. Writing it up on here has kept me motivated, and I hope it is useful for someone in the future.
Ped
Club Member

(2 points for spotting the above TV reference)
Here are the templates for anyone else who wants to do the same conversion.
REMEMBER TO PRINT PDFs OUT AT ACTUAL SIZE
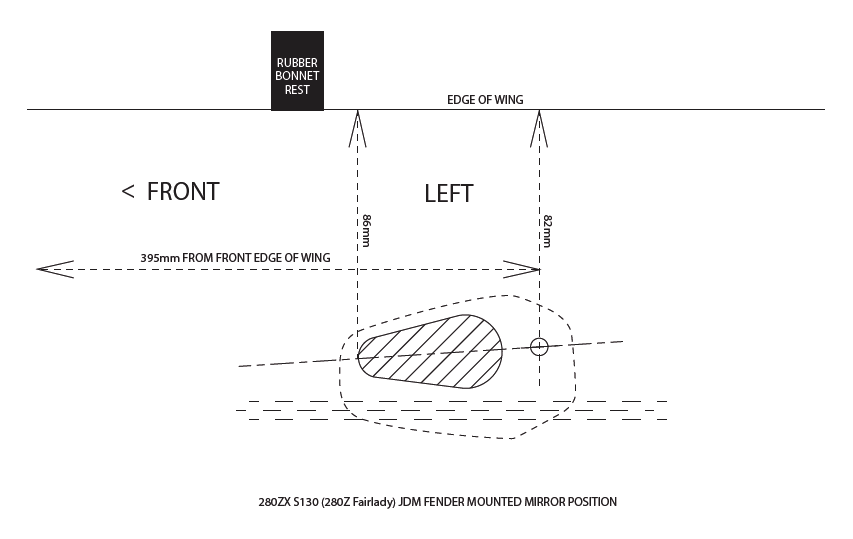
Hole mount position template (pdf)
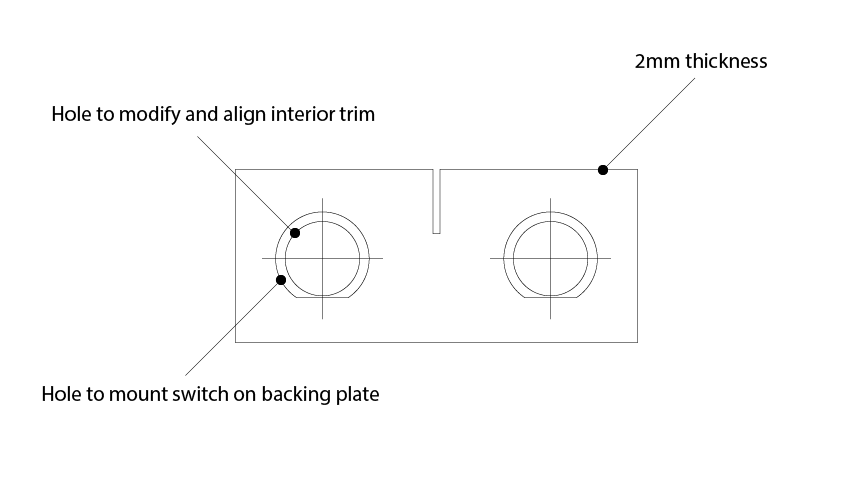
Centre console trim backing plate template (pdf)
Link to connector block and cable spec.
Enjoy!
Last edited by a moderator:
Ped
Club Member
Update on broken link above: Link to connector block and cable spec.