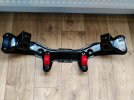
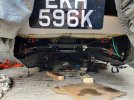
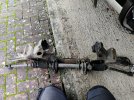
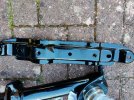
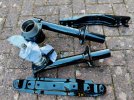
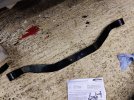
'For my alternator, there is a plug that in the above photo, you can see there is a green wire and a red wire. The green links to the yellow for excitation and the red I've through-crimped and wired in to the battery.
This particular connection is the sense wire that senses the voltage at the battery. I'm concerned that the seller of the alternator (Zcardepot) instructed to attach this red wire to the insulated generating post of the alternator. Which would pick up a higher voltage, fooling the internal voltage regulator in to thinking the battery is charged and therefore, not charging the battery.
(I will point out that there is an argument as to the resistance of the cable used would negate the above mentioned scenario)'
--------------------------------------------------------------------------------------------------------------------------------------------------------------
I think that connection will be fine - I did that on my blue 240 when I modified most of the wiring. It has not given a problem and has done a rally since.
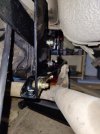
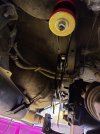
The alternator sense wire normally connects to the main battery lead at the starter solenoid. Ideally it should be at the battery but in practical terms the volt-drop in the cable to the starter would be negligible so that is a practical place to connect it and sense the battery voltage. On a standard car the battery power is fed from there into the cabin to the fusebox etc and then back out to the alternator. There may be a noticeable volt-drop in that run hence the starter sense location otherwise the alternator would overcharge.
On your car with your new second charge cable going direct from alternator to starter solenoid the volt-drop (from the battery) sensed by the alternator over the heavy cable will be minimal. I had a similar configuration.
Think of the sense voltage as the voltage at the alternator when the motor is not running. If you think of it as the voltage when the motor is running (and therefore charging) the standard 'set-up' wouldn't work either because at the battery (starter solenoid connection) it would be about 14v.
This particular connection is the sense wire that senses the voltage at the battery. I'm concerned that the seller of the alternator (Zcardepot) instructed to attach this red wire to the insulated generating post of the alternator. Which would pick up a higher voltage, fooling the internal voltage regulator in to thinking the battery is charged and therefore, not charging the battery.
(I will point out that there is an argument as to the resistance of the cable used would negate the above mentioned scenario)'
--------------------------------------------------------------------------------------------------------------------------------------------------------------
I think that connection will be fine - I did that on my blue 240 when I modified most of the wiring. It has not given a problem and has done a rally since.
The alternator sense wire normally connects to the main battery lead at the starter solenoid. Ideally it should be at the battery but in practical terms the volt-drop in the cable to the starter would be negligible so that is a practical place to connect it and sense the battery voltage. On a standard car the battery power is fed from there into the cabin to the fusebox etc and then back out to the alternator. There may be a noticeable volt-drop in that run hence the starter sense location otherwise the alternator would overcharge.
On your car with your new second charge cable going direct from alternator to starter solenoid the volt-drop (from the battery) sensed by the alternator over the heavy cable will be minimal. I had a similar configuration.
Think of the sense voltage as the voltage at the alternator when the motor is not running. If you think of it as the voltage when the motor is running (and therefore charging) the standard 'set-up' wouldn't work either because at the battery (starter solenoid connection) it would be about 14v.
Last edited:
")