GTR-240Z
Well-Known Forum User
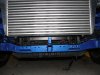
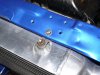
John here is the link to the radiator we talked about at North Weald may be useful in your conversion since your need the inlet/outlet on the same side like an RB.
Griffin Thermal Products 1-28182-X - Griffin Aluminum Circle Track Radiators - Overview - SummitRacing.com
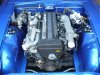
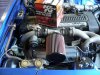
How much power are you hoping to get out of the 1JZ once finished?
Griffin Thermal Products 1-28182-X - Griffin Aluminum Circle Track Radiators - Overview - SummitRacing.com
How much power are you hoping to get out of the 1JZ once finished?
")