-
The Z Club relies on the support of it's paid members - join the club or renew your membership here.
You are using an out of date browser. It may not display this or other websites correctly.
You should upgrade or use an alternative browser.
You should upgrade or use an alternative browser.
I'm going 1JZ
- Thread starter Russell
- Start date
Russell
Club Member
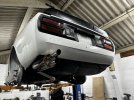
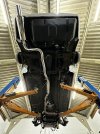
Exhaust done and really happy with the sound.
Took a couple of days to get exactly right as the factory mounts were all long gone.
Here are some of the fabricated brackets.
This one is right at the back of the backbox -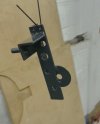
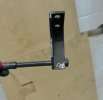
This one a bit further forward -
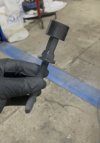
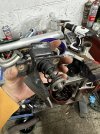
This one is a modified gearbox mount bolt -
Here are a few pics of the exhaust in its final location. Wideband installed ready to wire up, heat wrap on the down pipe.
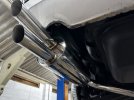
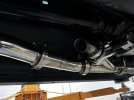
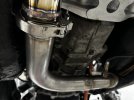
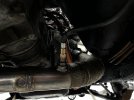
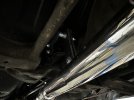
Took a couple of days to get exactly right as the factory mounts were all long gone.
Here are some of the fabricated brackets.
This one is right at the back of the backbox -

This one a bit further forward -

This one is a modified gearbox mount bolt -

Here are a few pics of the exhaust in its final location. Wideband installed ready to wire up, heat wrap on the down pipe.


Russell
Club Member
It is, only for leaving traffic lights and driving through small villages of course.Is that a valved unsilenced outlet Russell?
Russell
Club Member
Russell
Club Member
Refurbished the inspection light. It was pretty crusty and although it didn’t stand out before, now the engine bay is nice it looked terrible.
I took it apart, sand blasted and got it coated.
Salvaged the original wire inside as well as the lens. Even the original switch cleaned up.
Would have taken a before photo if I know it was going to come out this well!
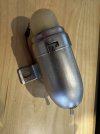
I took it apart, sand blasted and got it coated.
Salvaged the original wire inside as well as the lens. Even the original switch cleaned up.
Would have taken a before photo if I know it was going to come out this well!

Russell
Club Member
Today I got the headlights and indicators working on the front then tidied the wiring up.
Started putting the interior back together starting with the headlining and some vinyl round the edges.
Then to the back to put some panels back.
Takes a lot longer to clean 7 years of grime off than it does to actually fit them!
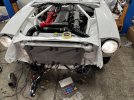
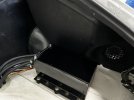
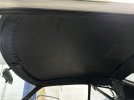
Started putting the interior back together starting with the headlining and some vinyl round the edges.
Then to the back to put some panels back.
Takes a lot longer to clean 7 years of grime off than it does to actually fit them!


Russell
Club Member
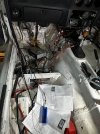
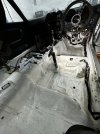
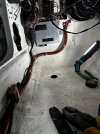
Started back at the bottom again. Only had a couple of hours this evening.
Bit of sound deadening, rolled on by the boy (who has featured a few times and his rate of growth shows how long it’s taken us to build this thing)
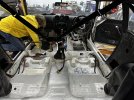
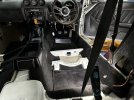
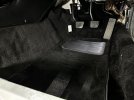
Started cutting and gluing the underlay.
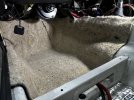
Laid some of the carpet parts out so I can get an idea of the final look.
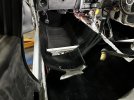
Bit of sound deadening, rolled on by the boy (who has featured a few times and his rate of growth shows how long it’s taken us to build this thing)

Started cutting and gluing the underlay.

Laid some of the carpet parts out so I can get an idea of the final look.

Russell
Club Member
I am expecting to have it back on the road in a matter of days, depending how much evening time I can give it.Do you think you will have it on the road this year
The only things stopping me driving it right now are;
- Air filter - Should have that done in a couple of evenings.
- Panel modified for some relays for the lights and fans (changed my mind on initial design).
- Bolt the front panels on.
- Finish the carpet - This is cosmetic though and could just bolt the seat in and go
I need to come up with a decent plan to wash it though. The doors dont really fit so spraying it with a hose will result in water getting inside. It also has 7 years of various dust, debri, metal shavings etc. all over it.
Russell
Club Member
Russell
Club Member
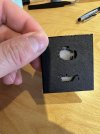
Forgot to get the bonnet catch plated with the other side and inspection light.
Only realised when we put the bonnet on and the catch wasn’t on it.
Found it in a box and looks like I dragged it out of a swamp….. great!….
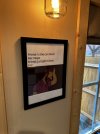
Got tagged in this pic so printed out and framed next to my desk to keep the motivation up!
Only realised when we put the bonnet on and the catch wasn’t on it.
Found it in a box and looks like I dragged it out of a swamp….. great!….

Got tagged in this pic so printed out and framed next to my desk to keep the motivation up!

MCBladeRun
Club Member
God I love that Simpsons episode, I've got a video of someone cosplaying as Scorpio:Forgot to get the bonnet catch plated with the other side and inspection light.
Only realised when we put the bonnet on and the catch wasn’t on it.
Found it in a box and looks like I dragged it out of a swamp….. great!….
View attachment 56943
Got tagged in this pic so printed out and framed next to my desk to keep the motivation up!
View attachment 56944
https://www.reddit.com/r/BeAmazed/comments/11rtk4e
Don't know if the link will work
Russell
Club Member
It did, great costume!God I love that Simpsons episode, I've got a video of someone cosplaying as Scorpio:
https://www.reddit.com/r/BeAmazed/comments/11rtk4e
Don't know if the link will work
Russell
Club Member
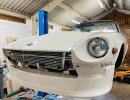
I can’t take the credit for anything really nice on this car. Other than 3D printed stuff and electronics Iain is the brains of the operation.
He is physically unable to do something unless it’s perfect.
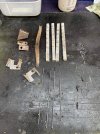
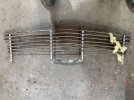
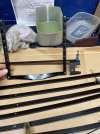
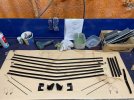
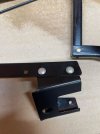
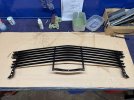
Here is a visible example. Most of the really cool bits on the car are hidden or simply not noticeable.
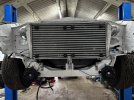
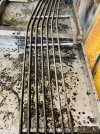
The grill was a little bit scabby but a quick wire wheel and rattle can over would have “been fine”
Unless you give it to Iain who proceeds to paint strip, completely strip down, straighten it out, sand blast it, whatever else he did and now it’s good as new.


Russell
Club Member
Here is the man and legend himself! Tirelessly finishing the car off while I’m away for the weekend.
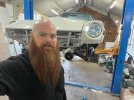
Waxoiling everything on the outside
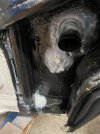
ACF50 everything on the inside. The inspection panel made many years ago serving its purpose allowing access to the inside of the panel and down the air tubes.
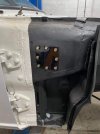
Adding some generic eBay seal so the wing doesn’t rub.
Keeping the weather out is pointless as the doors don’t actually fit (the originals were too far gone when I painted it last).
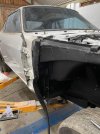
Bolt the wings and bonnet on and get them as aligned as possible.
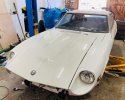
Then realise that I put the wiper linkage in wrong so it goes backwards so looking forward to taking that apart again!

Waxoiling everything on the outside

ACF50 everything on the inside. The inspection panel made many years ago serving its purpose allowing access to the inside of the panel and down the air tubes.

Adding some generic eBay seal so the wing doesn’t rub.
Keeping the weather out is pointless as the doors don’t actually fit (the originals were too far gone when I painted it last).

Bolt the wings and bonnet on and get them as aligned as possible.

Then realise that I put the wiper linkage in wrong so it goes backwards so looking forward to taking that apart again!

