Sunbaked '76 Cali 280z

Robotsan

Club Member
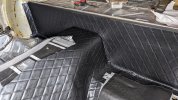
Also finally commited to glueing some vinyl down today!

But I did realise I shouldn't glue the whole trans tunnel trim down yet as I've got to feed the wire for the seatbelt back under it. So all I've done is glue the excess flaps of the trans tunnel trim to the riser, so that I could then glue the entire riser trim down on top of that.

Pretty chuffed with how it looks, considering I've never done anything like this before.
PXL_20230101_174608351.jpg

I test-fitted the plastic trim that goes on top of the riser too - nice snug fit!
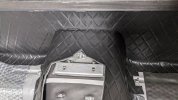
PXL_20230101_175713950.jpg
 

Kieronpollock

Club Member
Excellent job! I found a hair dryer and the rollers used to put down the sound deadening are up great tools to have on hand to get the vinyl properly stretched and creases removed. Enjoy the strut towers…. A complete bugger!
 

Robotsan

Club Member
Excellent job! I found a hair dryer and the rollers used to put down the sound deadening are up great tools to have on hand to get the vinyl properly stretched and creases removed. Enjoy the strut towers…. A complete bugger!

Thanks Kieron :) I've already decided I'm taking it to an auto upholsterers for the strut towers and wheel wells! I want those bits to look 100%.

I'm finding creases aren't really a problem so far as I've backed the vinyl with scrim foam, so it's quite thick and wants to lie flat. I'm probably not going to glue it down absolutely everywhere - as in push it down in to every undulation on the tunnel - as I think it looks better when pulled kind of taut, if that makes sense. So it might be a tiny bit 'baggy' in some places if that makes sense.
 

Robotsan

Club Member
Got a full day on the car today for once! So decided to work on something slightly frivolous which gets me no nearer to getting the car on the road .. the rear view mirror.

Managed to get the mirror glass out by heating the assembly in hot water and inserting a plastic tool along the top edge. Still hard work and I did scratch the casing a bit still. Thanks @Geoff-R for the tips.

I had already sanded it down - the California sun had turned most of the textured finish to dust, so just had to keep scrubbing it until it stopped falling off.

Then I masked it ready for plastic primer. I considered just spraying it with black paint, but the surface had too many imperfections which would end up showing through the paint.. So instead I've gone for Upol Plastx to try and recreate the textured finish. Masked around the smooth bezel as I want to keep that smooth.

Will apply a coat of satin black paint over the entire casing after this, so it should hopefully blend the textured bit with the rest..

PXL_20230107_184939523.jpg

Gave it a couple of coats of primer and left it overnight. Then practised the Upol on a few plastic tubs this morning. Found the best results by giving it one light coat from around 40cm away, waiting 5 min, then giving it a 2nd coat from around 80cm away - this gives it good coverage, and the 2nd coat from distance sprays a finer texture.

Fairly pleased with it so far. Maybe a bit too course but it'll do. Will leave it to dry overnight I think and then apply the black paint tomorrow.

PXL_20230108_131938491.jpg


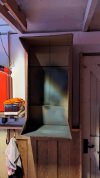
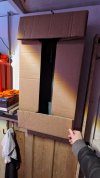
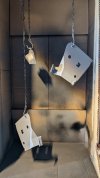
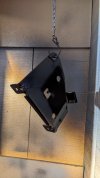
I also made a little wall mounted spray booth in the garage for spraying these little bits. It even folds up! 😂

PXL_20230108_120902581.jpg

PXL_20230108_120916210.jpg
 

jonbills

Membership Secretary
Site Administrator
Got a full day on the car today for once! So decided to work on something slightly frivolous which gets me no nearer to getting the car on the road .. the rear view mirror.

Managed to get the mirror glass out by heating the assembly in hot water and inserting a plastic tool along the top edge. Still hard work and I did scratch the casing a bit still. Thanks @Geoff-R for the tips.

I had already sanded it down - the California sun had turned most of the textured finish to dust, so just had to keep scrubbing it until it stopped falling off.

Then I masked it ready for plastic primer. I considered just spraying it with black paint, but the surface had too many imperfections which would end up showing through the paint.. So instead I've gone for Upol Plastx to try and recreate the textured finish. Masked around the smooth bezel as I want to keep that smooth.

Will apply a coat of satin black paint over the entire casing after this, so it should hopefully blend the textured bit with the rest..

View attachment 55344

Gave it a couple of coats of primer and left it overnight. Then practised the Upol on a few plastic tubs this morning. Found the best results by giving it one light coat from around 40cm away, waiting 5 min, then giving it a 2nd coat from around 80cm away - this gives it good coverage, and the 2nd coat from distance sprays a finer texture.

Fairly pleased with it so far. Maybe a bit too course but it'll do. Will leave it to dry overnight I think and then apply the black paint tomorrow.

View attachment 55345


I also made a little wall mounted spray booth in the garage for spraying these little bits. It even folds up! 😂

View attachment 55346

View attachment 55347
You're really cracking on 👍🏻
 

Robotsan

Club Member
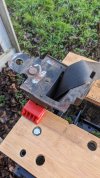
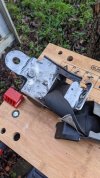
While I was in the painting mood though I did also have a go at refurbishing one of the seatbelt assemblies, as like most things near the floor they got rusty..

PXL_20230108_153056926.jpg

So quick scrub with the poly disc..
PXL_20230108_155448748.jpg

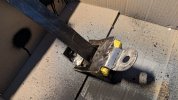
And then the tricky job of masking it all off.. including taping up a couple of foot of the seatbelt itself so that wouldn't get primer on. I've given it 2 coats of etch primer then will paint satin black tomorrow.

PXL_20230108_162730129.jpg
 

Robotsan

Club Member
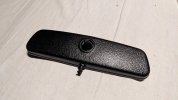
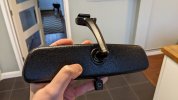
Hmm. Checked the mirror casing just now - it's had almost 24 hrs to dry (albeit in a cold slightly damp garage - not ideal!), But it's still tacky to the touch.

Looks good though. But I'm scared the Simoniz 'tough' satin black is not happy going directly over the Upol PlastX, and I might have to rip it off and start again 😢

PXL_20230109_180015976.jpg
 

Rushingphil

Club Member
Hmm. Checked the mirror casing just now - it's had almost 24 hrs to dry (albeit in a cold slightly damp garage - not ideal!), But it's still tacky to the touch.

Looks good though. But I'm scared the Simoniz 'tough' satin black is not happy going directly over the Upol PlastX, and I might have to rip it off and start again 😢

View attachment 55379

Just checked the TDS and it states a minimum of 20 deg.C for flashing off and drying. I'd be putting it in the airing cupboard :)
 

Robotsan

Club Member
Still tacky after being in a warm-ish room all night indoors. The same paint on the front of the casing (where I didn't spray the PlastX) is absolutely fine and actually was dry yesterday morning, so I'm guessing this is a reaction between the PlastX and the Simoniz satin black.

Contemplating either giving it a 2nd coat of the black paint (as maybe now it has a base coat a new top coat might dry on top?!) or trying a coat of lacquer (even though it says don't put lacquer on top on the Satin black can!).. but I can always strip it all off and try again if need be.

Maybe put a primer layer between the Plastx and the paint?
 

Rushingphil

Club Member
Not sure :conf2: I guess there is a possibility that the product has absorbed moisture and not flashing off properly.
I would leave it a bit longer before scrubbing it all off and redoing it...
 

Robotsan

Club Member
Not sure :conf2: I guess there is a possibility that the product has absorbed moisture and not flashing off properly.
I would leave it a bit longer before scrubbing it all off and redoing it...

Dayum. OK will leave it another day next to the radiator. Cheers!
 

Robotsan

Club Member
Result - gave it 10 min at 50°c in the oven and a bit more time on the radiator and it's dry.

Looks great and the previously corroded arm came out perfectly too!

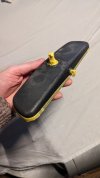
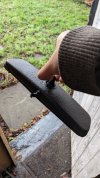
PXL_20230110_144837398.jpg

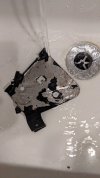
Thinking I should give the little glare dial a coat of lacquer to brighten it up to match the rest ..

PXL_20230110_144932543.jpg
 

Geoff-R

Club Member
I've had this happen before, usually in exactly the same conditions as you described, a cold, damp garage. It might seem a little rash but my advice would be remove the paint and start again. You can paint it in the garage then bring it in the house to dry. This time of year is a nightmare unless you have a nice warm heated garage when it comes to painting. I feel your pain.

I stand corrected, you've saved it. My wife would kill me if I started putting car parts in the oven :)
 

Robotsan

Club Member
I've had this happen before, usually in exactly the same conditions as you described, a cold, damp garage. It might seem a little rash but my advice would be remove the paint and start again. You can paint it in the garage then bring it in the house to dry. This time of year is a nightmare unless you have a nice warm heated garage when it comes to painting. I feel your pain.

I stand corrected, you've saved it. My wife would kill me if I started putting car parts in the oven :)

Thanks Geoff! Yeah it's weird because the same paint on the metal arm dried perfectly and quickly out in the garage. I'll bring in anything on plastic in the future, in case that's the issue.

PS. My girlfriend is at work, she'll never know mwahahahahaaa..
 

Robotsan

Club Member
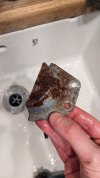
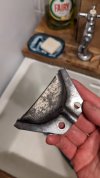
I've been working on all of the various seatbelt parts recently, putting my Bilt Hamber Deox-C to good use to de-rust bits seeing as I have the luxury of them not being attached to the car..

This plate from the boot covered what I think was an earth wire and was pretty rusty ..

PXL_20230110_172438207.jpg

Came up nicely after a night in the acid bath..

PXL_20230111_184621298.jpg

And after a bit of primer and silver paint it looks almost like new..

PXL_20230112_195415740.jpg


Also did the plates that go on top of the strut towers for the seat belts. The paint just slid off them..

PXL_20230110_172408037.jpg

Bit of etch primer..

PXL_20230112_155410251.jpg

Then nice shiny new paint..
PXL_20230112_200612966.jpg
 
Top