From Smoker to Sssssmokin’!

Rob Gaskin

Treasurer
Staff member
Site Administrator
Well if you gents are ever at Abby again, I expect to hear from you! You will be a mile or so from me and we’ll have to have a coffee / tea.

It was done at Silverstone when I attended a 350Z trackday.
 

AliK

Vehicle Dating Officer
Staff member
Club Member
After my exhausting videos :EXTRAlol:I found some fuelling issues - turned out to be one of the carb needles had come loose and fallen quite a bit - thankfully failed safe!

But chasing this rough idle / part throttle has me out of ideas except for the inlet / exhaust manifold.

BF3F98A6-2B67-40AE-9F8F-6E60168A86F0.jpeg
Set aside 3 hours, spent 6!!!! The trouble is, you never just do ONE job on these cars: now I have the manifold off, I can do XYZ and reach such and such!

The gasket was toast and disintegrated into dust in parts (this wasn’t one supplied by Sean but one I had bought from the late Mr F. which at the time didn’t feel like the best quality product but I knew very little about these gaskets up to that point).

So out came a felpro from my stash (I have 18 left - don’t ask!!!).

495D09EA-6E6D-4BBE-8C56-0F9A799B8431.jpeg

1514CACA-DDF3-4676-BF68-99CA8EEC4FA8.jpeg

I did a lot of cursing at the no.1 nut which can only be turned 1/6 at a time with a spanner or a socket at an angle, eating the corners. I couldn’t get the torque wrench on so it was old school “that’s tight enough”/ft.

80CCD9F8-B0F4-4749-952E-04E6B34233D5.jpeg


I did a little grinding to make room for the known tight stud (I had previously used a bolt to get over the issue), but then I had lost the stud I got out of the stash to use and was runing out of time so went back to the bolt after all :EXTRAlol:.:banghead:

6E5051DC-BF5D-44D9-A873-7E3C8A0F4F54.jpeg

Re-calibrated the mix nuts on the carbs as they didn’t both have the same position at the same jet heights when supplied by ZT and found that the rear piston wasn’t sitting square on the bridge either so cleaned up the base to make that work.

Also the choke was never balanced between the carbs so took quite a lot of care to get the bit you have to bend to within 0.2 of a mm between them - what a terrible design!! Whoever thought bending something for an adjustment was a great idea!?

MC needles at 1.2mm jet setting and she fired up perfectly. But I only had enough time to put it into the garage before putting kids to sleep and joining my Zoom online course :(.

.
 

AliK

Vehicle Dating Officer
Staff member
Club Member
An easy win of the day yesterday.

Been too busy to deal with the Z of late. I had to pull her out of the garage to get to some tools and I was looking at the doors not quite shutting flush. When I bought the car, I saw this and just assumed it was simple hinge adjustments, but then some more experienced members told me someone must have done a dog leg / rear panel replacement and not welded it straight, so I gave up thinking about it.

I had one of those "I wonder" moments and just couldn't help myself. Within 10 mins and with a screwdriver to adjust the door catches, I have the passenger side looking factory good and the driver side 95% perfect. The next 5% involves taking the door off and replacing the worn top hinge that allows vertical movement. 1.5mm at the hinge makes a big difference at the back / bottom of the door.

upload_2021-9-10_15-35-59.png
 

Farmer42

Club Member
Interesting that you are using MC needles in the carbs. How do they run compared to other needles you have tried (i have lost track of what you have tried so far)?

I have been having issues lately with rough idling and bogging down on the top end revs. I initially thought it was needles and I have tried some DX needles and just ordered some TS needles (I'm catching up with you!!). However I subsequently found that it was this new E10 fuel that I had mistakenly put in the tank. Drained that and put some decent stuff in and it ran loads better although its running lean and a bit lumpy on idle.

The originals were SM but the guy at the Dyno suggested DX to give me more BHP at top end and it would accelerate smoother. I found they ran lean up to about 2500-300o revs then kicked in and pulled like a rocket from there. The TS needles should be a little richer all through the range according to the SU charts but match the DX needles from around 2500 revs . The MC needles seem to show an even leaner reading at idle but compare to DX at top end. It's quite frustrating trying to get the right balance.
 
  • Like
Reactions: Huw

AliK

Vehicle Dating Officer
Staff member
Club Member
Interesting that you are using MC needles in the carbs. How do they run compared to other needles you have tried (i have lost track of what you have tried so far)?

I have been having issues lately with rough idling and bogging down on the top end revs. I initially thought it was needles and I have tried some DX needles and just ordered some TS needles (I'm catching up with you!!). However I subsequently found that it was this new E10 fuel that I had mistakenly put in the tank. Drained that and put some decent stuff in and it ran loads better although its running lean and a bit lumpy on idle.

The originals were SM but the guy at the Dyno suggested DX to give me more BHP at top end and it would accelerate smoother. I found they ran lean up to about 2500-300o revs then kicked in and pulled like a rocket from there. The TS needles should be a little richer all through the range according to the SU charts but match the DX needles from around 2500 revs . The MC needles seem to show an even leaner reading at idle but compare to DX at top end. It's quite frustrating trying to get the right balance.

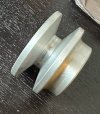
This just shows I need to update my other thread on carbs! ;)

I'm not sure my needle selection would work the same on your engine as I think yours is stock - right? On my stock L26, I found the SMs worked very well. But on my L28, the MCs set up a little richer are nearly ideal except for a lean idle. I will soon be playing with different manifold to eliminate the torque holes and will at that point pick up the needlework again. Being down with COVID for 3 weeks lost me all the sunny days I had planned for some experimentation.

Also the other difference is that mine is idling at 1000RPM which uses a different part of the needle to your car. Have you considered bravely and very gingerly polishing the first two stages on your needles? I've been sorely tempted! ;)
 
  • Like
Reactions: Huw

Farmer42

Club Member
Of course, I forgot you had a L28. Yes, mine is stock including inlet & exhaust manifolds.

Polishing very small needles with my eyesight is going a bit too far for me. Now that I have found the fuel issue, I may go back to SM as it did run ok before I used the E10. The Dyno guy planted a seed of more BHP so naturally I had to give it a go but I would rather it ran properly and not have to stop to fill up every 5 mins! I will try the TS first out of curiosity.
 

AliK

Vehicle Dating Officer
Staff member
Club Member
Never being quite happy enough with the 70mm pulley on the ATi damper I had to improve the cooling with 2 electric fans in tandem with the mechanical fan that I do like having. The sensing circuit using PWM works a treat and ramps up / down the fans continuously depending on water temp. The cockpit switch allows me to set it to sensing mode (10-87% duty cycle), off or fully on I.e. 100% duty cycle So far so good.

IMG_2484.jpeg

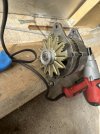
Next, I hated the alternator not spinning fast enough even with a 63mm pulley (stock is 70 or 75mm I think).

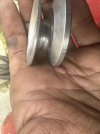
So I set about making the smallest possible pulley I could put onto the alternator.

I started with a 47mm blank from simply bearings.

881a7c89-96af-4294-8994-6d20a7d52350.jpeg

The key issues are to carve out enough material to allow the spindle nut to sit on the spindle flush and to make the rear of the pulley concave enough to accommodate the bulge in the alternator fan so that it sits flush enough to not have alignment issues with the water pump and crank pulleys.

First attempt - I may have removed a little too much material :eek:

IMG_2479.jpeg
It fell apart as soon as I put the smallest amount of torque onto it.

Second attempt was a success but I had to sacrifice using the serrated washer between the alt nut and the pulley.

IMG_2482.jpeg

I used the jam jar opener to hold the pulley while impact wrenching the nut in place.

The adjustment on the alternator bracket is now maxed out! Will need to order a new belt but also will go for a cogged SPA belt next.

Now I have a 70/47 or 1: 1.5 ratio. With an idle of 1k rpm I now have 13.6v at the battery and with lights full on, interior fan full on and radiator fans set to full, it drops to 12.8v. Not ideal but not discharging!

Anything above idle gives me a steadfast 13.8v. At 4k rpm I see 14v dead. Even with all fans on full and the lights on.

I’m not sure if my alternator is somehow defective and is supposed to give 14.7v. But at least now I have charging rather than discharging at idle.

I planned to make 2 pulleys (the second for Mark Woodrow who has the same damper and same problem) but ran out of time, my neighbour’s goodwill (using his lathe for 3 hours) and also figured I should try mine first to test its long term reliability, before killing Mark’s super expensive engine!

So wise ones - does anyone’s 280zx / Bosch reman alternator produce over 14v?

Ps. I did have mine rewound for 90A peak output and earlier generation by an electrics company that deal with London busses, but I can’t be sure they didn’t do something to it to make it produce below 14v or if this is just normal for our cars. It did come back a couple of KGs heavier though!

Edit: just measured at the alternator terminals and at 1.2k rpm I get 14.2v versus 13.8 at the battery and 14.5v @ 2k rpm. Time to upgrade the cables from the alternator!
 
Last edited:

Farmer42

Club Member
And the tinkering resumes with a vengeance!!😂

Just looking back at a previous post about carb trumpets and the difference in size on the Merlin ones. Don't forget that the Hitachi carbs are slightly smaller than HS6 as the British SU is imperial sizes and the Hitachi's are metric. The Merlin trumpets are made for imperial and fit perfectly on my HS6.
 

AliK

Vehicle Dating Officer
Staff member
Club Member
To bring the thread up to date:

Installed the 4 row Aluminium rad back in October. It was a cheapo eBay job but as far as I could see the expensive ones are exactly the same but with a brand stamped on them.

This is what it looks like next to the stock 2 row rad.

IMG_3143.jpeg

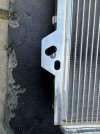
The install was easy minus modifying a couple of holes to align with my rad panel.

IMG_3147.jpeg


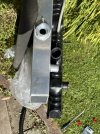
Oh and the fan shroud mounts are in the wrong place so I had to modify that too!

IMG_3148.jpeg

Next I need to make a bracket to mount the electric fans at the front again.

IMG_3152.jpeg

With just the mech fan temps are way down and the car is just A LOT happier. Strangely, because the rad is taking so much more heat out, even the fuel rails are noticeably cooler and the carb tune massively more stable in all conditions.


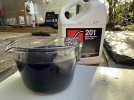
Cold but dry day today, so I decided a good 1 hour job (took 2.5) would be to change the gearbox oil to Swepco. Just before lockdown I changed to MT90 and to be frank the gear change became worse.

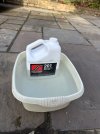
I started with warming up the Swepco in a tub of tap hot water - which was a great idea as the gear oil is super viscous, especially on a sub 6°C day!

IMG_3975.jpeg


In the meanwhile I warmed up the gearbox in a frightening way. Danger, is my middle name! 2nd gear and around 1500rpm. I worked through all the gears including reverse for about 10 mins. You could feel the gearbox being warm to the touch - well, a shed load warmer than 6°c.


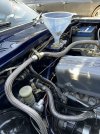
My funnel and hose method of last time worked well again, but boy was the swepco slow to pour through it!

IMG_3977.jpeg
Here it is at the gearbox end
IMG_3981.jpeg

While the fluid specs say 1.5L for earlier cars and 1.75L for later ones, mine took just over 2L before the dripping out started. I suspect it’s because I had the car 2.5° tilted up (measured with iPhone spirit level).

I had to work hard to ensure my wife wasn’t going to find blue spots on the jug :eek: that stuff is super sticky!

IMG_3978.jpeg

I have to say a big thanks to @Albrecht for putting me onto this stuff. On the couple of miles test drive (the only roads not salted / gritted yet around here) I could feel the box is instantly smoother and the gears engage so much more willingly!

It’s actually when you’re not looking for it that it takes you by surprise. Another job off the list.

Ps. If like me you keep looking for 6th and find reverse, just remind yourself of this little collection!! Gulp!IMG_3976.jpeg
 
Last edited:

Ian

Club Member
Nice work. Looks like a nice day despite the cold.


You may get away with a cheap radiator but you should never cheap out on an intercooler, the cheap ones can look the same externally as a more quality brand one, but internally they can be awful and restrictive and don't flow or cool as well and I've seen it lead to both overheating and serious power restrictions. I guess a radiator that size though, is large enough that even if its not as good as I high quality it will still provide more cooling than the car will need.
 

Farmer42

Club Member
Ali. Keep us updated on how the gearbox operates with the swepco. I changed my oil earlier this year for a similar type but my gear changes are worse. I'm thinking of dumping that and getting the swepco which is what I should have done in the first place. Where did you get it from?
 

AliK

Vehicle Dating Officer
Staff member
Club Member
Have SWEPCo in mine and works very well. But what do we think of using it in the diff too?
Really hadn’t considered using it in the diff. IIRC I went with Millers GL5 for the diff. Having said that, I understand that the Porsche guys use it in their diffs.

Nice work. Looks like a nice day despite the cold.


You may get away with a cheap radiator but you should never cheap out on an intercooler, the cheap ones can look the same externally as a more quality brand one, but internally they can be awful and restrictive and don't flow or cool as well and I've seen it lead to both overheating and serious power restrictions. I guess a radiator that size though, is large enough that even if its not as good as I high quality it will still provide more cooling than the car will need.

That’s a really good point. To be frank, at £124 delivered, I figured it was worth a punt ;) - but to your point, what I didn’t say earlier was that I had to file open the inlet and outlet parts as the pipe to tank welding was slightly off centre and the holes weren’t fully aligned, causing a small restriction / turbulence. I wish I had done a before and after photo.
 

AliK

Vehicle Dating Officer
Staff member
Club Member
Ali. Keep us updated on how the gearbox operates with the swepco. I changed my oil earlier this year for a similar type but my gear changes are worse. I'm thinking of dumping that and getting the swepco which is what I should have done in the first place. Where did you get it from?
Will do. Need the salt off the roads first for a decent run that gets the temps up.

Not too sure where I got it from but I got a good deal. I’ll have a look through bank statements and let you know.
 

AliK

Vehicle Dating Officer
Staff member
Club Member
I’m declaring 2024 as:

“The year of the derrière”

You know how you can’t just do one job at a time on these cars? You know that voice in your head that says: while I’ve got this bit off, I can now get to that bit and do the other job that requires this same bit taken off again at a later date? So this year I plan to focus on one job - everything on the rear that needs doing! ;)


1. Do the diff

Been meaning to do an ATB LSD diff since 2017, but life and other jobs took priority.


So when a brand new Quaife ATB came up at a bargain price, I couldn’t say no!!


Then along came a very good friend offering to put it in for me. Frankly, he is the ONLY person I would trust with the job. Hence forth he shall be known as the Diff Stig!


The diff came out last weekend - working in the drive between 3° and 0° with numb hands and howling wind was an absolute joy!

IMG_4582.jpeg


2. Rear Camber and Toe

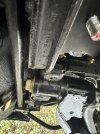
Another job on the Derrière is to match the toe and camber on both sides. Here is something I saw when I dismantled everything in lock-down but decided to deal with it another time. Spot the difference between the front bushes left to right! Not sure why different bushes have been used by the PO - but nothing surprises me these days. At least it’s an obvious thing to measure / investigate when the weather improves. I can’t do anything like that in the garage. I have the offset camber bushes to drop in there but there is virtually ZERO room at the front of the suspension arm for adjustments once the cross member is on. So this could be interesting.

Left:

IMG_4577.jpeg


Right:
IMG_4578.jpeg

3. Install tandem electric fuel pump

@Rob Gaskin kindly sold me his red top pump and Mapalsi filter / regulator, a couple of years ago; but that job also took a back seat. So while things are apart it seems ideal to sort that one too.

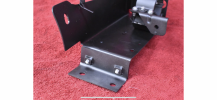
It needs some electric work as I won’t run the stock wiring (for obvious reasons), installation of an inertia switch and sorting out the bracket. The bracket I have is missing the angle piece with the captive nuts. I started fabricating one but put that on the back burner at the time.

IMG_7908.png

So welcome 2024 and may the fun begin!
 
Last edited:

AliK

Vehicle Dating Officer
Staff member
Club Member
Some updates front the Diff Stig:

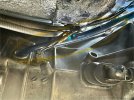
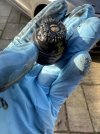
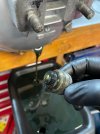
Oil drained and zero deposits on the magnetic sump plug.

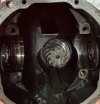
03f7b0a1-50f6-415f-bcac-a590e5201e48.jpeg


1. Measured new bearings at 20.74mm and 20.70mm respectively, I will double check before installing. Datum value is 21.00mm. So 0.3mm and 0.26mm gap to shim.


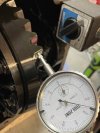
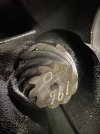
2. ⁠cracked open the cover and measured the backlash (so I know your diff is in good shape before I tear it down). Factory is 0.13mm to 0.18mm. Yours comes in at 0.15mm at all 4 points on the crown wheel, so she’s a good un!

837dc35c-3e55-4318-a969-a086acdc8004.jpeg

3. ⁠Half shafts removed (bit OTT on the grease Mr K.

(Well, my response to the Stig is: you can never have enough lubricant!! Works on so many levels!!)


4. ⁠Bearing caps removed, They put up a fight.

6d5f8b70-b7d7-4a8b-a3da-f5dc18559cd1.jpeg

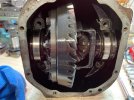
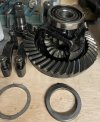
5. ⁠Diff cage removed, put up even more of a fight.
0a41528e-ac50-4a17-8d15-76e8e7b8076f.jpeg


de91d345-2ac3-40bb-9ea3-57446e88b1d2.jpeg
4d1efde4-d1b5-46d0-b5d1-c98bd53ed2c9.jpeg

6. ⁠Case is draining, will clean the internals


Next is Swapping the crown wheel to the Quaife.

Is it wrong that a grown man is excited like a 4 year old on a bouncy castle by that last line?
 
Top