Project Candy Begins (rb25det 240z)

Wally

Club Member
Vapour blasting gets the best results in my experience. Otherwise I've seen good results will Brillo pads and lots and lots of elbow grease.

That picture is after 20min with a scouring pad and carb cleaner. Even fine wire wool wasn’t shifting anything.


Sent from my iPhone using Tapatalk
 

Wally

Club Member
I’ve got some well used media so I might have a go at blasting it tomorrow. Hopefully it goes ok and I don’t have to resort to buying a billet thermostat housing [emoji16]


Sent from my iPhone using Tapatalk
 

Robbie J

Club Member
Little bit more work this weekend. Engine is slowly coming together but the more old bits I add on, the worse the engine is starting to look. Even after cleaning the parts. I think I’m going to have to paint the timing cover and get a new crankshaft pully/harmonic balancer and cam angle sensor.

8f218c8282c29d9d494074e79dd180fa.jpg

ba018cb3dabd9e85c5f4c06121e78037.jpg

48c328b80c557c6d46fe43f17520e762.jpg

897056dcd3f01f631483018649cc2992.jpg

a2e3061629be9349c9e9bf8370a22720.jpg


The wiring on the rear lights has now been tidied up. Just waiting on some new washers so I can fit them.

b3adc47fd5139dc3b748e527c2fe3bd6.jpg


Has anyone got any suggestions for cleaning cast aluminium parts? I’ve tried degreaser, carb cleaner etc. Does white vinegar work or should I buy a proper aluminium cleaner? I can bring myself to put parts like this back on the engine.
83ca0199f93029db0c726bb7f7cb5a9b.jpg


Sent from my iPhone using Tapatalk
that's why i went for RB20 finned cam covers and R33 RB metal timing covers
 

Wally

Club Member
Bit of an update for over the last week or so.

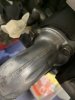
I've pretty much finished up the engine now apart from the sump, cam covers and a few tidying up bit. The sump is away to get a couple of an fittings added and swap out the horrendous baffles that were fitted. I've got some cosworth vitel rubber baffles going in. I ended up sanding and painting the thermostat housing and oil/water heat exchanger. Turned out quite well.
9d797343d6900a312d2724e9276c2a0d.jpg

2625bbafad5bf50aca7c8dedce8c8464.jpg


The bc coilovers are now welded to the struts and a quick stop off at the powder coaters and they are looking very good if I do say so.

0eb7972de0ae2e4cf474ddc26e1dd611.jpg

48e45edafe11c932c0cd60014e14bece.jpg


Then onto the task of fitting this giant adults lego set. This is where I started to run into issues.

beb5c67fb4d556c8d16e80192962c4c6.jpg


The American company in their might and glory decided is was appropriate to use a mix of metric and imperial in a couple of places. The difference between 9/16" and 14mm might not seem much but on suspension parts this was totally unacceptable. This gave me around 1mm of play on the LCA bushing. The bolt being 14mm(13.7mm measured) and the hole in the bushing being 9/16"(14.7mm measured).

901af8e39864a21e388f689703d39be9.jpg


55cf990b27021da5651baf4d2f813612.jpg


I've dry assembled the fronts for now but I'm waiting on new bolts before I can get it all torqued up properly.

c77dc87146fb8c4f117d45e81a26d142.jpg

c65a7583c71f5dcfde3abb62abb8d715.jpg


The rears were slightly more complicated. As well as using the Apex rears I'm adding the full R32 gtr skyline rear handbrake and brake. Firstly I needed to slightly clearance the caliper sandwich plate. It was just touching the hub carrier.

aacf4e4368fcc38aa77273c27c3fe0a6.jpg

2773190ad847a091025d64fa9efc7d41.jpg


Easy enough. Then I had to trim the handbrake backing plate/splash guard to clear the caliper and lower part of the strut.
1695ba4a89c9d9b1803969bbf22ddbdc.jpg


Then it's all gone together pretty well and looking good.
036b54b7af9d0ec335d4cfb5b522b221.jpg

0a1daf309a76822b0bb12da2d6c2ad2c.jpg


I still need to find a way of merging the datsun handbrake cable with the skyline one and make a little mount for the cable on the rear of the hub but that's a future problem.

The wheel alignment is going to be well off but I've got both sides to match and it's roughly eye balled.

Time to fit the arches with tape and start measuring up the offset I'll require for the wheels.


Sent from my iPhone using Tapatalk
 
Last edited by a moderator:

Wally

Club Member
All looks very nice.


Surely a custom made one is the way to go?

Yeah potentially. I've not put much thought into it yet. The two systems are very simular in parts and operation. Any recommendations on places that made custom cables?
 

peter_s

Club Member
Well done!

Regarding the imperial bolts on the T3 stuff. It bugs me too, the only bad thing about their parts.
 

Wally

Club Member
Well I finally have a clutch and brake pedal. Although I ended up spending far too long fitting the pedal box. Due to having a new bulkhead fitted and all the brackets placed on, there was a fair bit of fettling to do. Not helped by the fact I'm using a Skyline brake master cylinder which is a different stud pattern.

acd73eb89a080bea3d997a106ed21b05.jpg


Hopefully my new bush for the steering rack is here tomorrow and I can get the steering finished up.

After loving using the milwaukee 3/8 stubby impact wrench and 3/8 ratchet, I thought I'd replace my aging dremel with the milwaukee version. That way I can swap batteries between all my tools and the dremel was serverely lacking in the battery department. Surprisingly the milwaukee batteries are half the price of the dremel's. Unfortunately though the collet destroyed itself on the first outing. Back to the store it goes.
96ce2e73afa1cd5fb4722c43f6d332f9.jpg


Sent from my iPhone using Tapatalk
 

Wally

Club Member
Finally back from working away and wanting to back back on with this project. Unfortunately I found myself in a bad situation with my move upto Edinburgh. The work space I'm currently using is getting repurposed by work so I need to get the car shifted sooner rather than later. The predicament I'm in is I can't find anywhere up in Edinburgh where I can both store and work on the car. The soonest I can get a place is 3-4months and that wouldnt be guaranteed. So I may be forced into a position where I need to sell her. Really not what I'm wanting to do but balancing up the enjoyment of working on it vs the headaches I'm faced with, it might be the sensible option.

For now though I'm sorting out what I can getting it to a point where I have a rolling chassis to make transportation easier. Not much work to do for that. Steering is done, suspension just needs tightening up and I need to figure out an option for the rear hubs. Hopefully only a day or two of work. Once that's done I can get packing everything up.
 

Wally

Club Member
14465587-80AB-4163-A78C-E4A0ACFEE46B.jpeg 1FFC4CB1-5754-4111-A029-741B96E081A5.jpeg 655E39E2-AEF6-4A2A-8ED3-6D91BA38E486.jpeg 03C8E508-6056-44B7-B369-E280B62DCC96.jpeg 916CE21F-3B28-4356-BC6A-91E9A2FC2469.jpeg AAF0E644-918B-4422-8313-5635631366EF.jpeg 15A4D66F-D7E4-443C-A628-735DEB45E2C7.jpeg Since I missed out the rebuild of the rack here are a few pics. Everything was stripped and cleaned, new bronze bushes as there was a bit of play in one of them and input pinion bearings. Sandblasted the casing and a luck of paint and good as new.
 

Ian

Club Member
Would be a pity if you had to sell it.

If you could even find somewhere to store it you could just about build it under a gazebo or temp garage. I built cars and bikes in a driveway under a strong gazebo I would put up for large jobs for about 10 years, sucks compared to garage, especially in winter, but it is possible.
 

RedDragon240

New Forum User
Love the work so far, I agree it would be a real pity to sell after all this work. I have a similar project about to start and this is giving me some great inspiration.

Look forward to seeing this unfold, good luck with the storage hunt.
 

Wally

Club Member
Unfortunately storage and a working space has been a bust. Balancing headaches with enjoyment, the headaches are winning unfortunately so I made the decision to sell. Will get rid of a big stress. Standby for sales pitch incoming.
 
Top