johnymd
Club Member
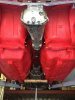
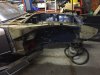
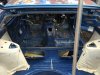
It is all a bit tight but everything clears. Most areas clear by only a few MM so getting it in exactly the right place was critical. The stearing coupling may have to be changed for a uj the same as the bottom as it's probably a bit too tight in that area.
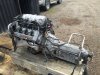
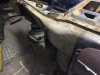
I used an 80ton cnc press to bend up the gearbox mount as it's very difficult to bend 5mm steel any other way.
I used an 80ton cnc press to bend up the gearbox mount as it's very difficult to bend 5mm steel any other way.
 great work john look forward to seeing it finished