Russell's 260Z 2+2 Restoration

Russell

Club Member
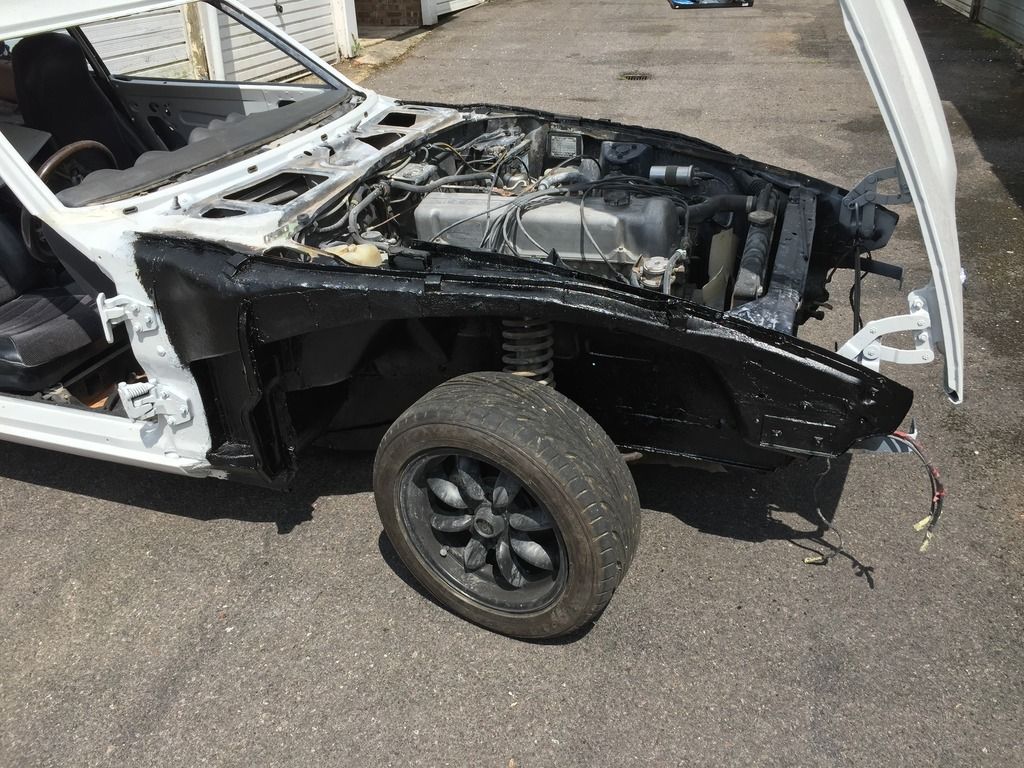
Getting there now, cleaned up and undersealed under the front wings. Its not going to be getting wet and I didn't have the money to strip it right back and paint it but everything is solid under there.


The back end is getting there, everything cleaned and painted, brand new seals for the lights, new bulbs, wiring cleaned up and deleted the bumper light that was there with super bright LEDs in the top so it actually illuminates the whole number plate.
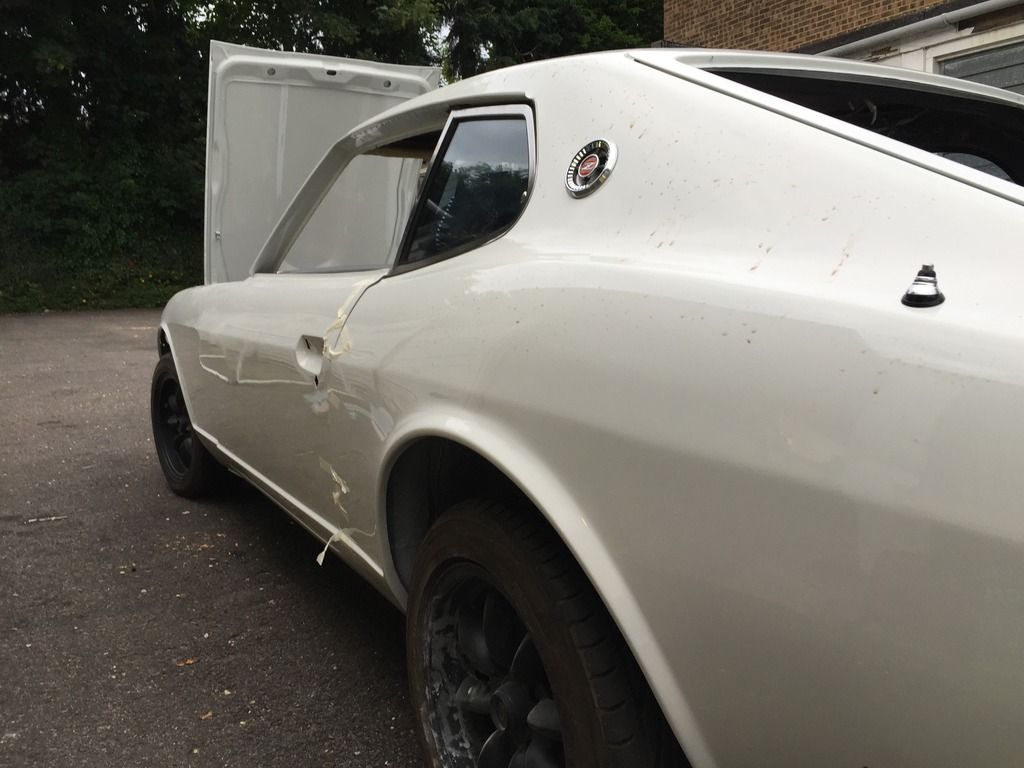
I actually really like the look of it without the rear bumper so not sure whether I put it back on or not....


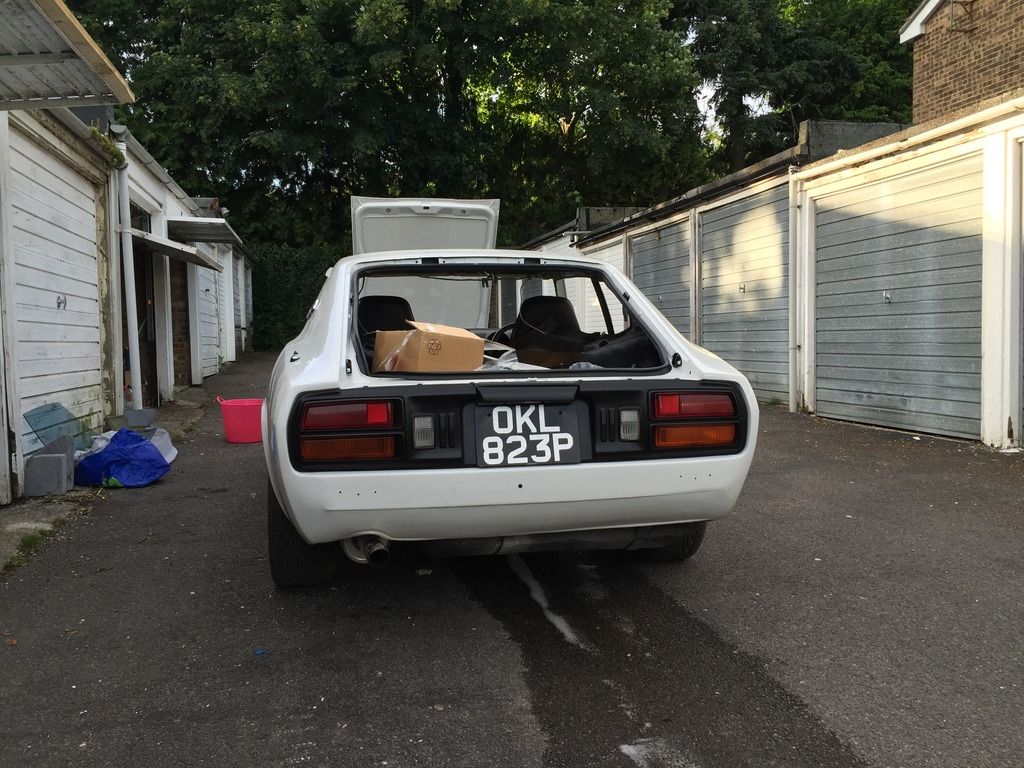
Thoughts on the bumper? Bearing in mind it will be satin black rather than chrome.

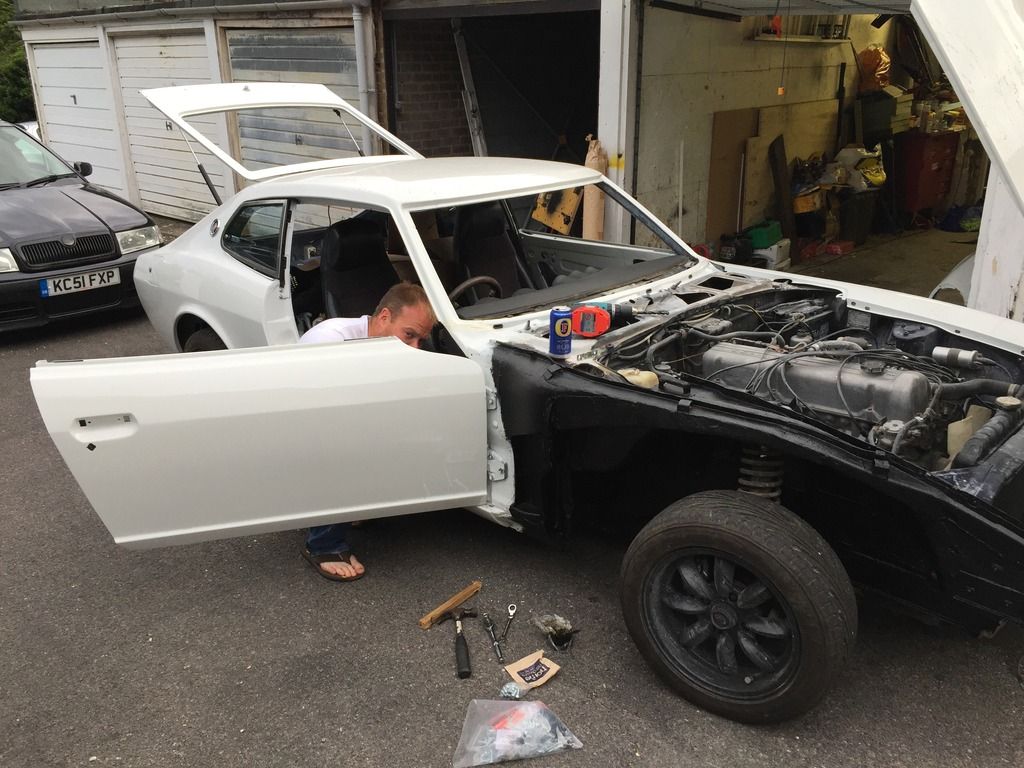
Most exciting, I have finally got the doors hanging properly(ish). They will never be 100% but they open and close and I can live with the panel gaps I have.
I can now build the doors back up, finally fit the wings and scuttle panel etc.


List of jobs before I can actually drive it is getting smaller now
1. Fit the new roof lining and interior trim
2. Fit the rest of the rubber seals
3. Get the front and rear screens fitted again
4. Build the doors back up and fit the central locking
5. rewire the headlights, sidelights and indicators
6. Fit my homemade front indicators with 3D printed brackets I have made (will be totally hidden behind the grill)
7. Fit the front spoiler
8. Take it back to the body shop for final polishing and painting of the spoiler
9. Give it a good service
10. Go and enjoy driving it (or not enjoy it as I will be worried about every stone, cyclist, pedestrian, stray wildlife that may want to scratch it)
 

Russell

Club Member
Still plodding along bolting things back on but need a bit of help finding out if a part exists or not.

I bought a FRP Devil style spoiler with the idea that I would leave the indicator blanks in as I don't have those indicators and just paint it.
Unfortunately that isn't going to work so I was thinking of cutting them out and putting some mesh behind them. Again, not sure that will look great.

Now I'm looking for some vents that replace the indicators so it has a cleaner look. I had a good google but I cant find any.

Any ideas?
 

Russell

Club Member
So a few late nights and I managed to get it out on the road to get some fresh fuel in it.

Still a way to go as the front end isn't finished and nor is the interior but I will at least get it to Simply Japanese now!


Russell

Club Member
So the car is now back on the road, a good tune up last night and it is mechanically ready to go.

I still need to put the interior back together but I will hopefully get that done tonight.

No pictures of the final result yet as its filthy dirty!
 

Russell

Club Member
So last picture update for a while as I make the decision whether to go body colour with the front spoiler or keep it satin black.

It seems a marmite subject so I'm going to leave it for now until I'm sure. Once I commit to getting it body colour I wont go back.

I am really pleased with how it came out!


yellowz

Club Member
Can you find anyone to Paintshop the picture and change the colour on that? I ended up buying an old 1/18 scale model and painting it to decide.

My vote goes with body colour

Is that your back garden? - impressive! :bow:
 

samuri-240

Well-Known Forum User
Deffo body colour.

Is the spoiler from MSA if so it is the same as one I have for mine along with a grp replica of the original uk set up. I will have both painted one day then decide which I prefer.
 

toopy

Club Member
I would say body colour for the spoiler,

If the bumper was white, maybe then a black spoiler would look better, but the black bumper and spoiler look too much on the overall whiteness, if that makes sense :unsure:
 

Russell

Club Member
Merry Christmas all!

Last few posts in the restoration thread as I have just made a purchase that will warrant starting a thread in the Hybrid section!!

The L26 has always been reliable with a set of HS6 SU's and was rebuilt the last time it was restored.

However, there has always been a slight blow from the manifold so it spent a week with a friend of mine who owns Passion Engineering near me to sort. IMG_0057.JPG

Turns out some of the studs had pulled out so a brand new set with a new gasket was in order and he set about helicoiling the stripped threads IMG_0049.JPG

IMG_6033.JPG

He kindly went over my carbs, manifold, linkage, exhaust etc. To make sure everything was perfect as we have never managed to perfectly tune it in the past. Turns out there were a few restrictions in the linkage, gaskets etc.

IMG_0053.JPGIMG_0054.JPGIMG_0055.JPGIMG_6030.JPGIMG_0048.JPGIMG_0047.JPG

Being an engineer everything has to be perfect so he went to town polishing and cleaning everything

IMG_0052.JPG


Sent from my iPhone using Tapatalk
 
Top